ContentShake AI is a content writing tool that helps you create unique, engaging content that clicks with your customers. It powers your business expertise with AI and competitive data so you can produce more quality articles for your website.
ContentShake AI assists you from ideation all the way to publishing directly on your blog. Additionally, it provides competitive highlights, analyzes what’s trending in your niche, and uses AI technology to help you compose and improve your text.
Find ContentShake AI in the Semrush App Center.
How Can the ContentShake AI App Help Me?
Content marketing can help you generate more traffic and build a stable flow of customers. But what if you don’t have the time or resources to master and scale it?
ContentShake AI will do the heavy lifting and help you create authentic and optimized content with ease. It allows you to:
- Find personalized topic ideas for your business
- Assemble high-performing articles: The app generates an outline, introduction, headers, and other items with just one click
- Optimize your content for users and search engines: See your copy’s score for readability, tone of voice, and SEO
- Find issues in your text and instantly fix them using AI
- Transfer your blog posts to Google Docs
- Publish your articles directly to WordPress without leaving the tool
- Create social media posts from scratch
Who Can Use ContentShake AI?
Anyone can use ContentShake AI. It doesn’t require special skills, and it’s extremely easy to use.
Small business owners who want to spend fewer resources on content creation and more time on growing their business will find it most beneficial.
Additionally, it’ll work great for in-house marketing teams and agencies looking to scale their content production and enhance the content quality control process.
How To Use AI in Content Writing
Note that tools utilizing AI should always be used with human supervision.
If you’re an expert in the topic you’re writing about but want to save time and better optimize your content, then this tool is for you.
If you’re using the tool to write about a topic you have no knowledge of, you’re less likely to create useful content that you’ll rank for.
Pricing
The ContentShake AI is available for $60 per month. Features include:
- Generation of full, SEO-ready articles
- "Compose with AI," "Ask AI," and "AI Chat" for rewriting and content refinement
- One-click WordPress publishing (connect up to 100 WordPress sites)
- Social media content generation
- AI image generation
How To Use ContentShake AI
ContentShake AI is easy to use. Access it from the Semrush App Center and then follow these five steps.
1. Set Up Your Page
First, ContentShake AI will prompt you to enter keywords to describe your business.
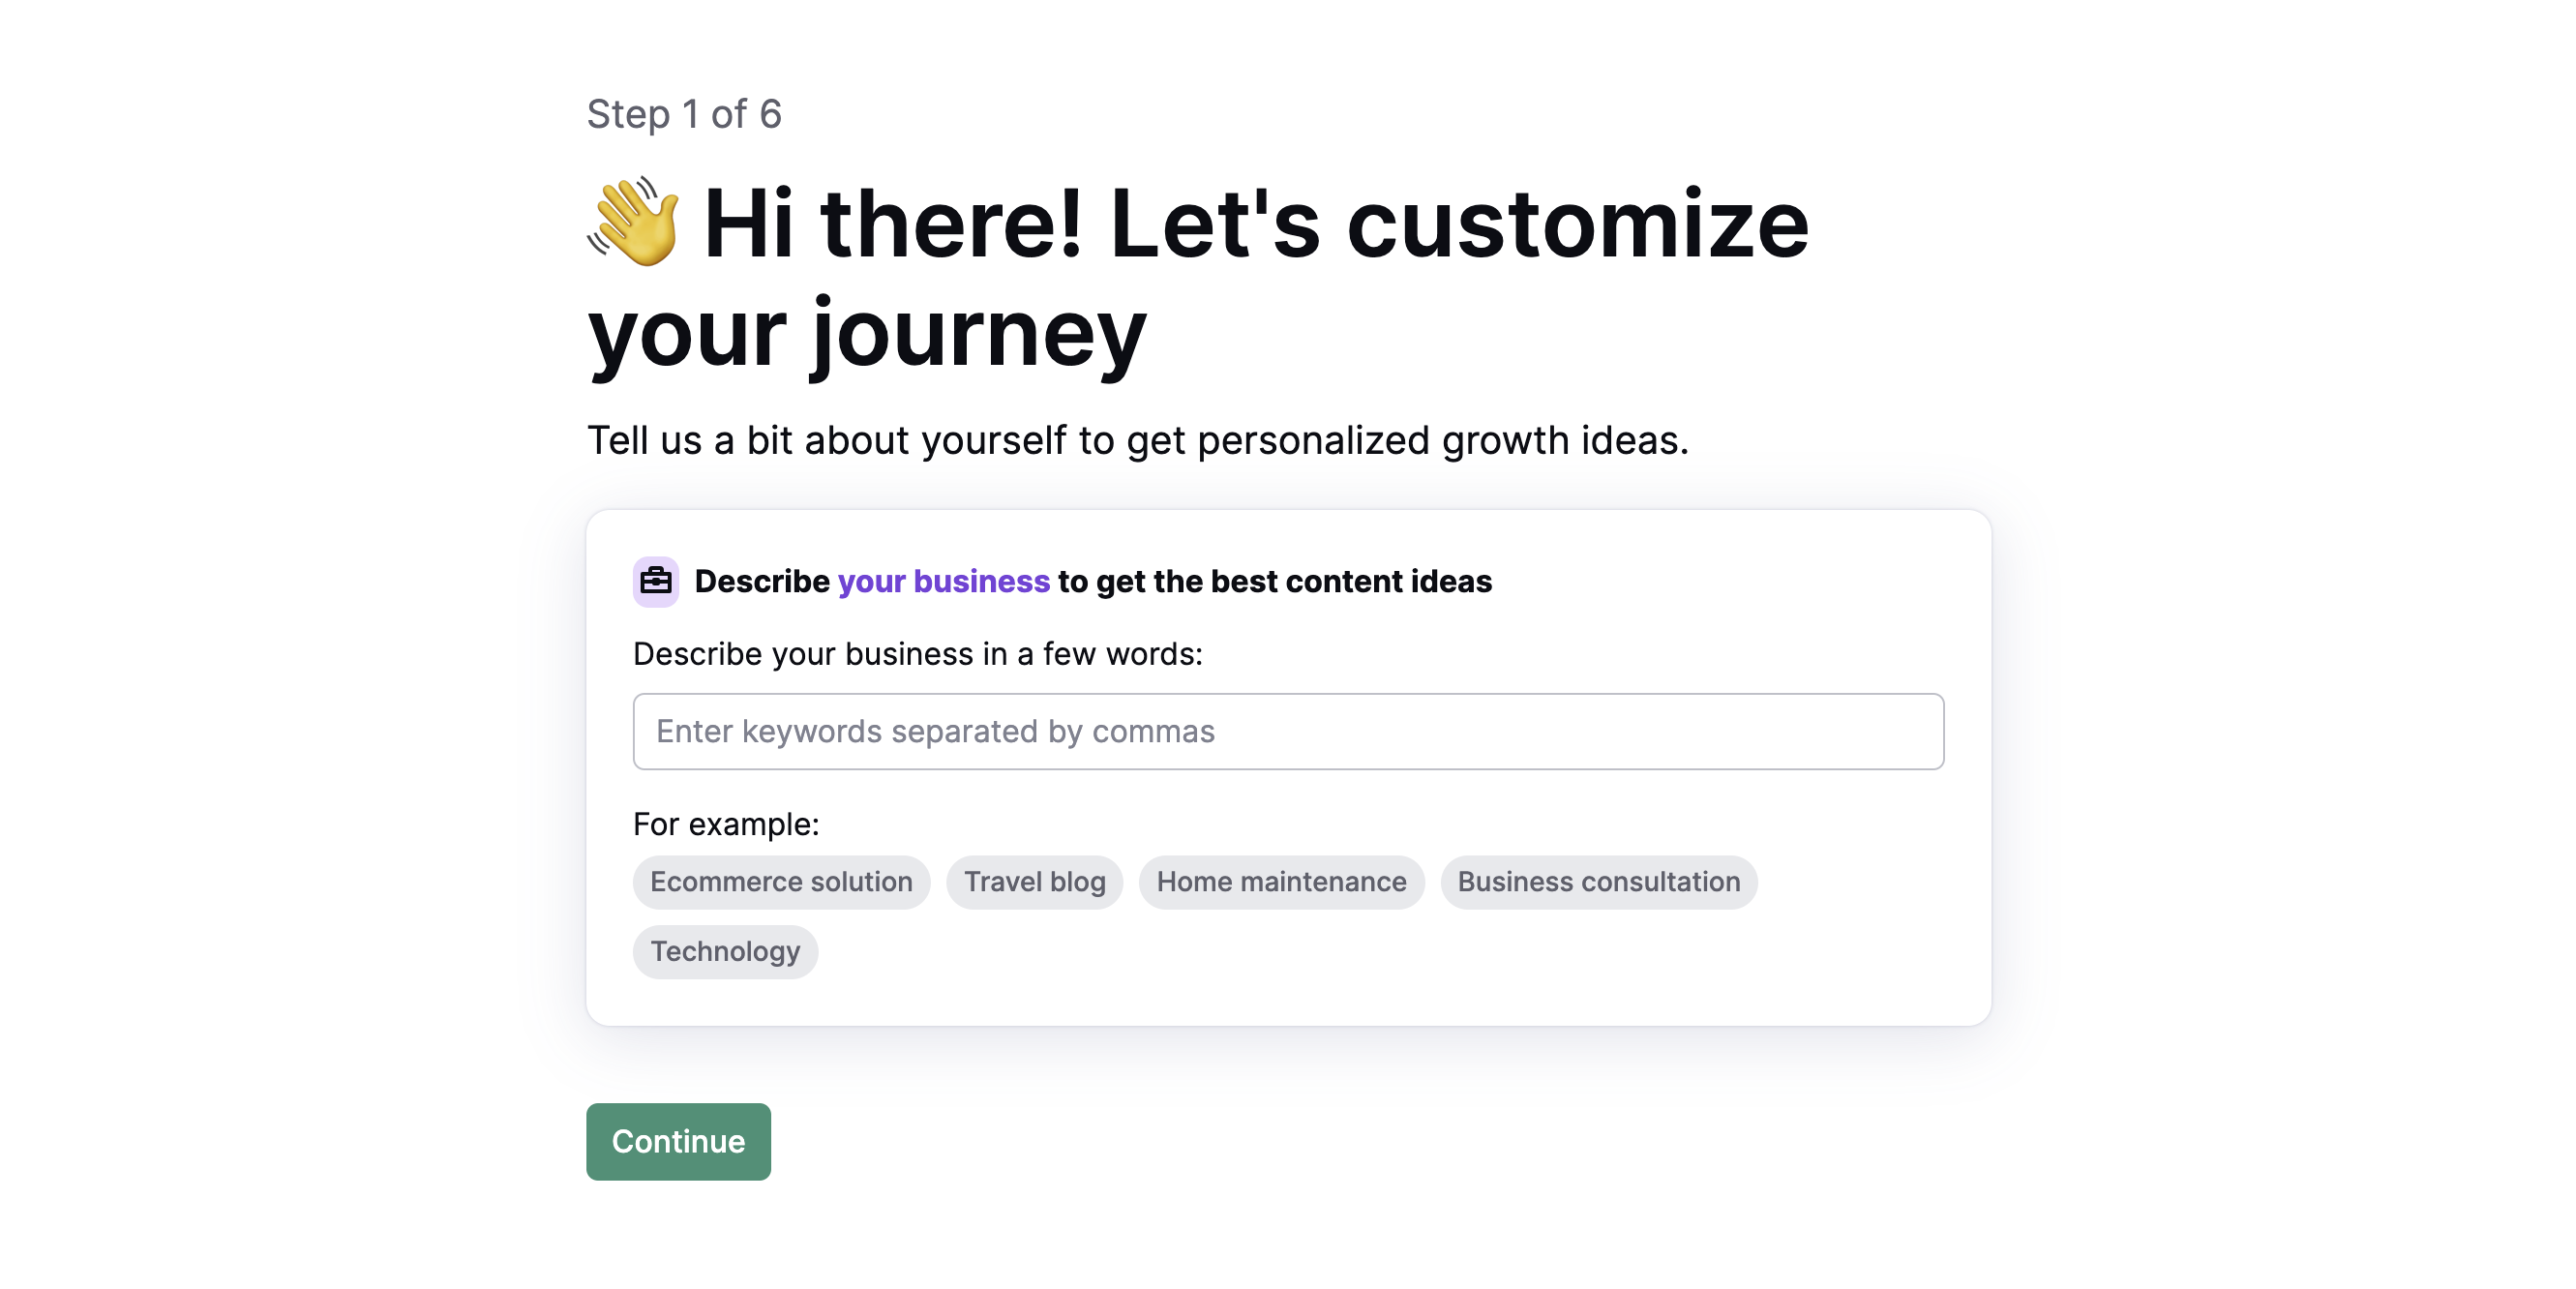
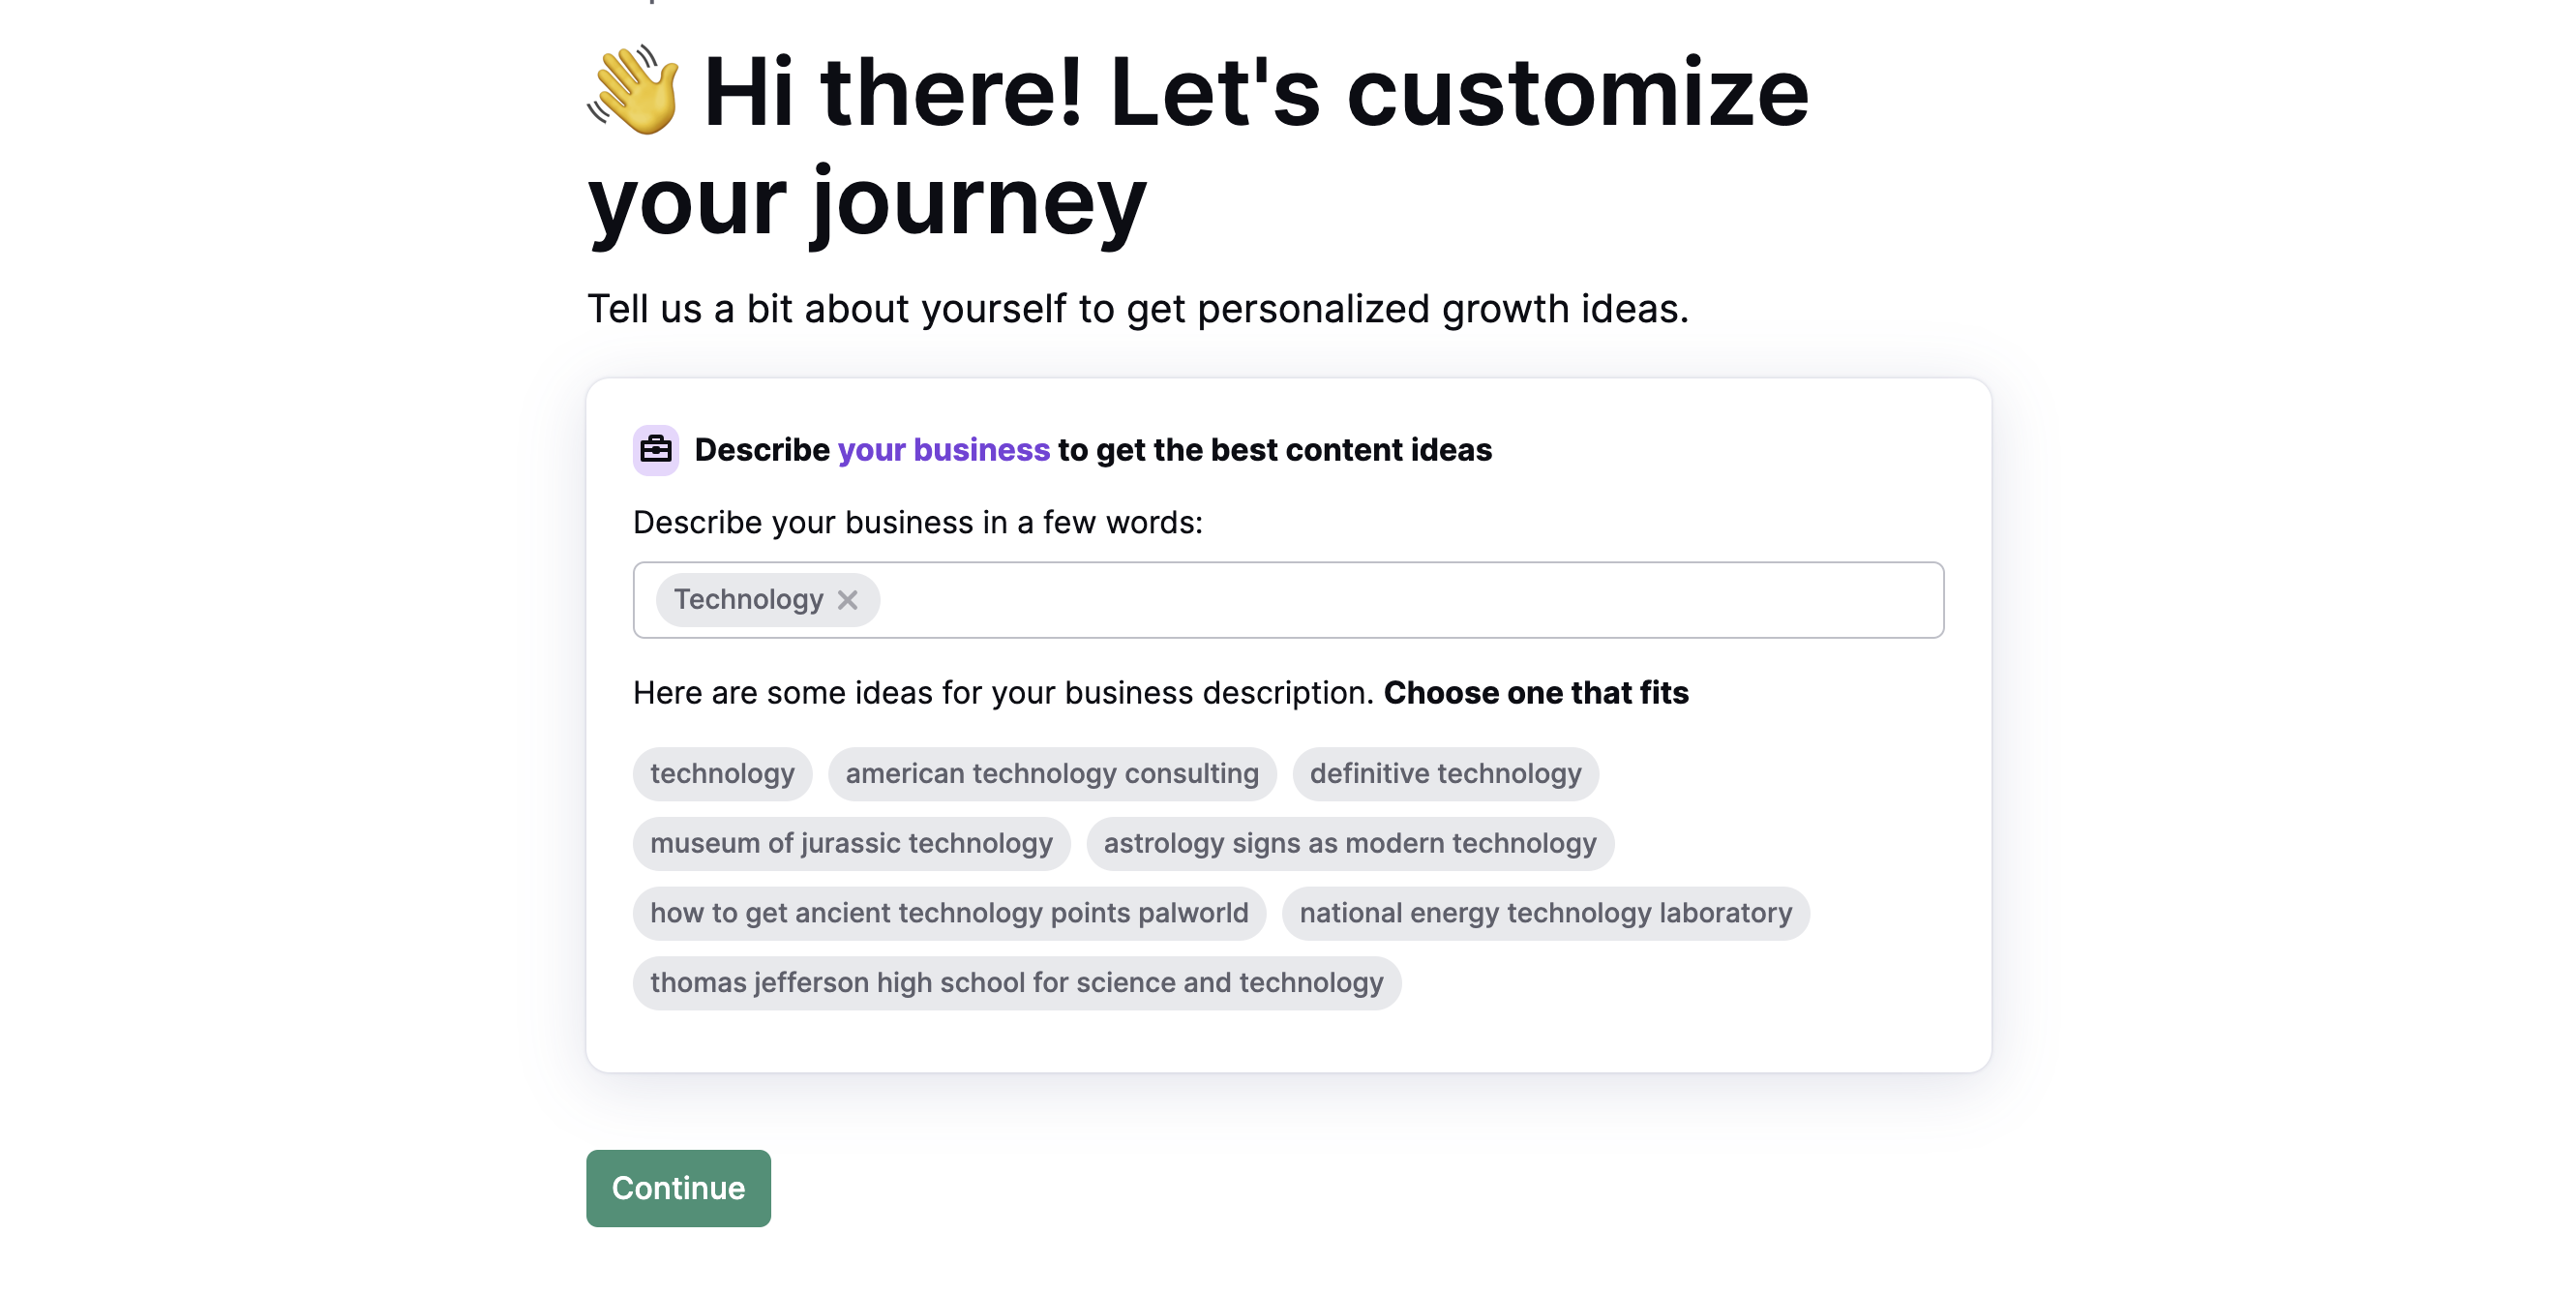
Once you add these, you’ll see suggested related tags. Choose the topics relevant to your business, and click on the Continue button.
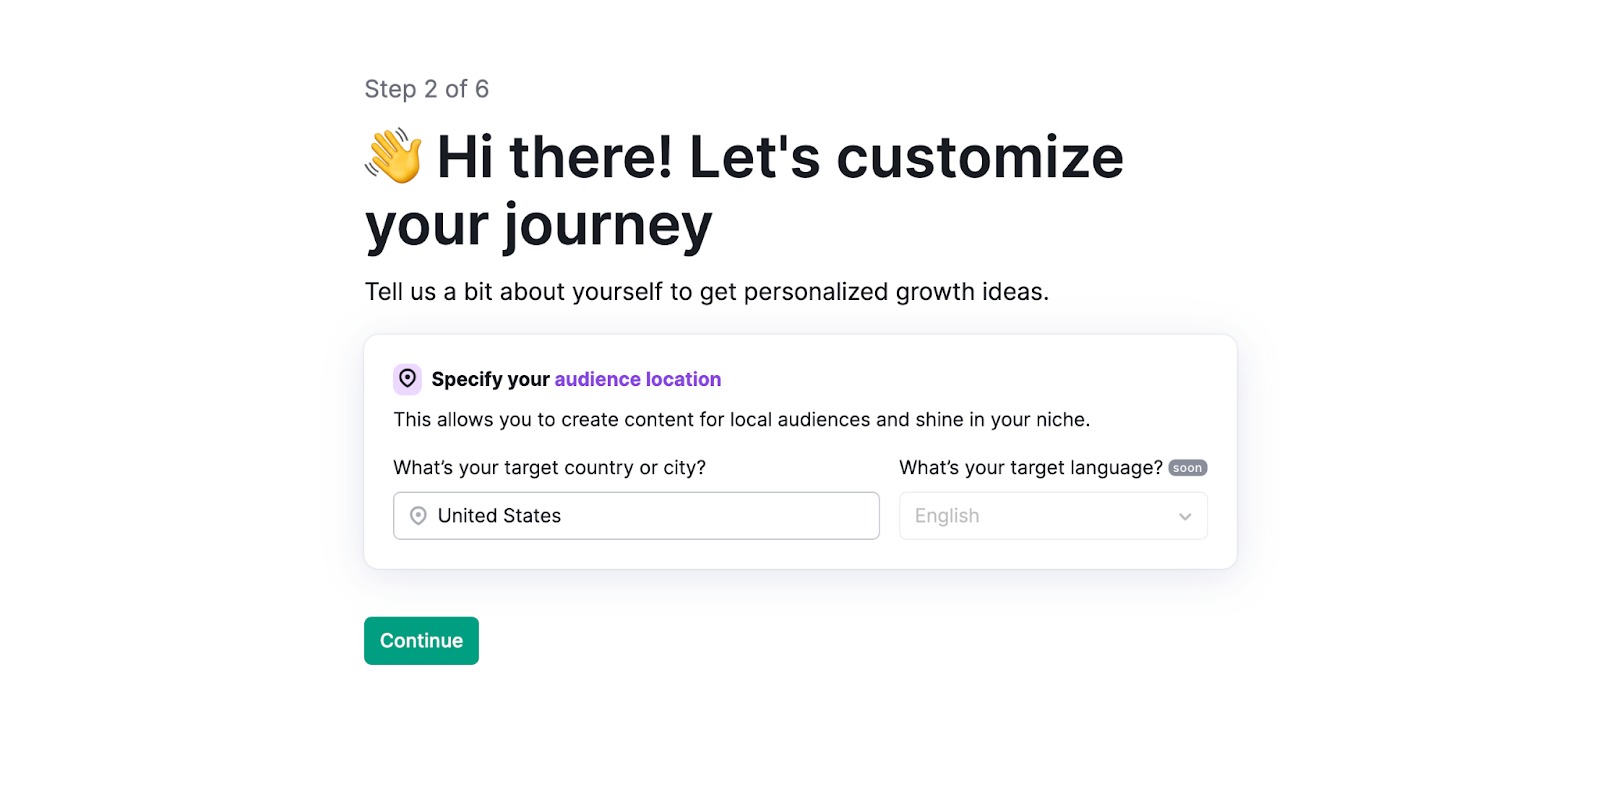
Input your audience’s location in the next step:
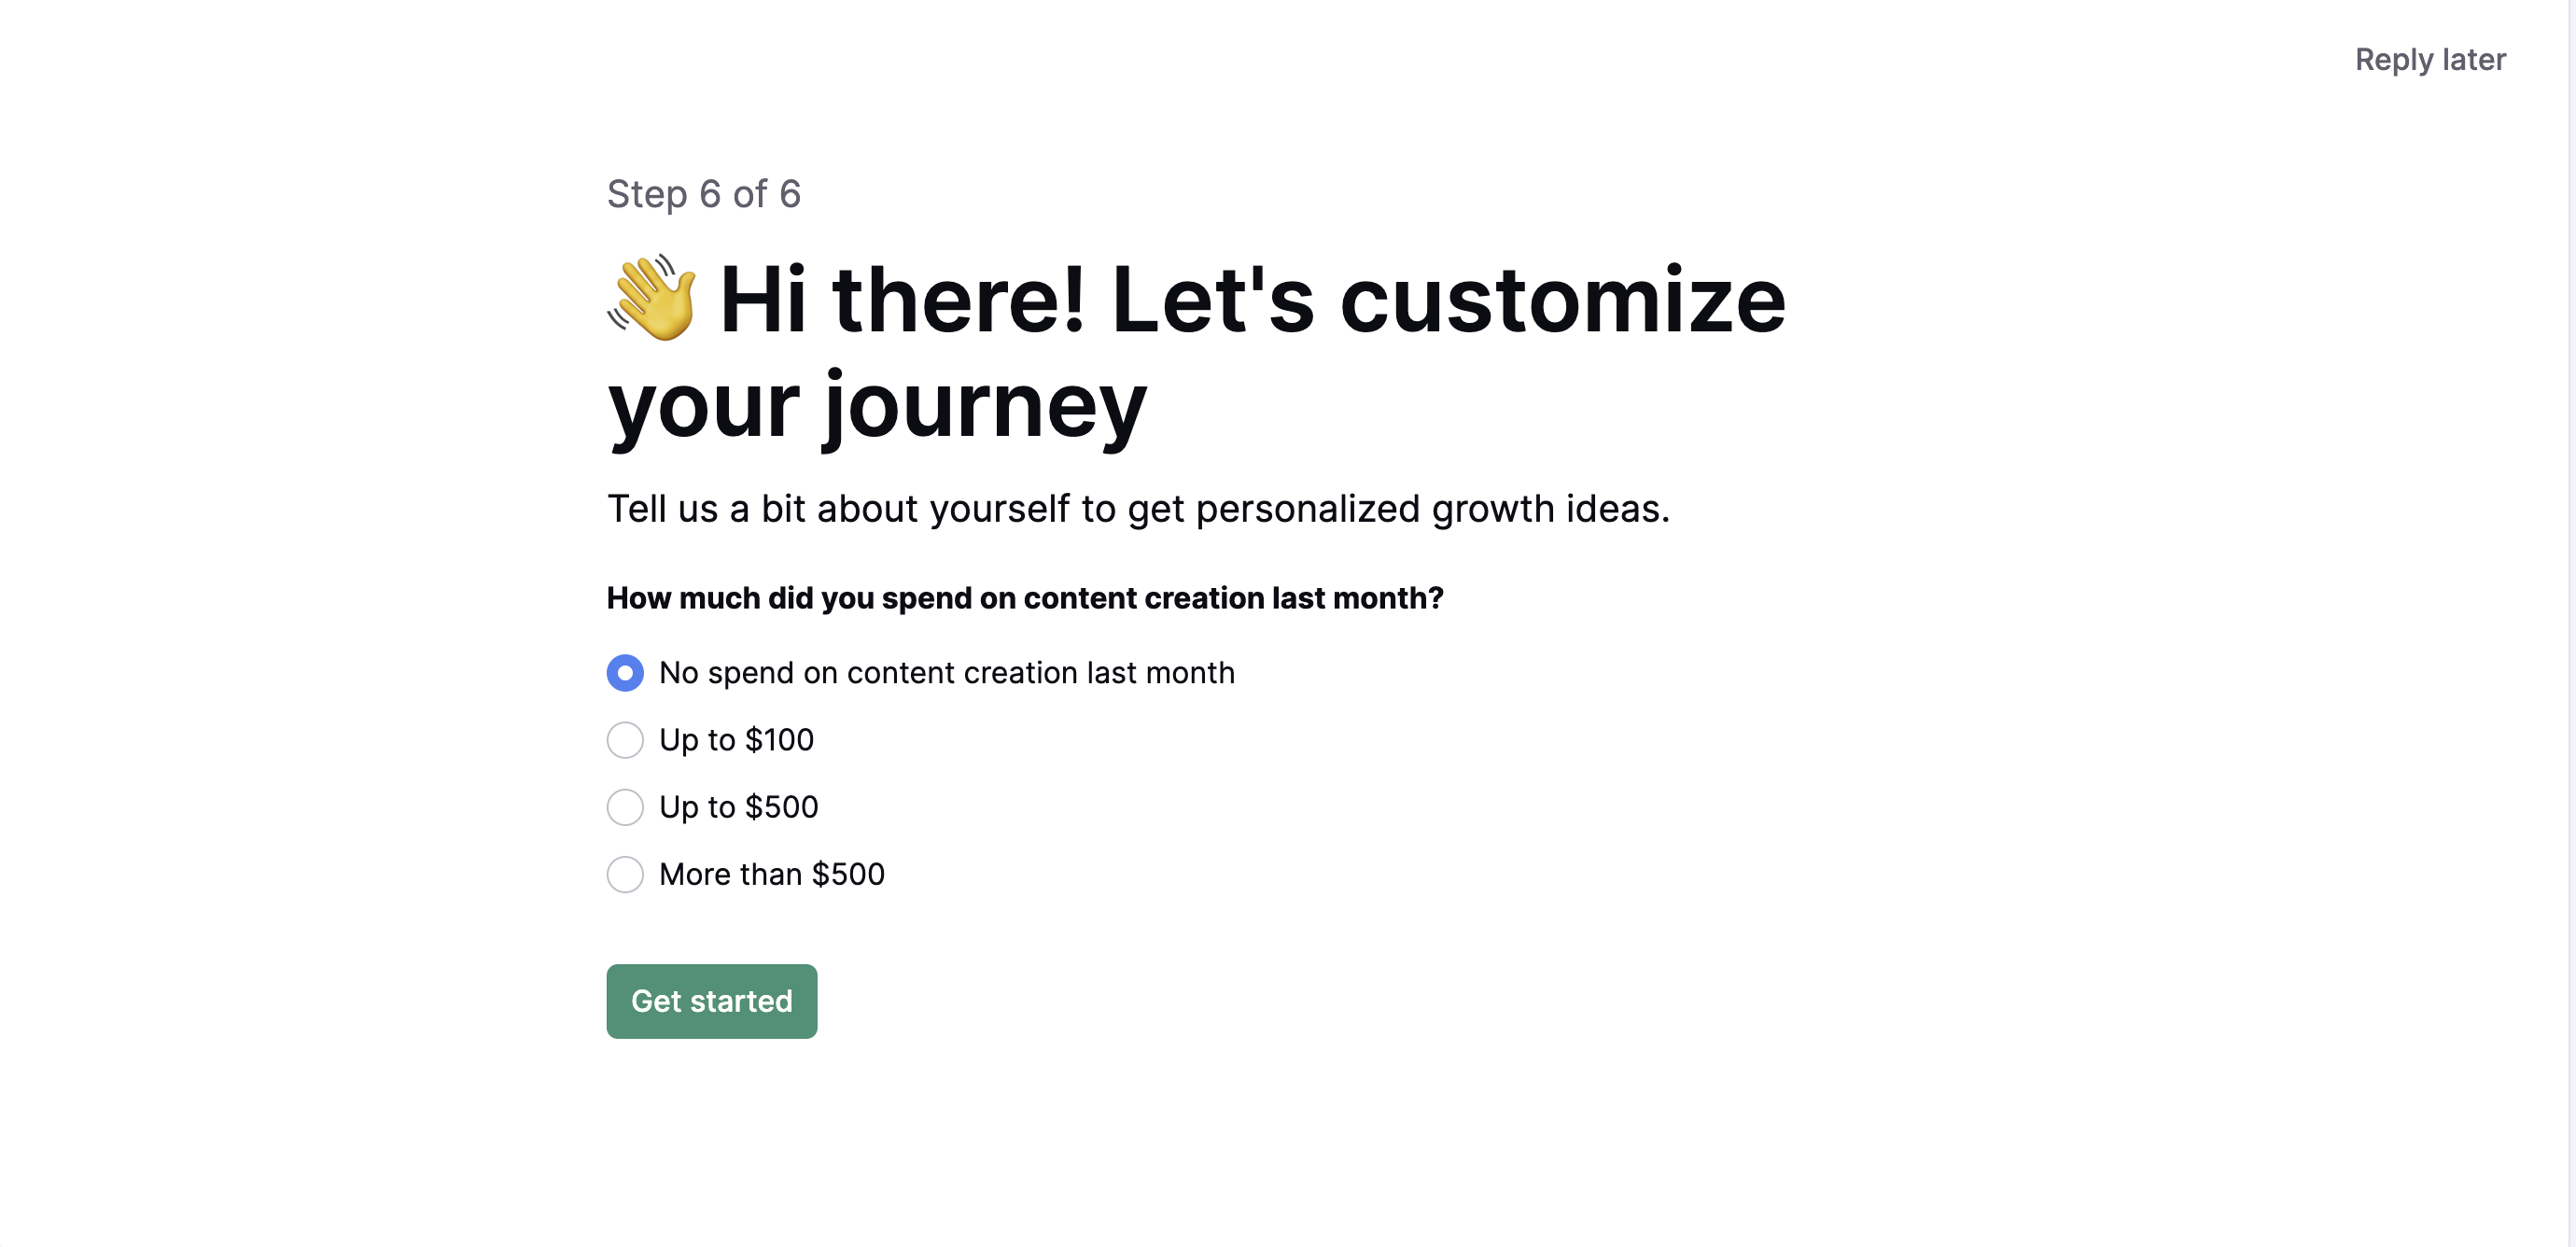
Provide some additional info about your current role, business, and content plan in the next steps of the setup, and click on the Get started button.
You can change the list of keywords, your audience location, and your target language in the Settings menu.
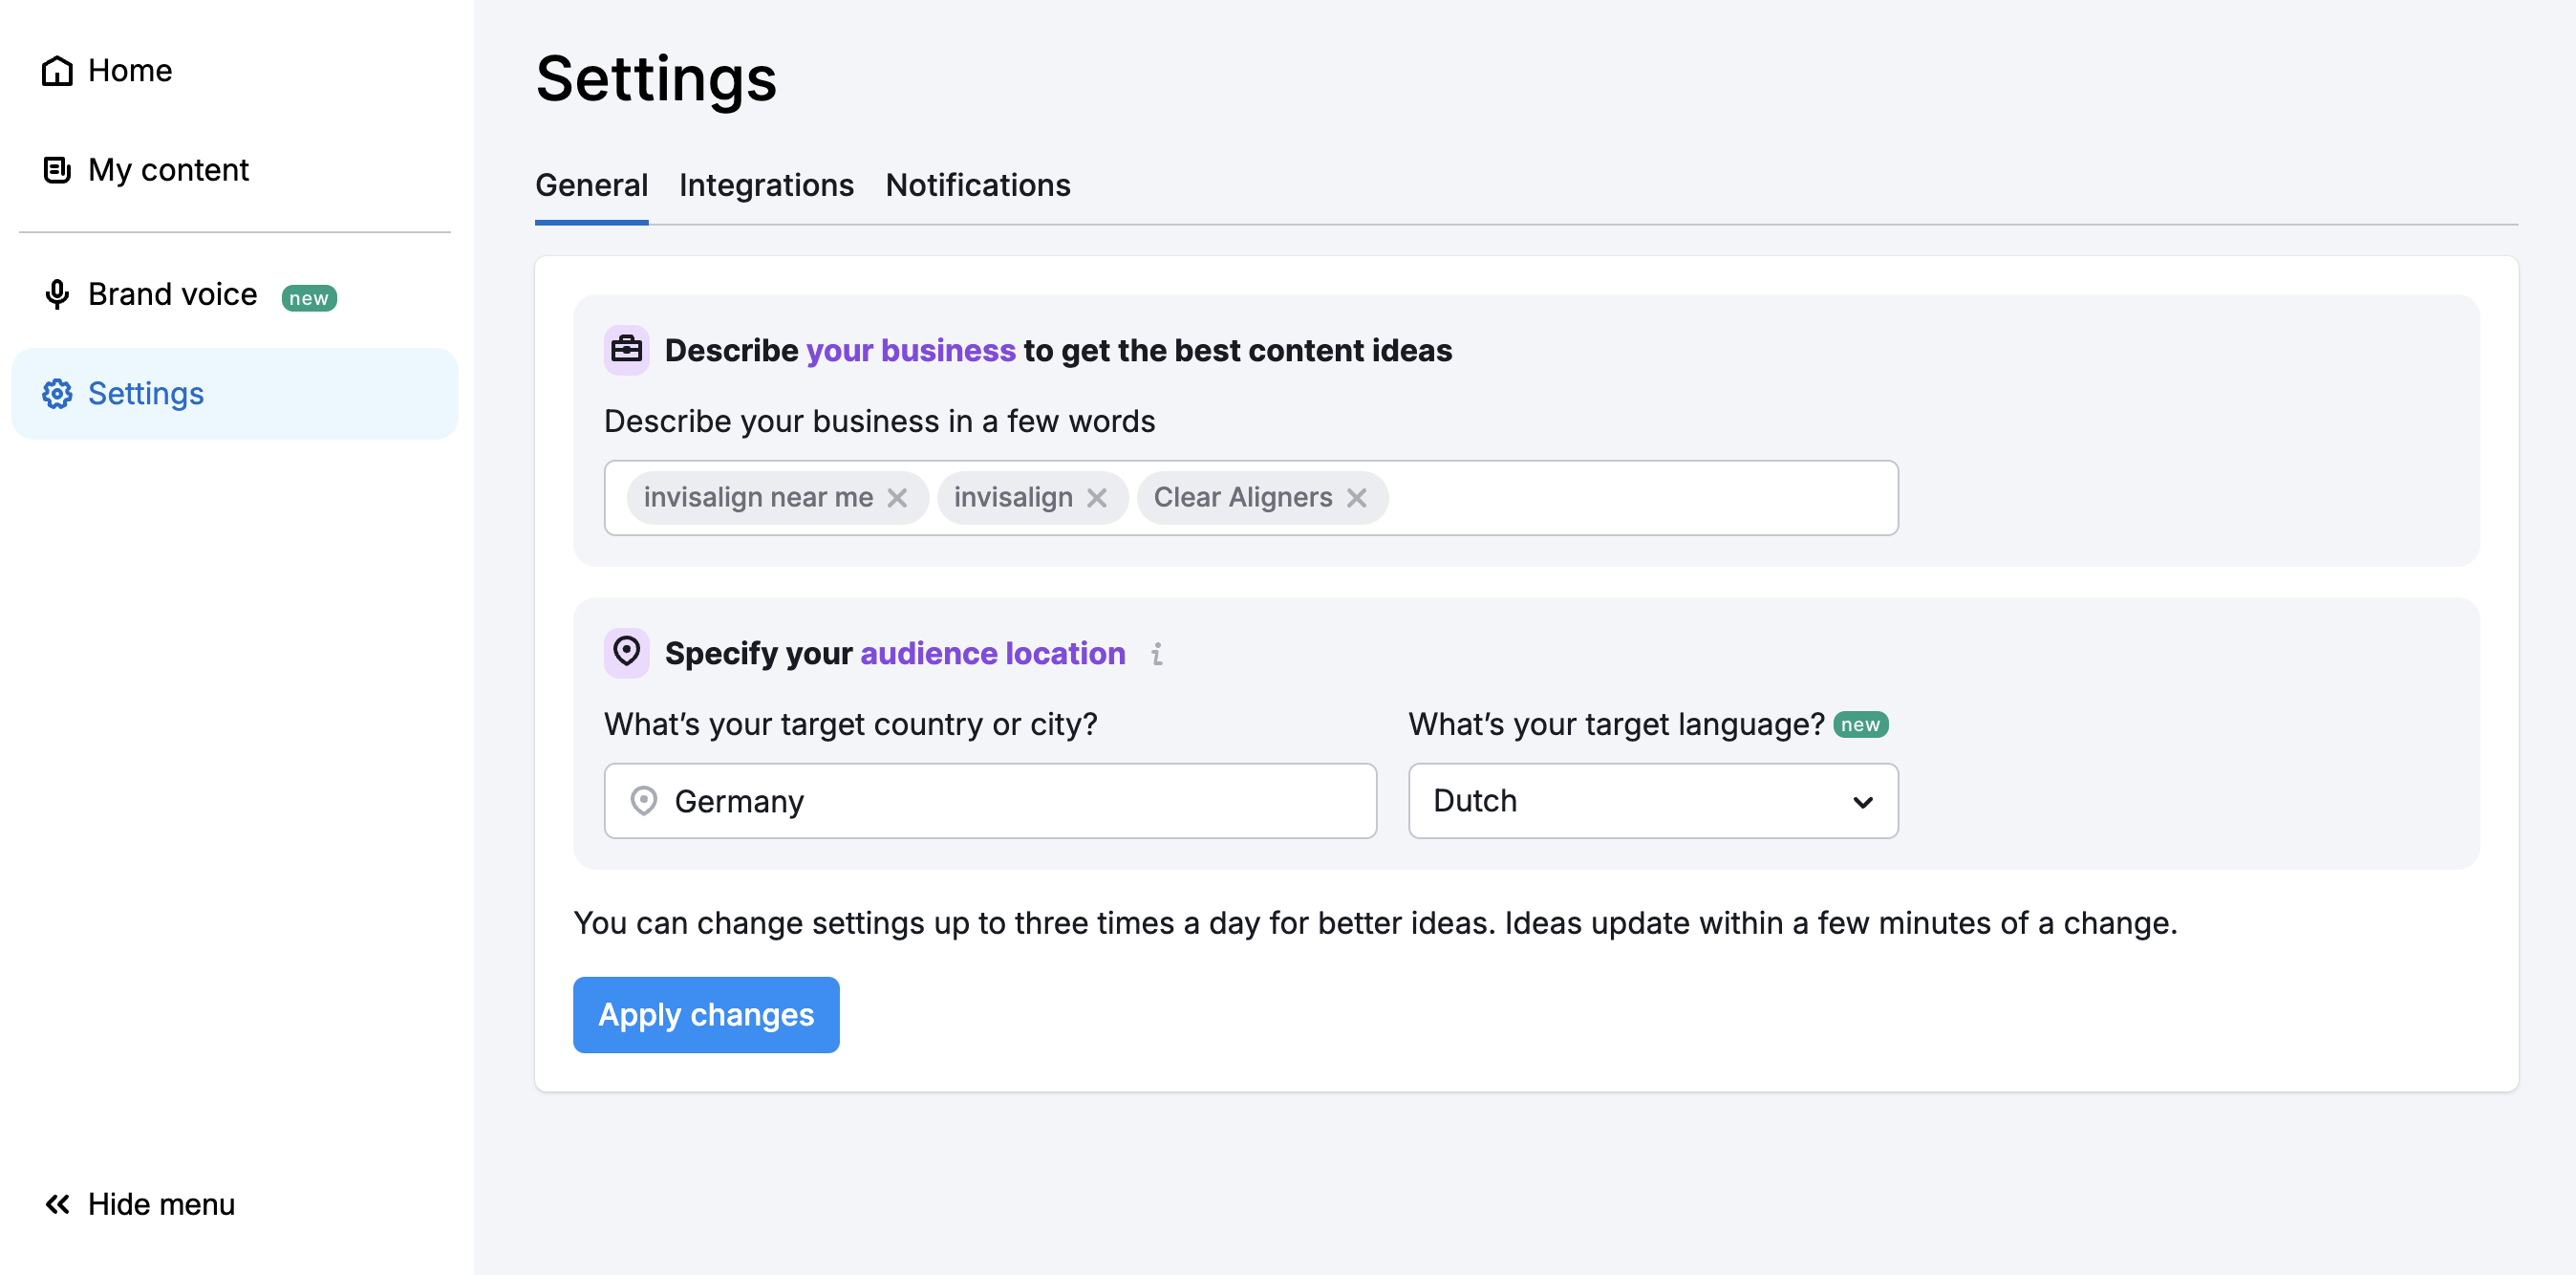
Note: the settings can be updated this way only three times per day for better ideas. Suggested ideas will be re-generated within a few minutes after you apply the changes
2. Choose Your Ideas
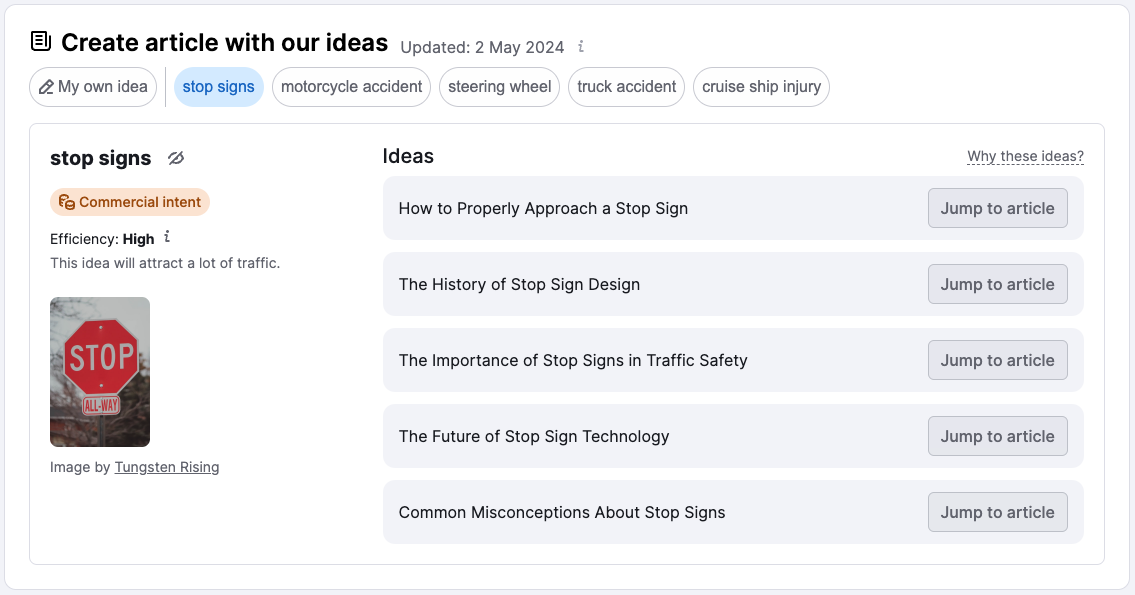
Next, ContentShake AI will provide a list of topics. Click on a topic to see the search intent and traffic potential. For each topic, the app provides a list of article ideas.
Choose an idea and click the Start writing button.
Custom Topics
You can also create your own topics by clicking on the My own idea button.
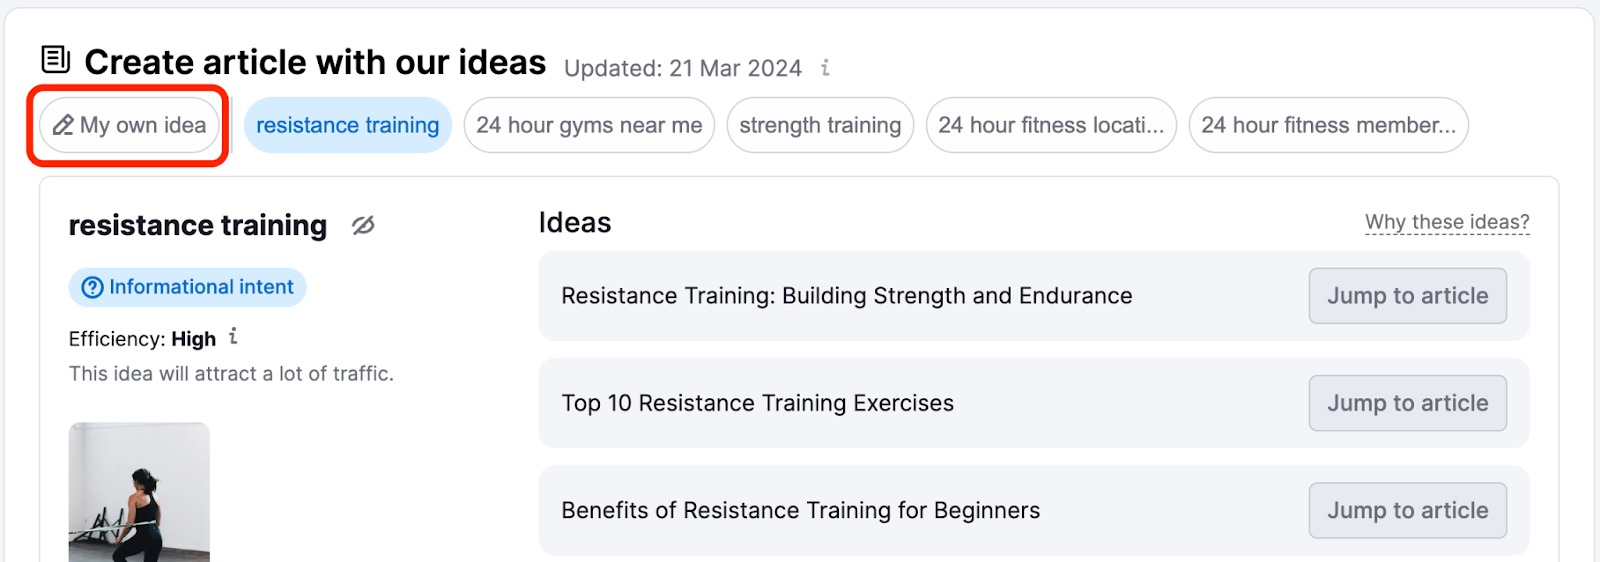
After typing in your idea, click the Start writing button. You will then be directed to the page where you'll find AI suggestions for the article title, target keywords, word count, tone of voice, and readability level. You can customize these to your liking.
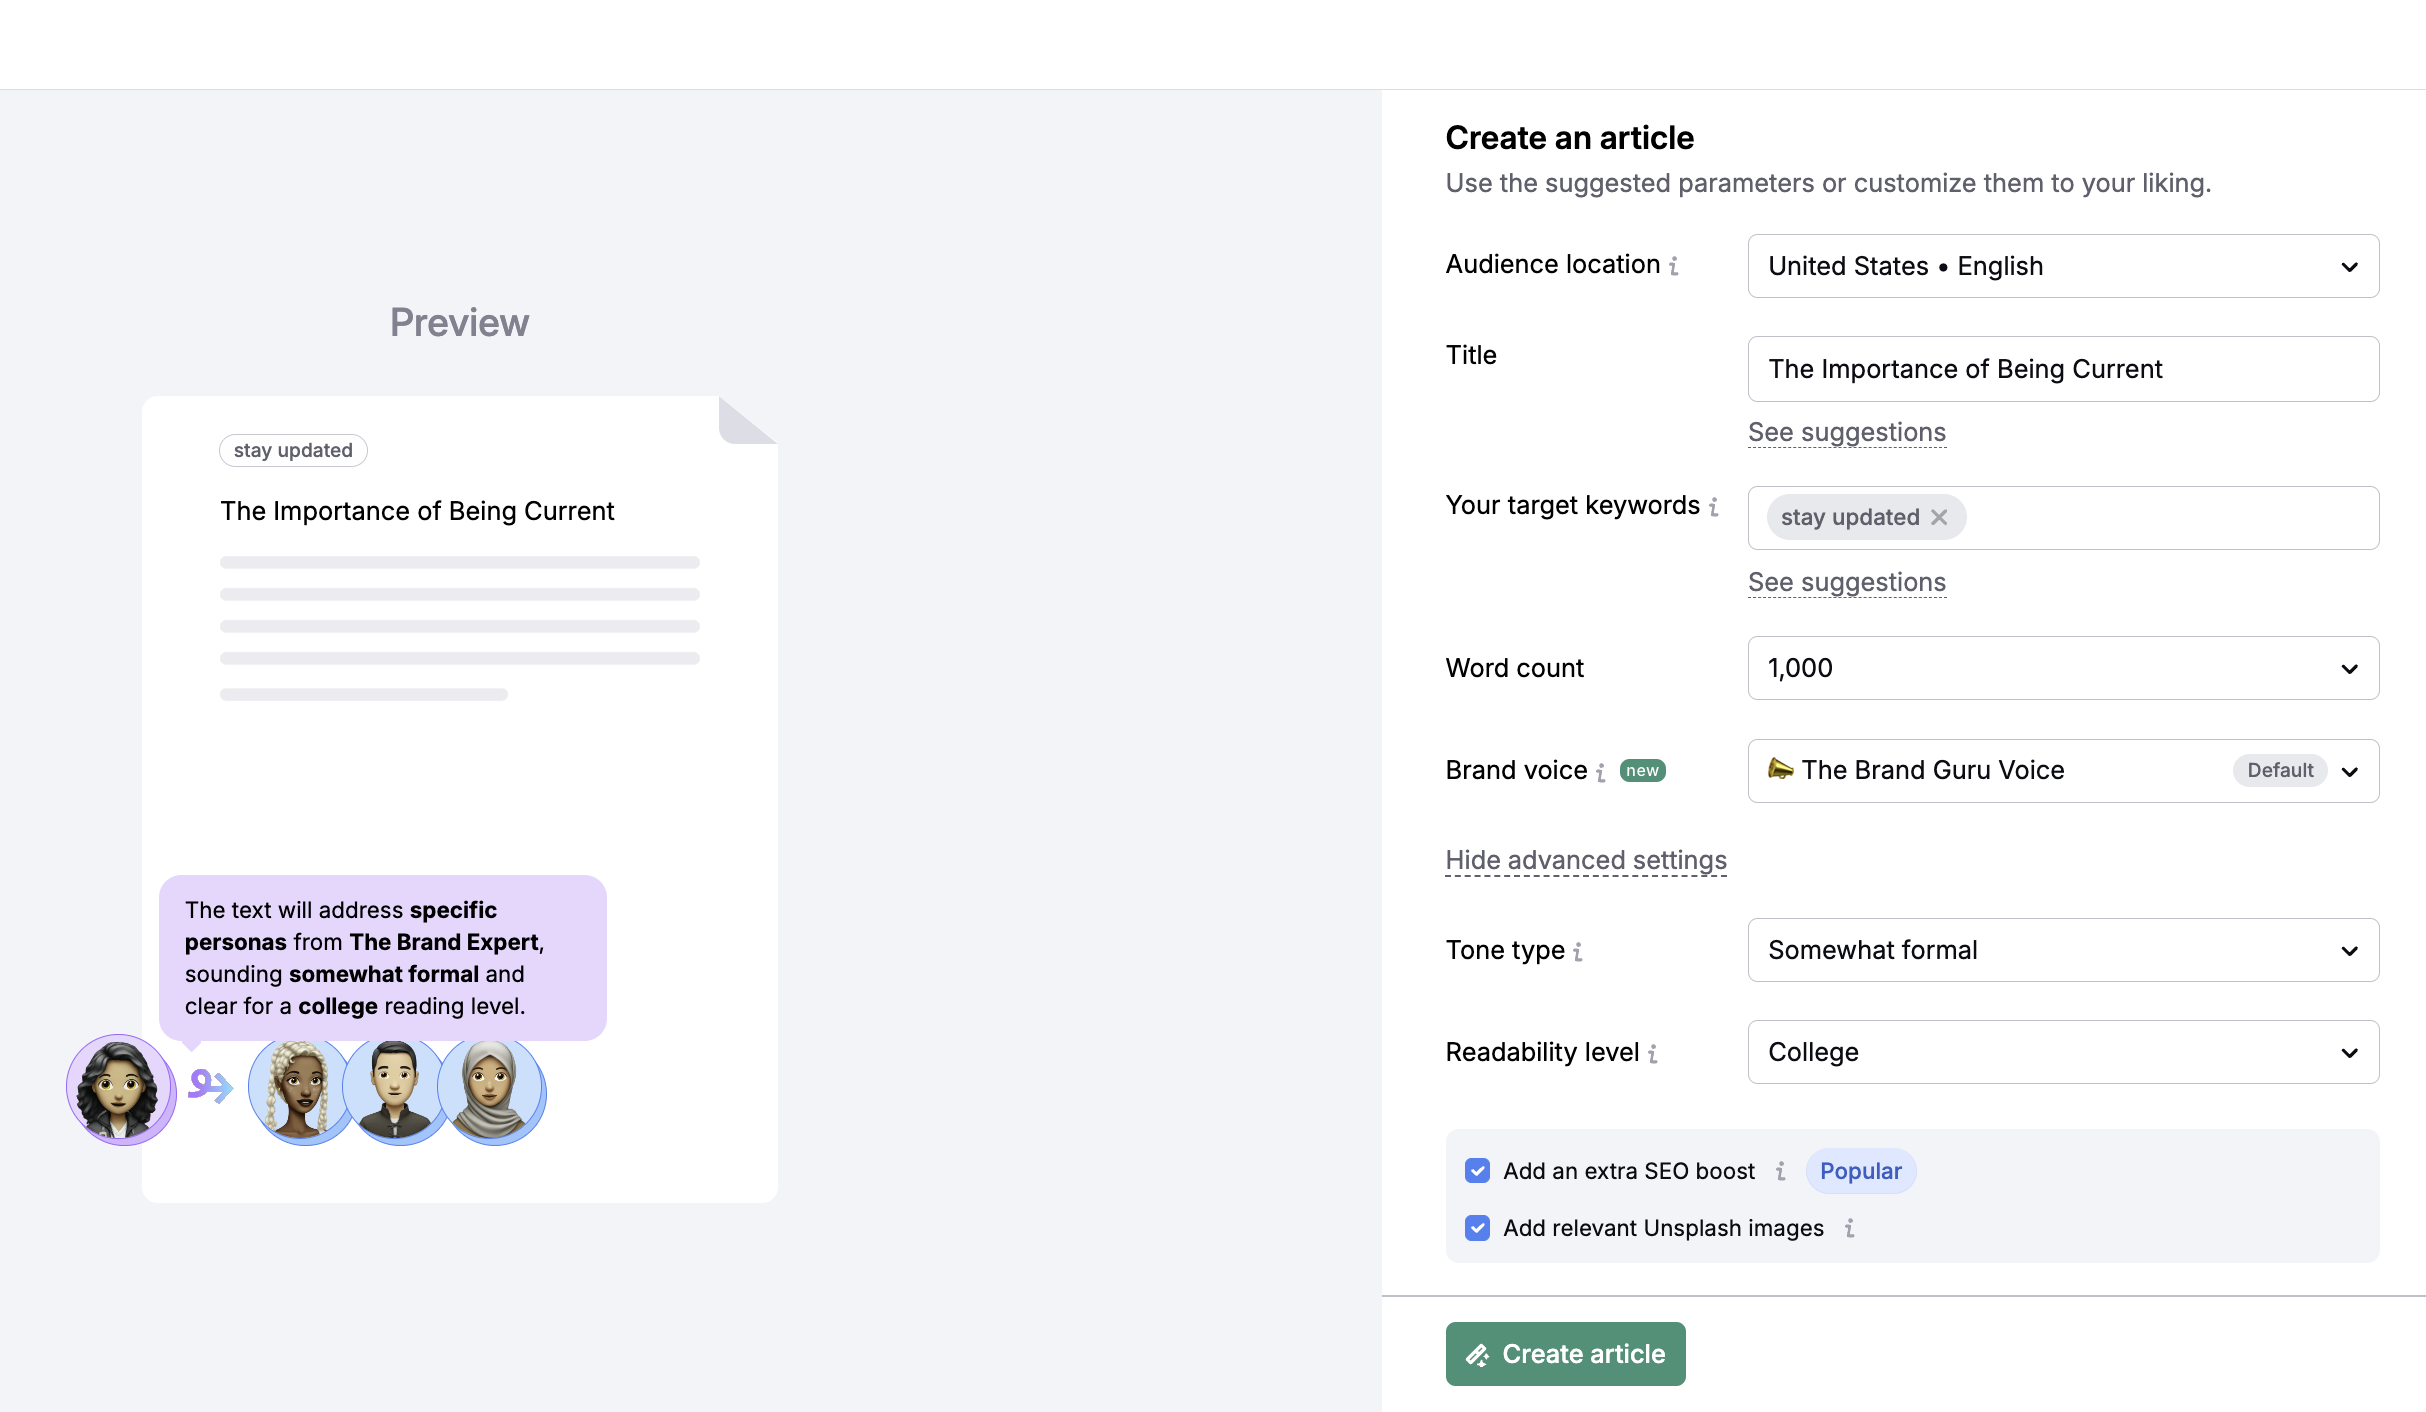
In the Audience location field, specify the city, region, or country where your audience is based. This helps ContentShake AI customize the content for local audiences.
You can also choose the target language for your article.
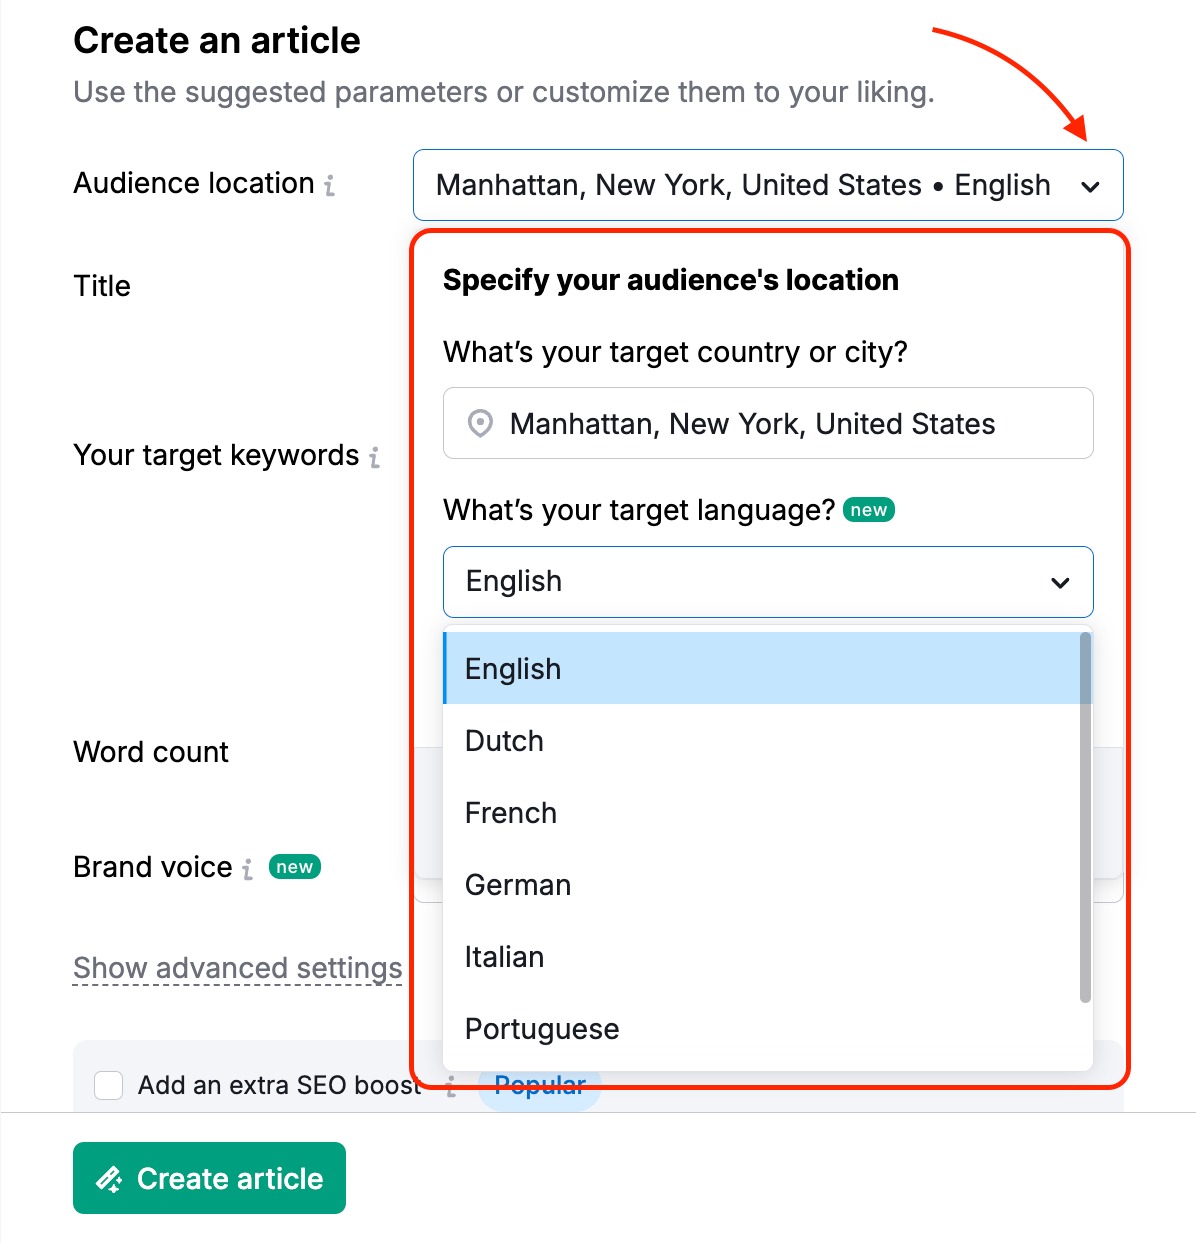
Check the Add relevant Unsplash images box to include free stock images that complement your article.
You can also enhance your articles' ranking on Google by utilizing the SERP-Based Article Generation feature. Simply select the Add an extra SEO boost option during article creation to activate this feature. The app will then analyze current search data to improve the ranking of your future article.
Hiding Ideas
Hide ideas that you don’t want to see again by using the “hide” icon (crossed-out eye).

More About Topics
All topics are sorted based on volume and difficulty. Every week, you’ll see new topic suggestions. Topics are rotated, so you may see the same topic again after one month.
Article ideas can't be used twice and will not be suggested again after you use them.
3. Write
After you choose your topic, ContentShake AI will produce an outline with a blog post title, subheads, intro text, images, and a conclusion. You can edit the outline and add your own text, or you can click on the Compose with AI button to add paragraphs of text.
As a paid user, you will receive unlimited AI suggestions.
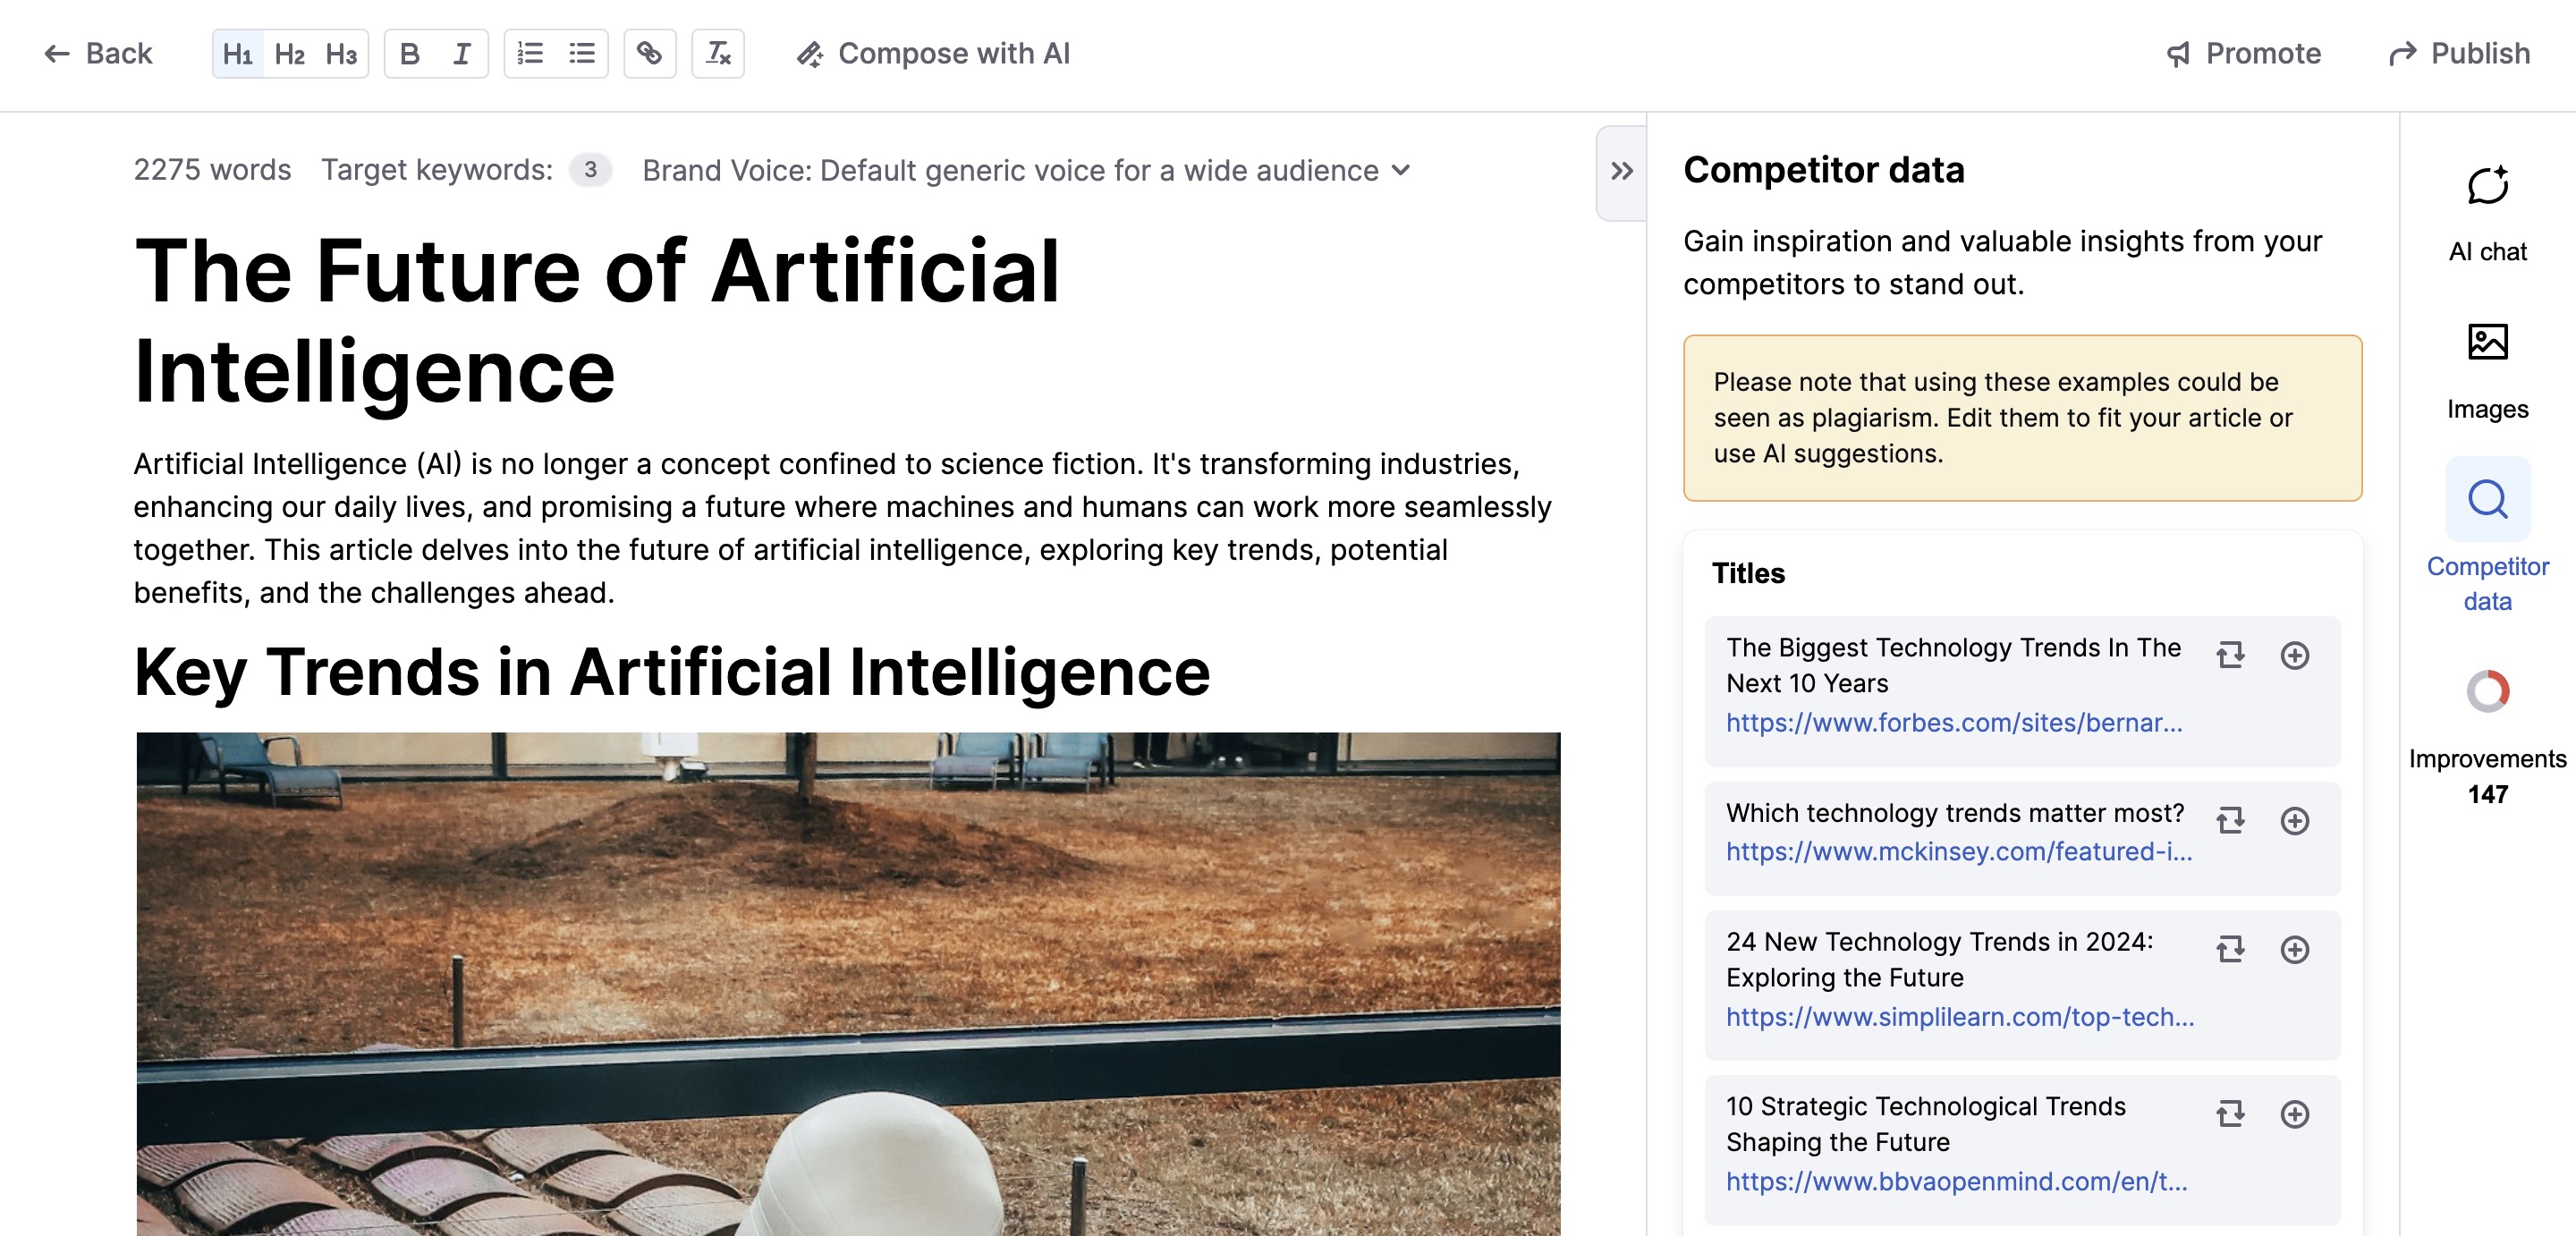
Additionally, you can edit an article with dynamic questions to AI by using the Ask AI feature.
With the help of this feature, you can get new structure ideas, related keywords, write an intro or conclusion for your blog post, etc. It also can answer any question, as a GPT model. It has knowledge of your article's context such as title, keyword, and typed text, and tries to help you using this data.
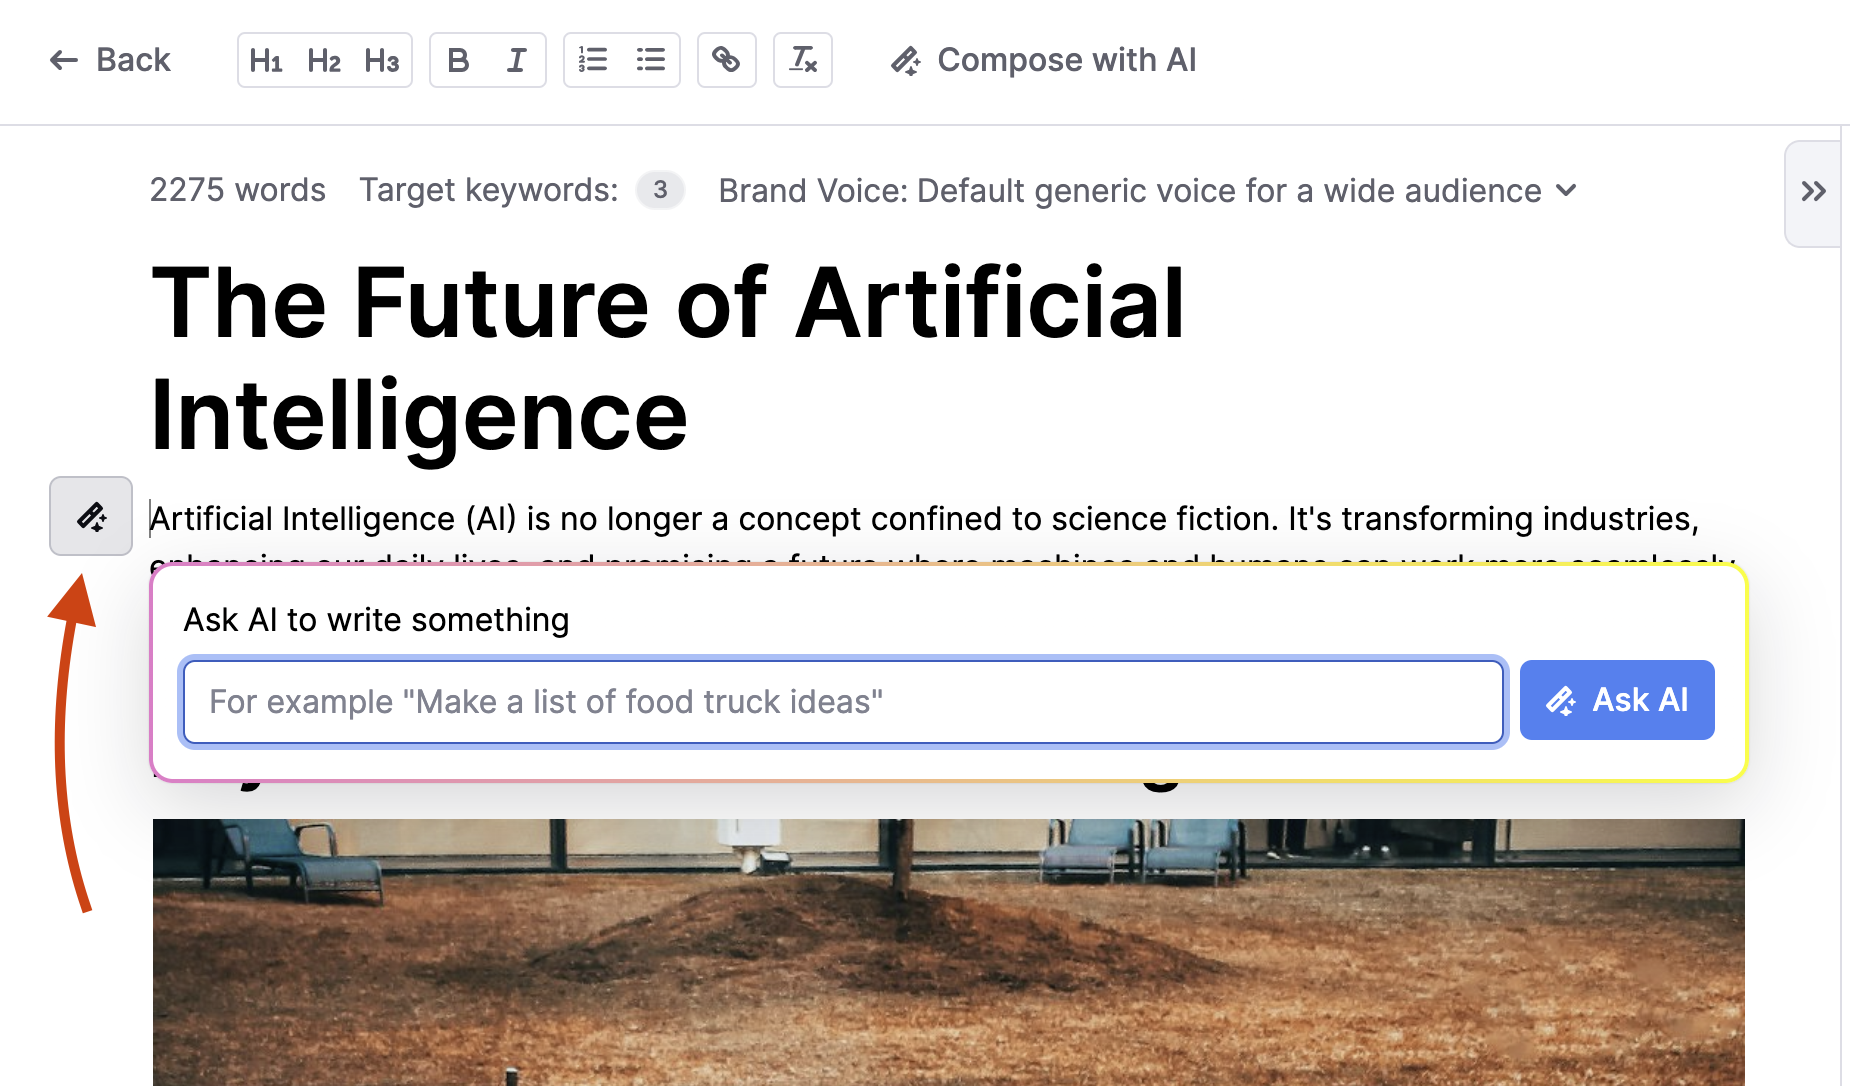
To the right, under the Suggestions tab, you’ll see several drop-down options.
Once you’ve selected options for each, click the Next button to update and optimize your text.
Title shows several options for your article’s headline as well as examples from competing articles.
Introduction provides you with suggestions for an opening paragraph as well as examples from your competitors.
Images provides options for royalty-free images to include in your article. Some of these get added automatically upon article generation, but you can adjust this part by removing them or clicking the plus sign to add more. It also shows you what your competitors are using.
Structure shows you the proposed heading structure of your article based on your competitors. You can add and remove headings here. Also, you can review the article structure of your competitors and dive into the actual text within each subheader.
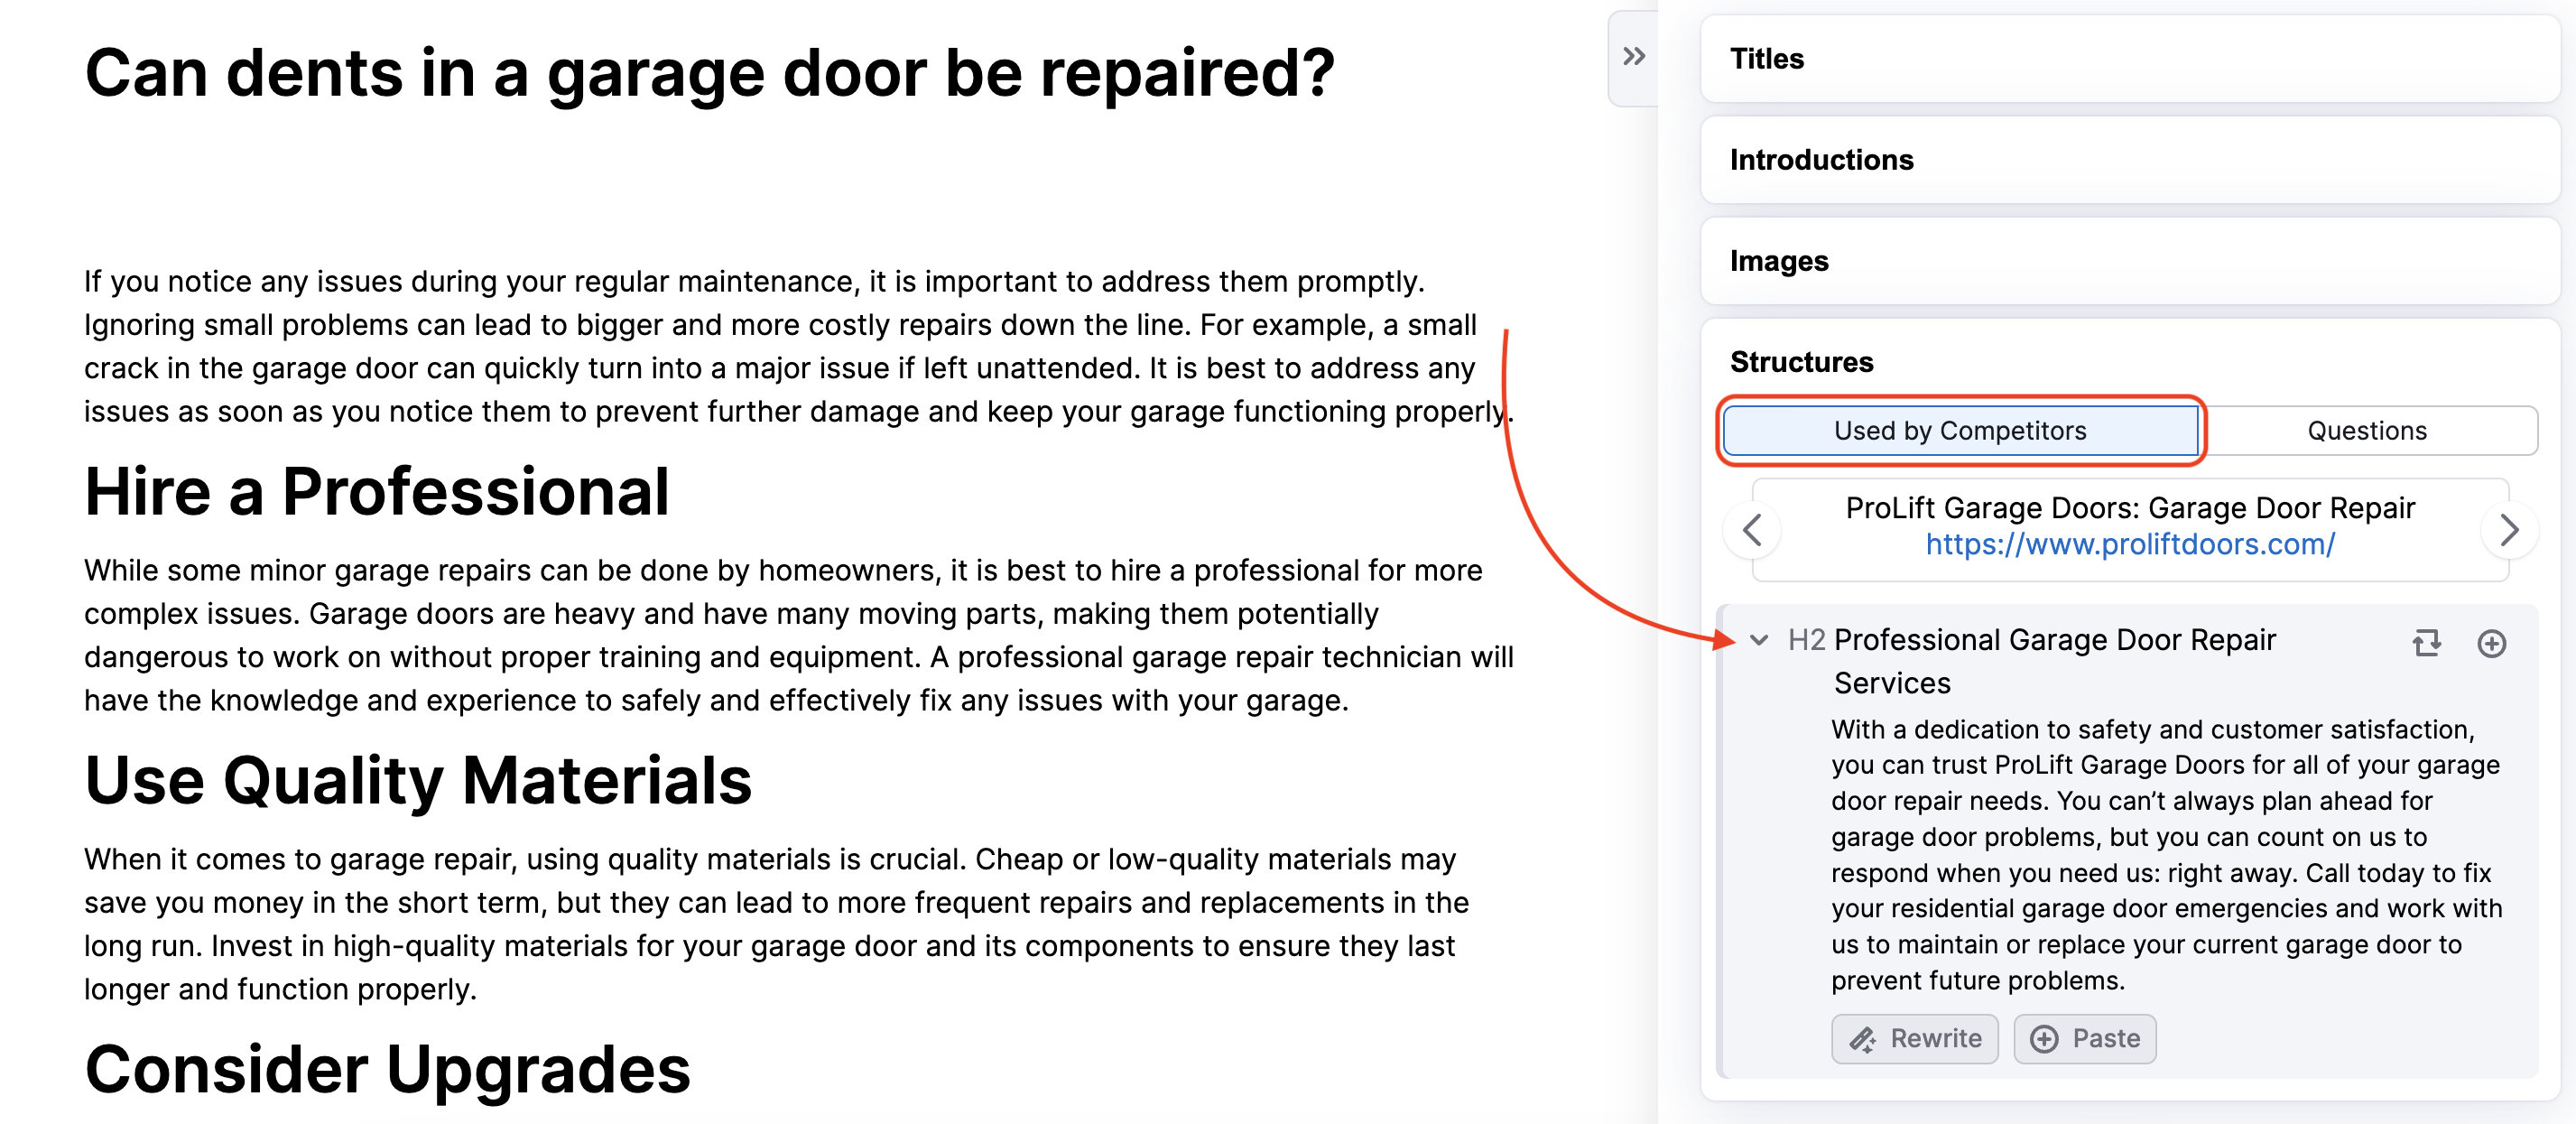
What is more, any text from the suggestions can be rewritten using the AI rewriter by clicking the “Rewrite” button.

The AI Chat feature allows you to communicate with our chatbot. Simply ask our chatbot to generate titles, introductions, structure, suggest images, and more. The chatbot remembers what was written previously, giving it a better context.
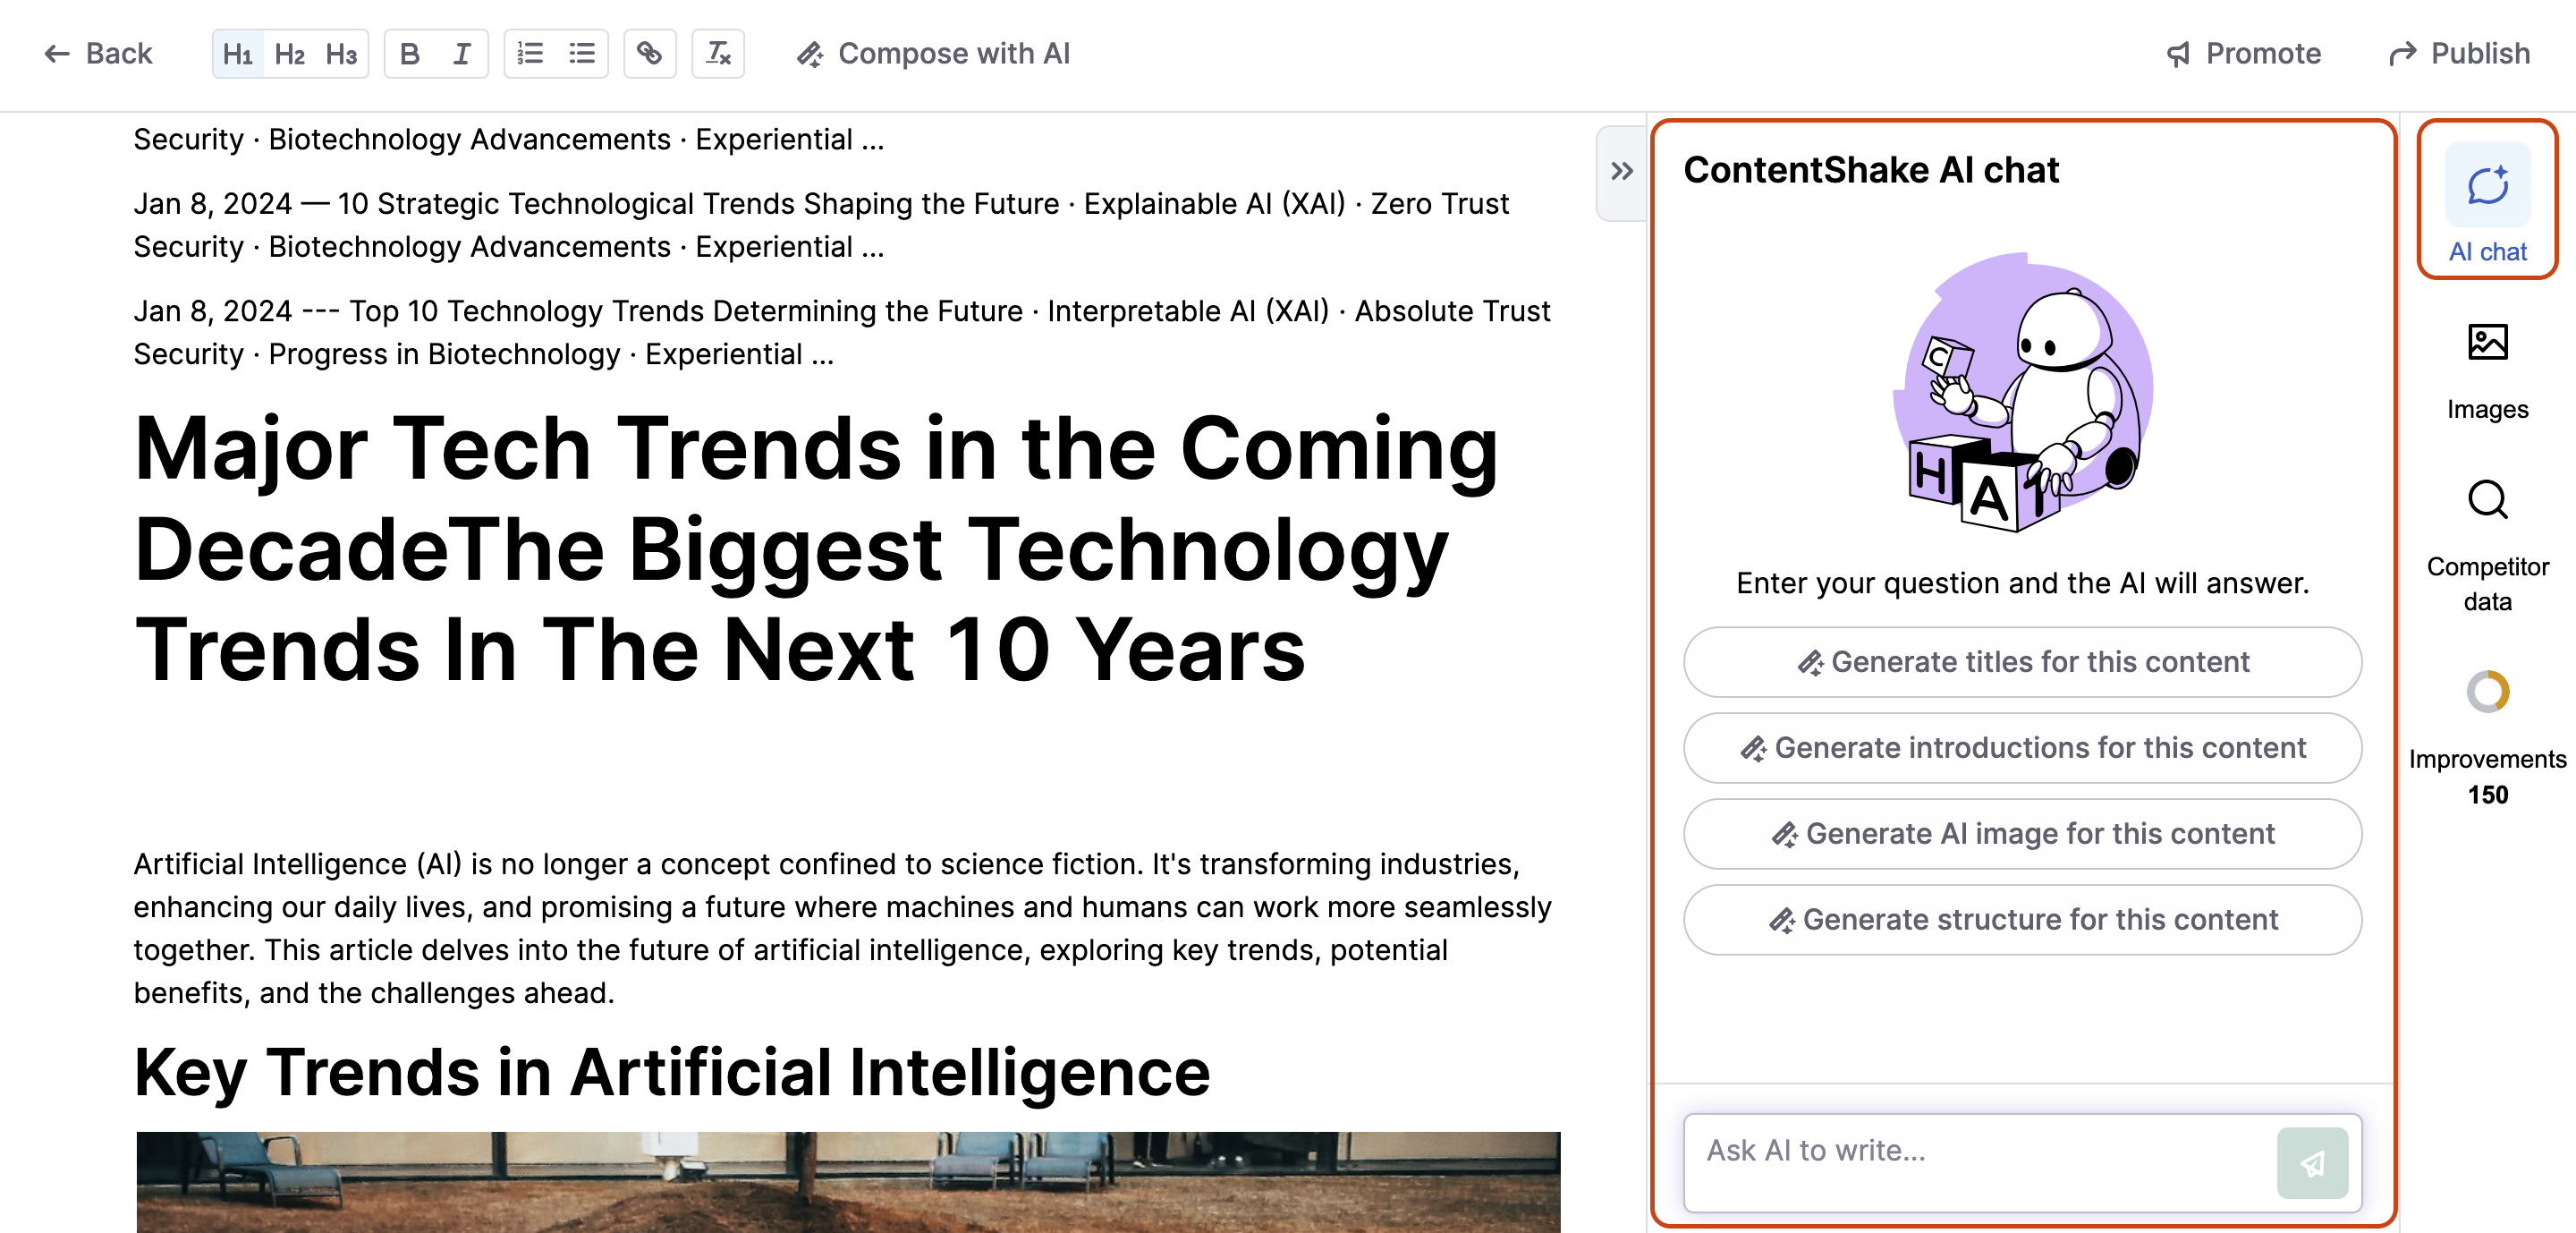
Note: AI Chat uses AI feature limits, with access being unlimited for paid users.
4. Improve
The Improvements tab provides a quality score on a scale of 1 to 100, based on SEO, Readability and Tone of voice.
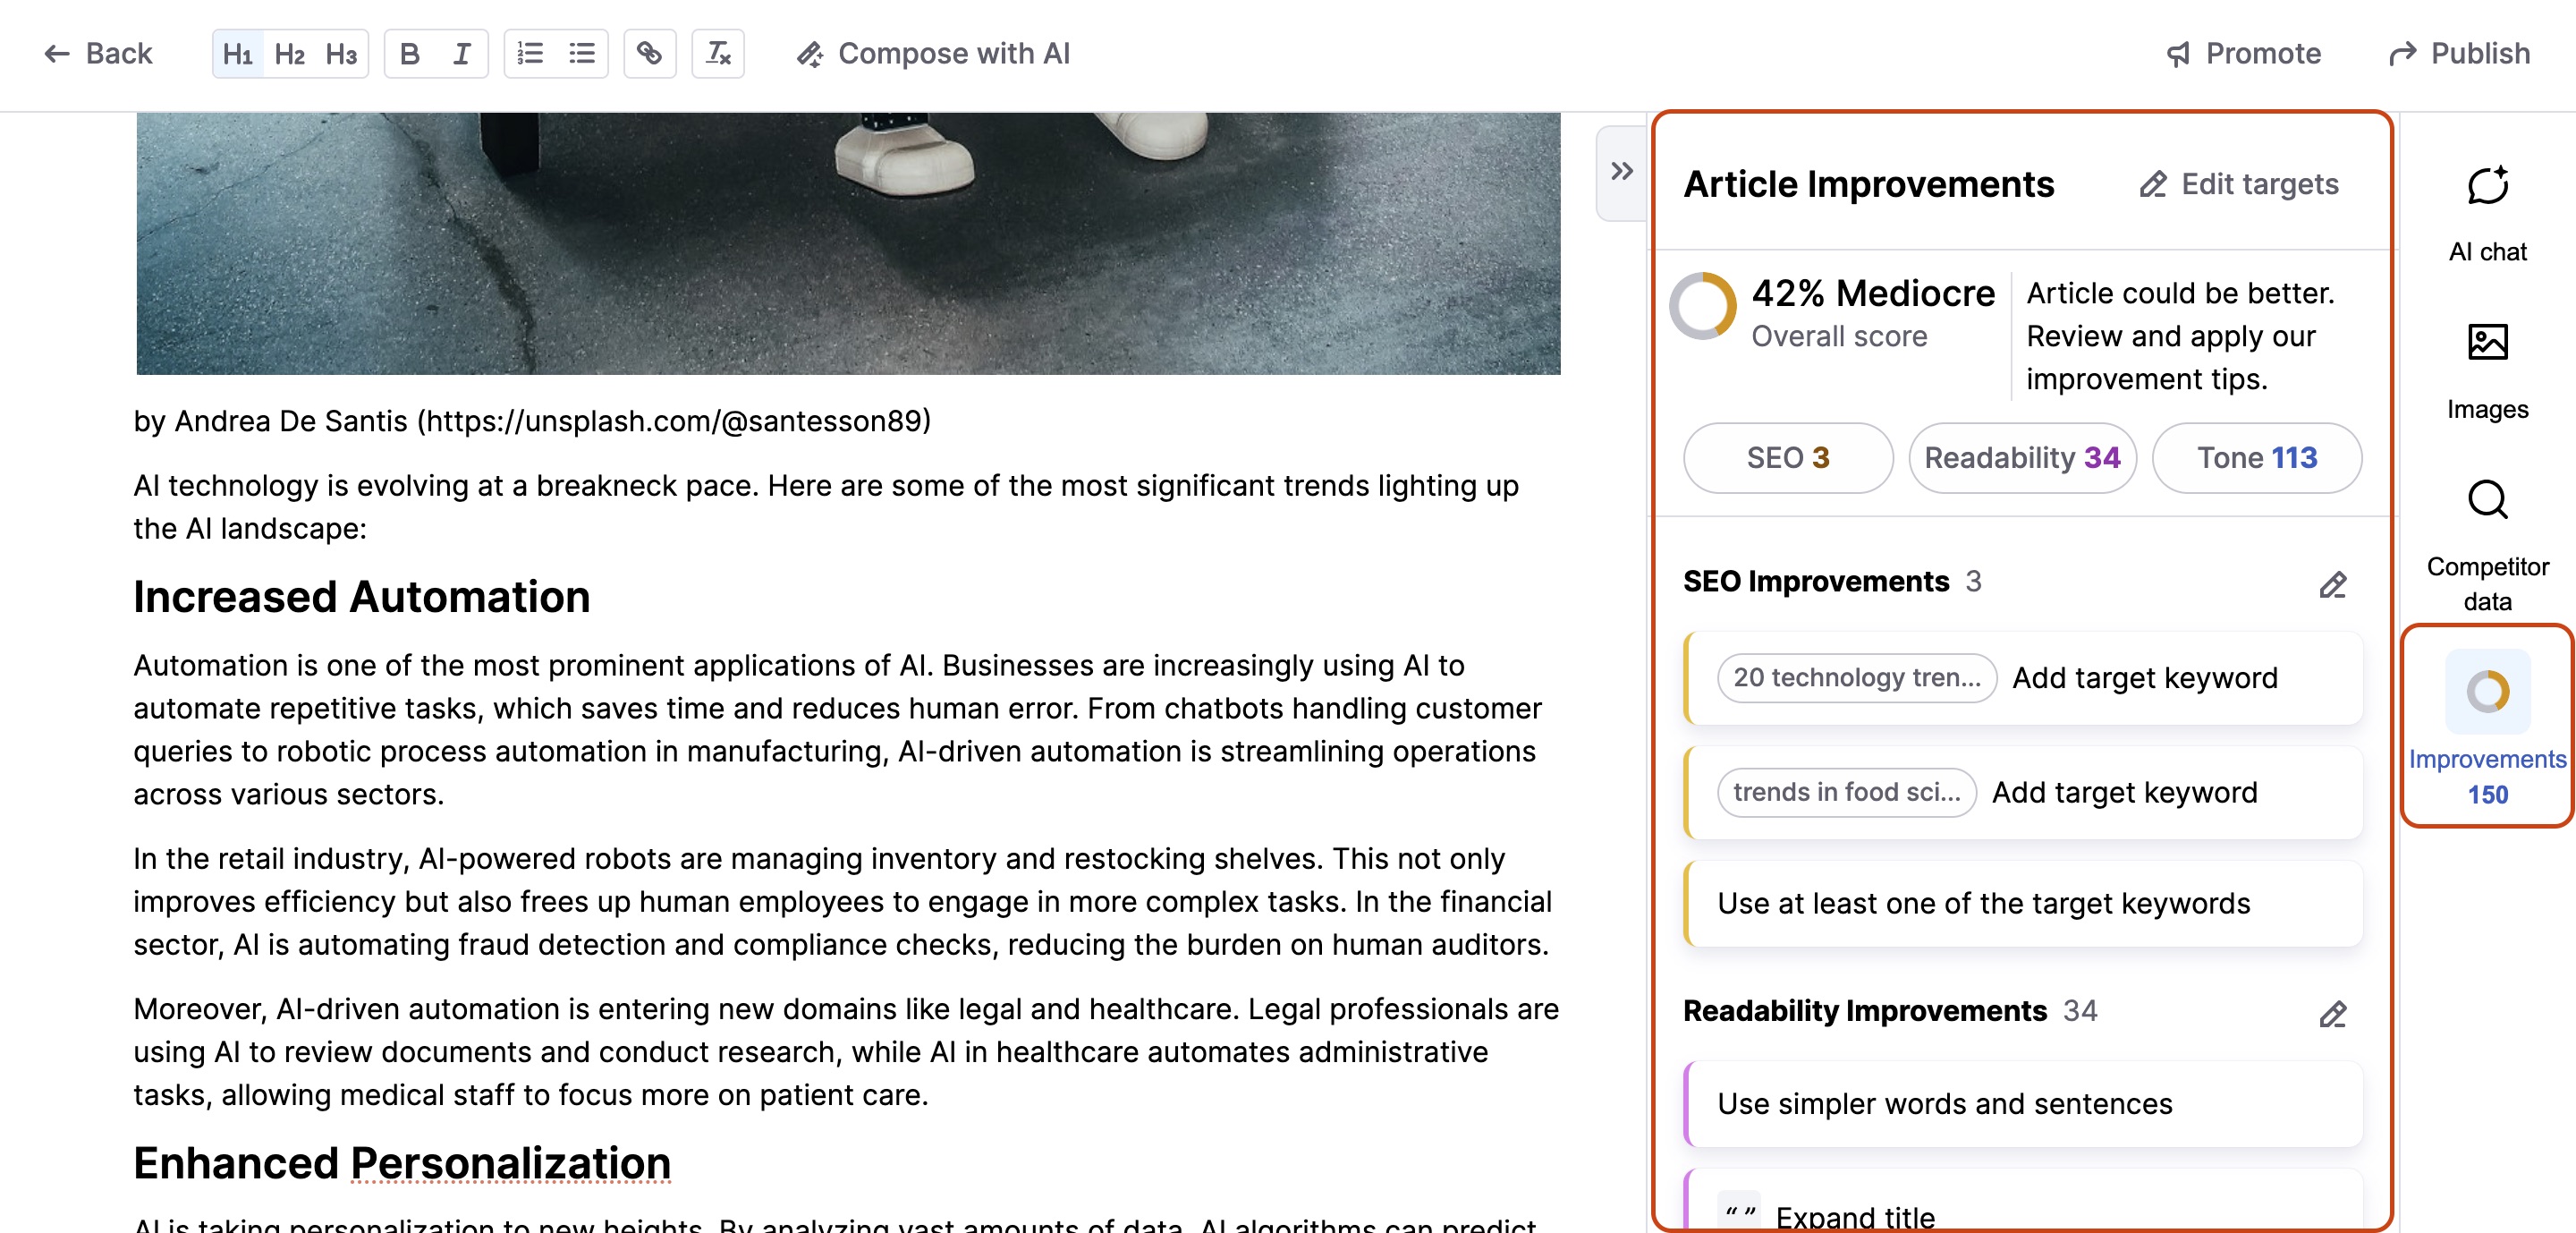
SEO
Readability
The Readability section provides a score based on the readability level you chose in the Targets.
It considers your current word count against the target word count, informs you of any issues with your title regarding character or word count, and also you’ll see any issues with a sentence and paragraph length as well as any additional issues with readability.
You can fix any of the highlighted issues in one click using the app's AI features. Select the text you need to adjust and choose one of the options: Rephrase, Simplify, Expand, Summarize, or Make list.

Highlight the text you want to change and choose one of the following from the toolbar:
- Rephrase: Paraphrase your piece of text to improve readability
- Simplify: Enhance your text’s readability by simplifying the selected sentences
- Expand: Combat writer’s block by adding more details related to your sentence or paragraph
- Summarize: Create a short summary of the selected piece of text
- Make list: create a list of bullet points to make text more organized and visually appealing
Tone of Voice
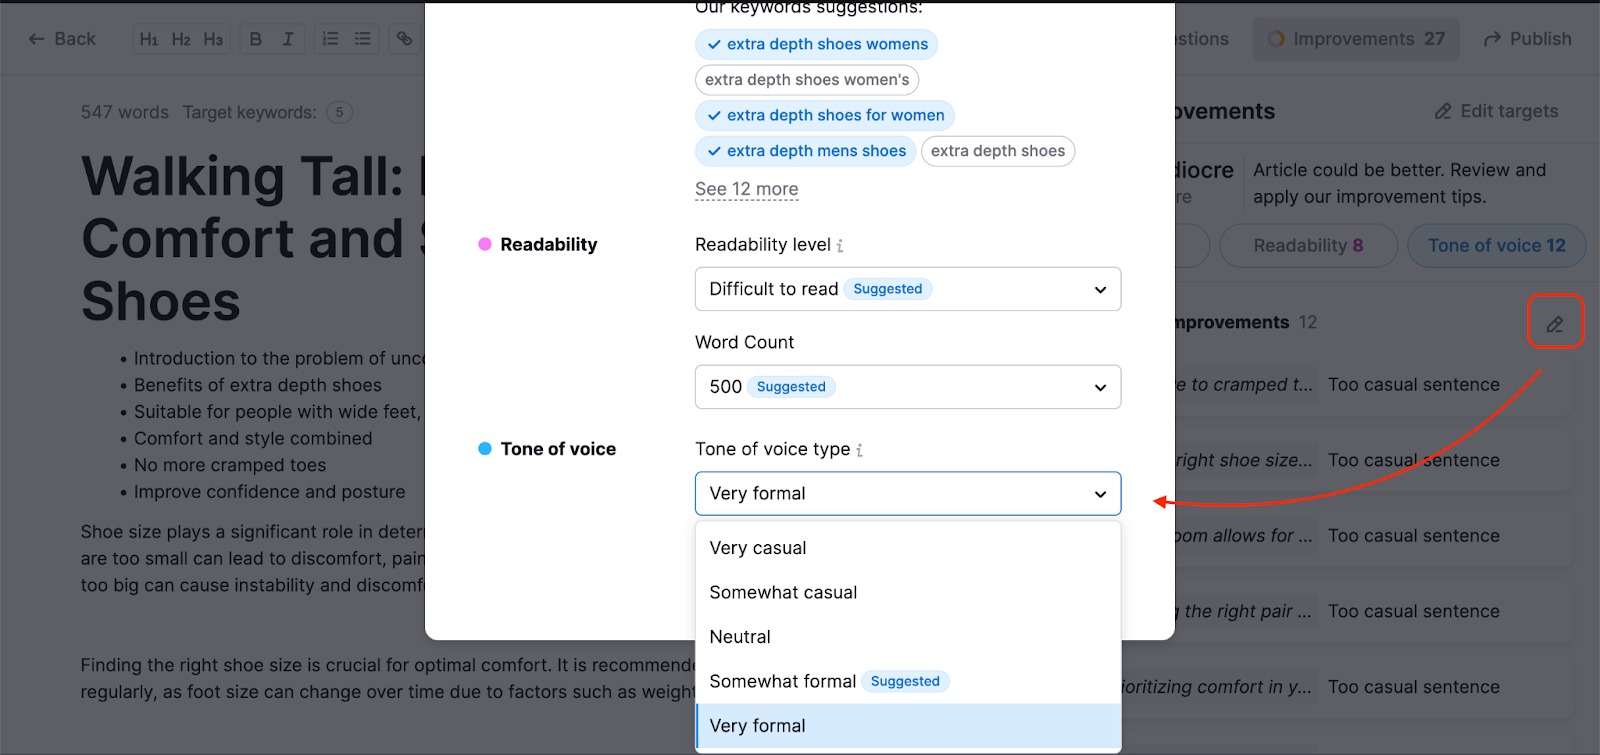
In the Tone of voice section, you’ll see a list of sentences that may lean too casual or too formal, depending on the tone you’re targeting.
You can change the Tone of voice target by clicking the “Edit” button.
5. Add Images
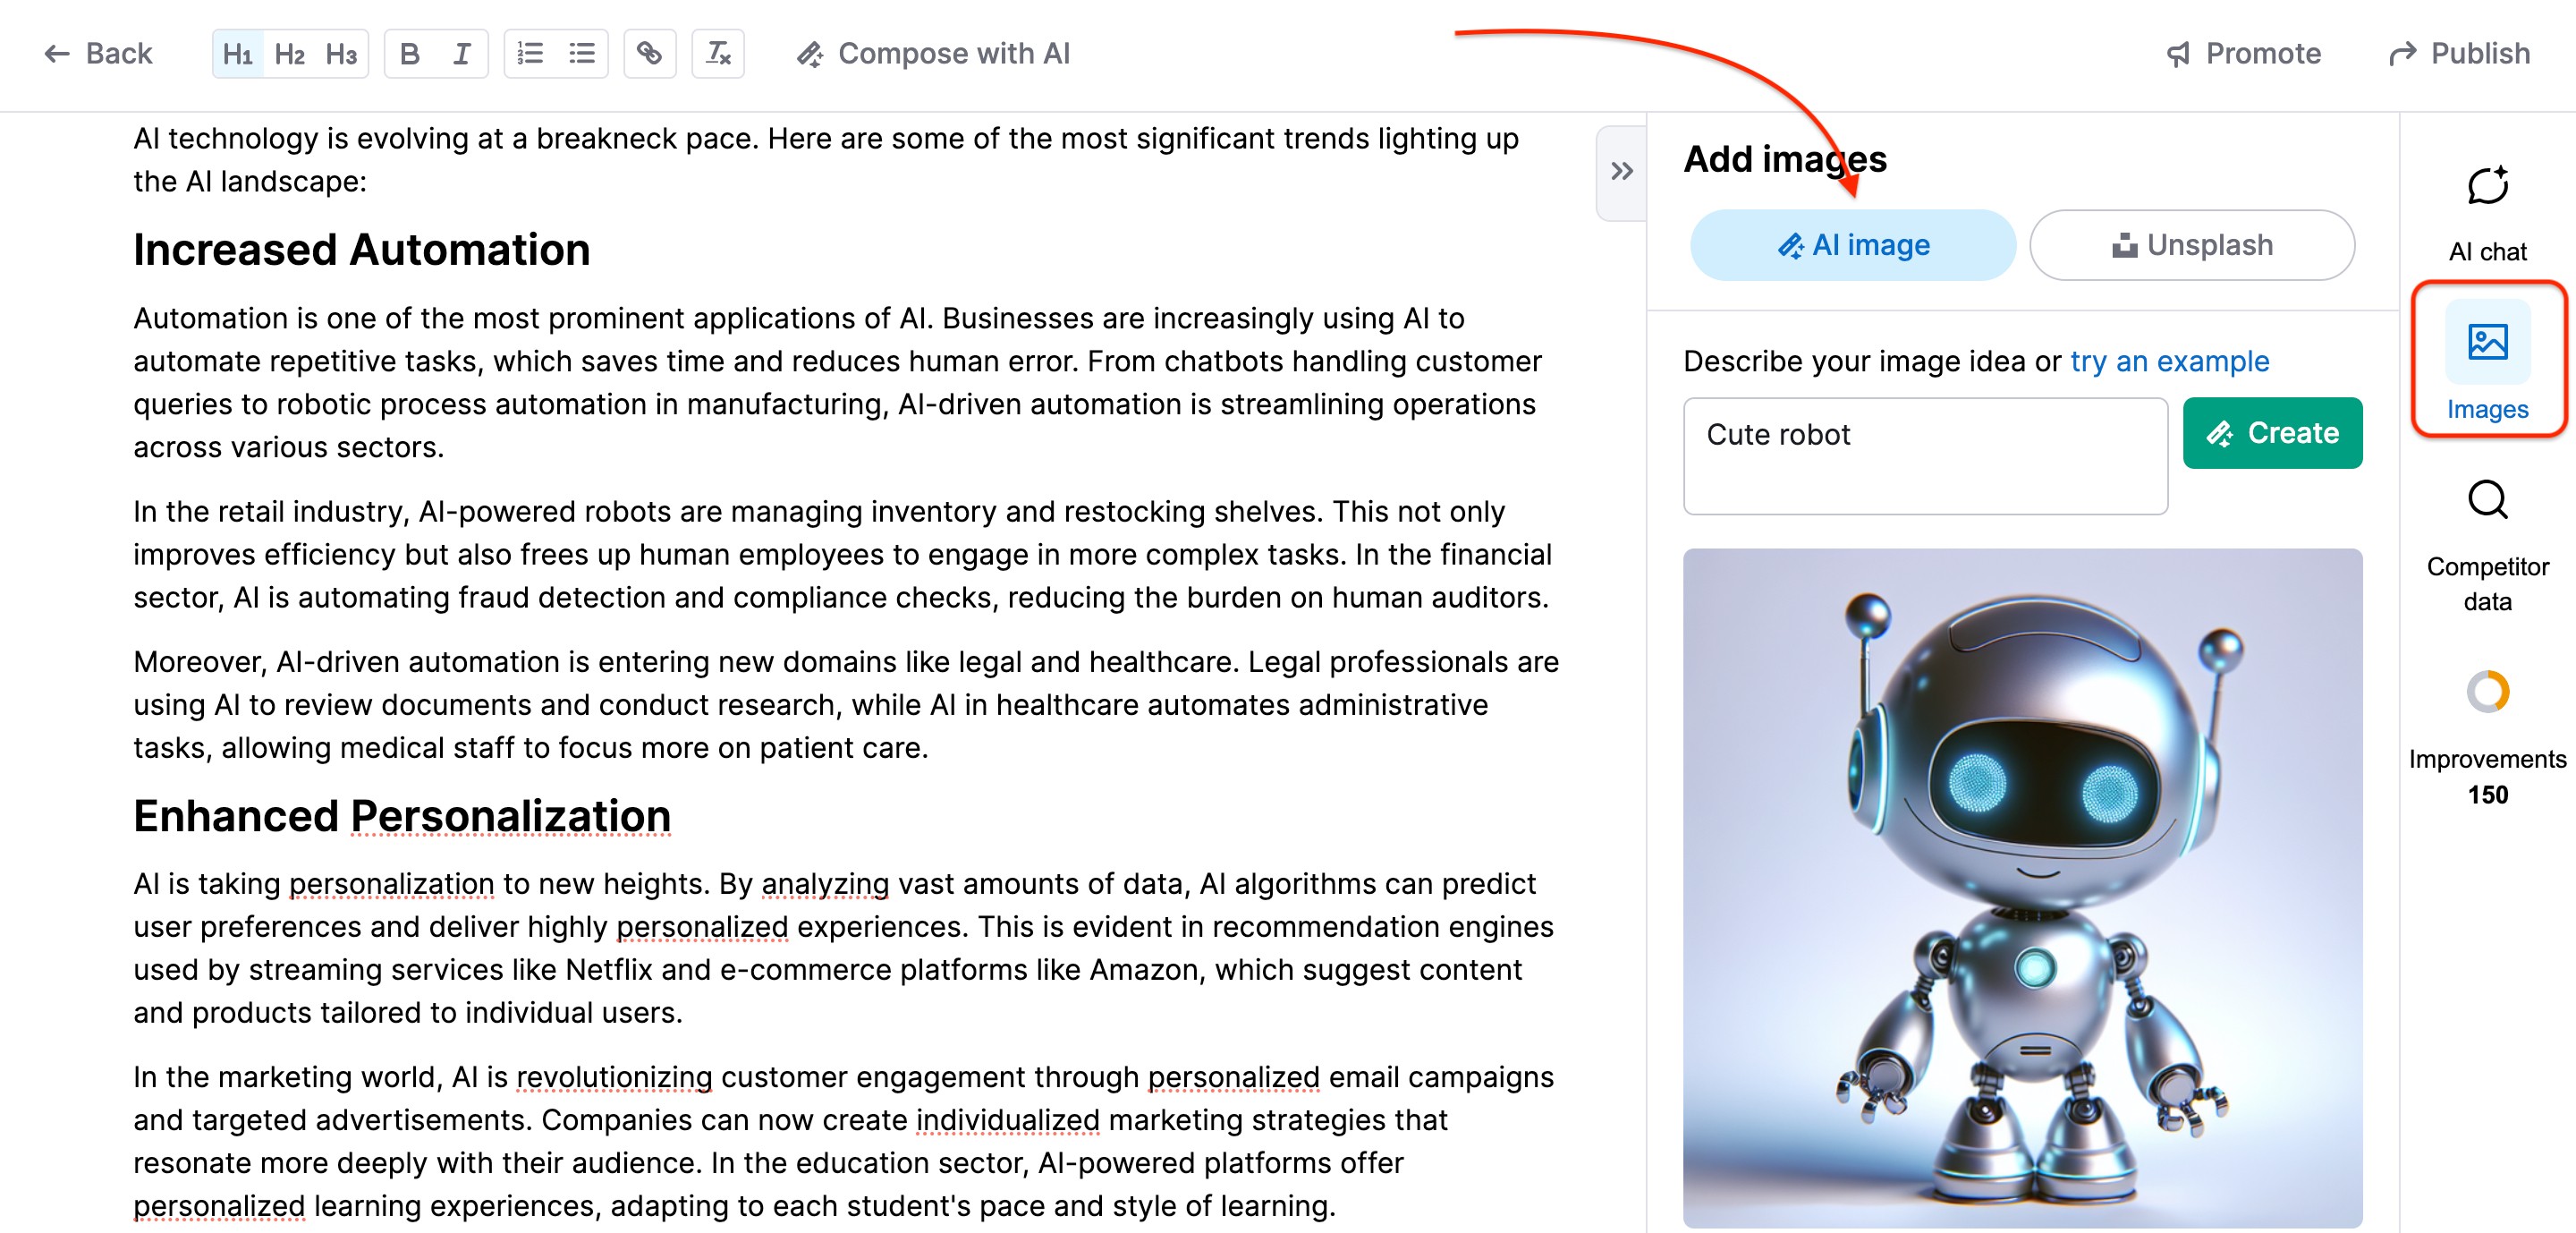
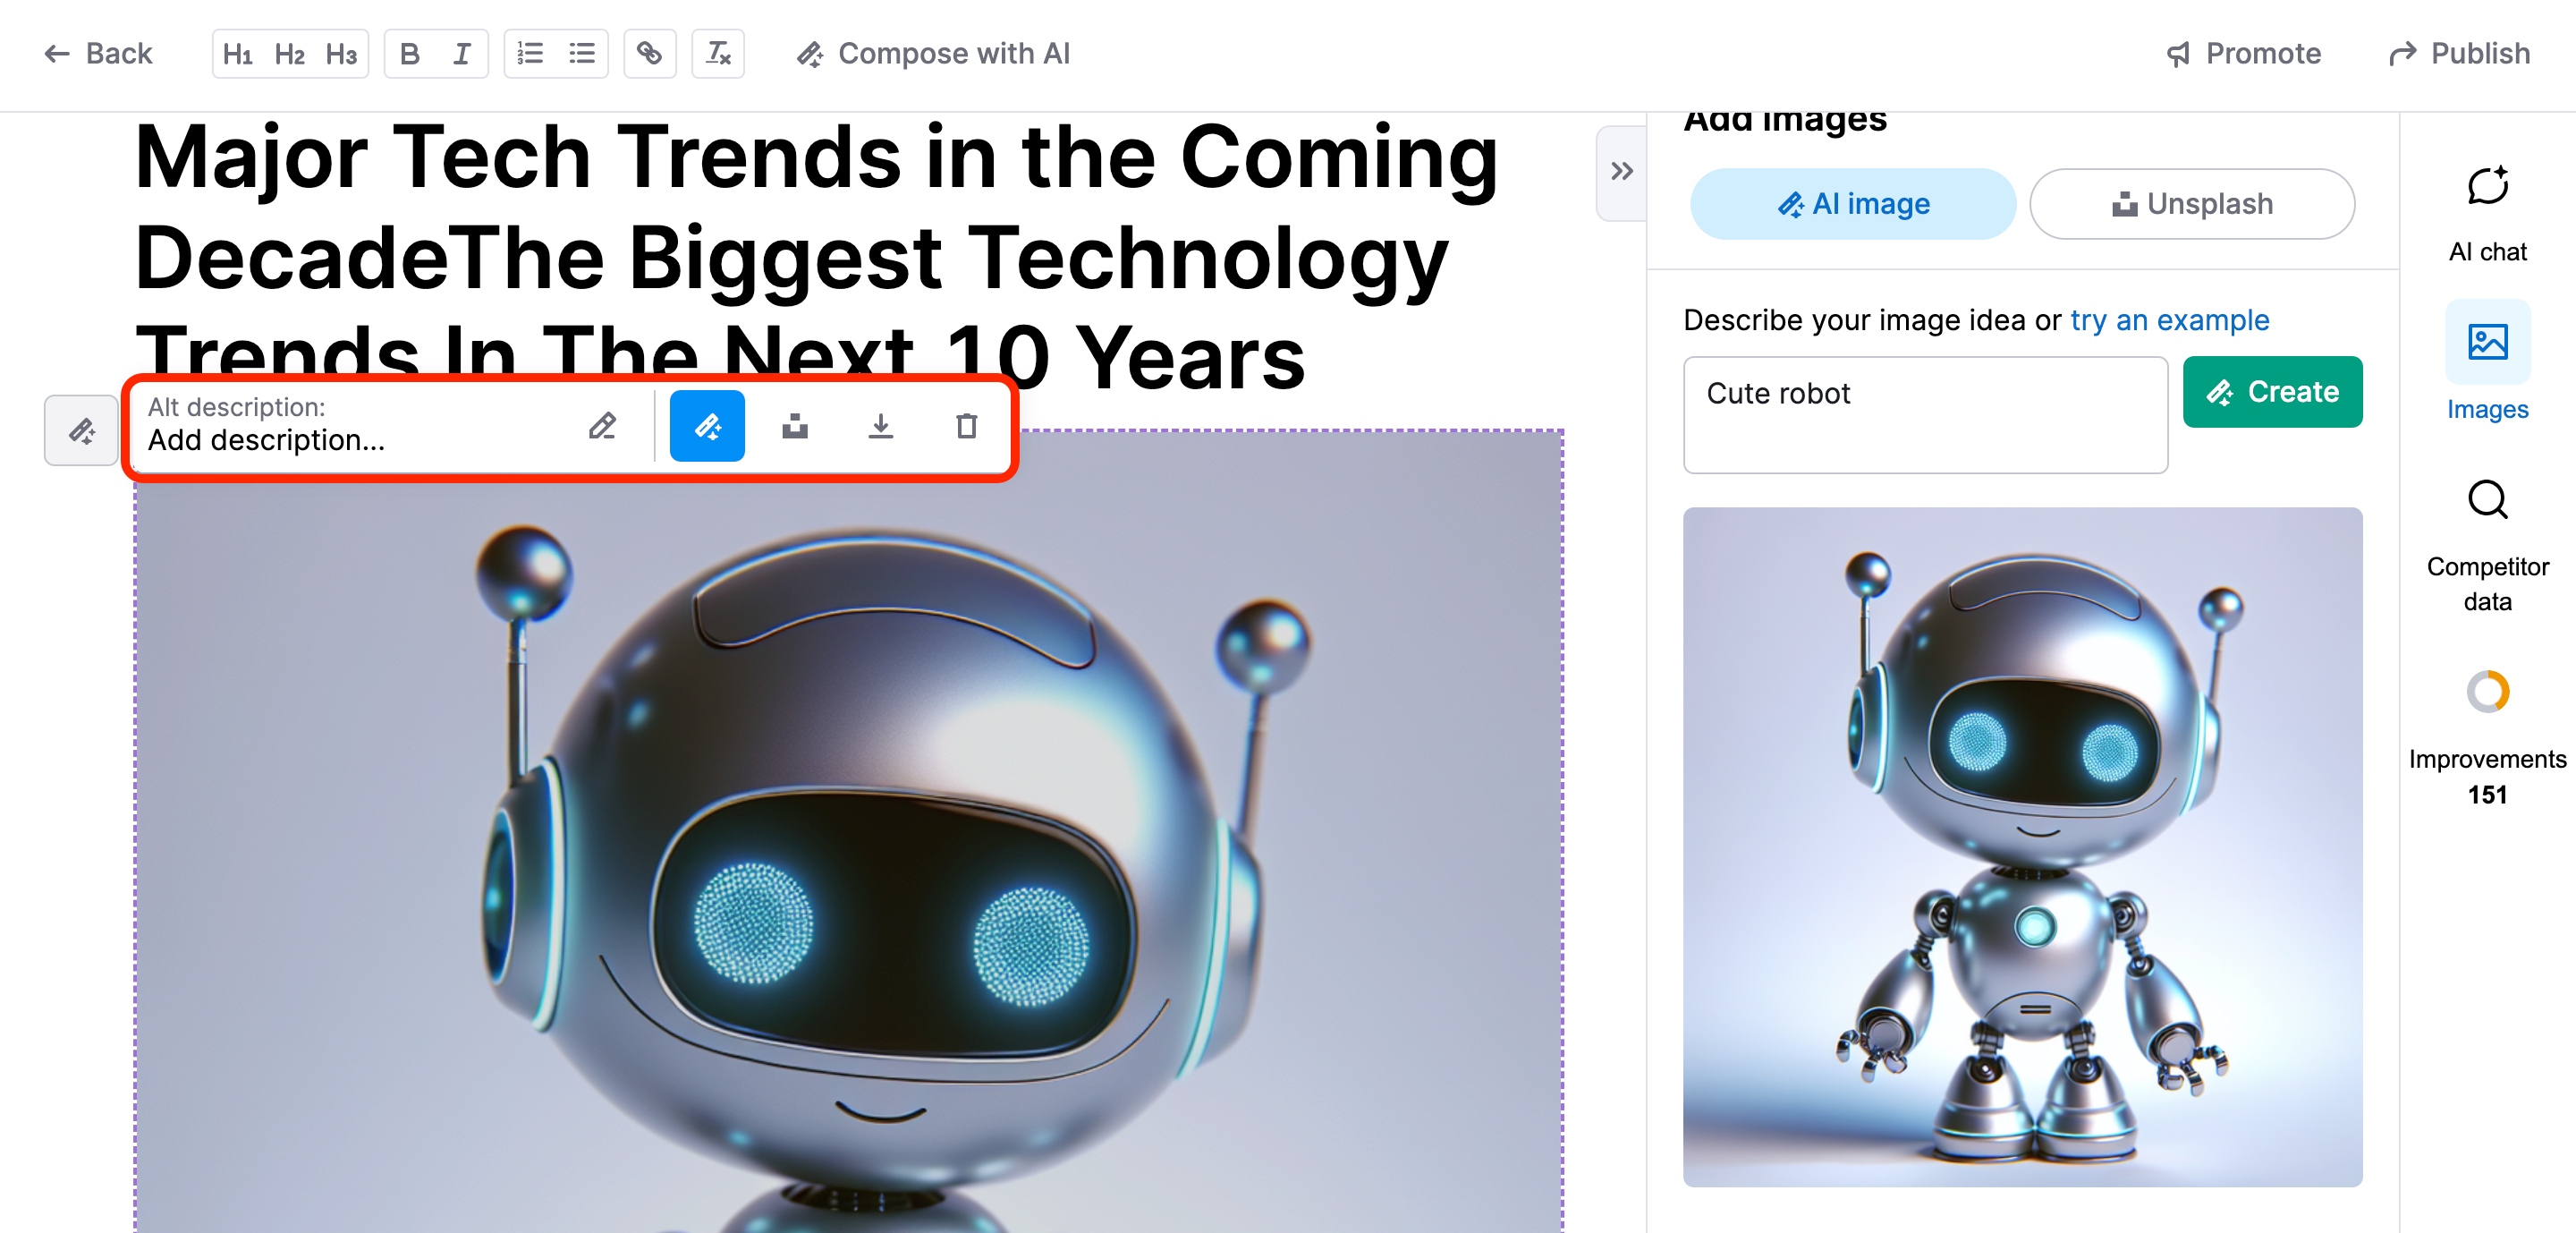
Create images using AI or find the perfect Unsplash picture to complement your content. Simply click on the Images button located at the top right corner of the interface.
In the AI image menu, you can input your prompt to generate a custom AI image that is tailored to your article.
In case an AI-generated image is not what you're looking for, you can also search for the perfect stock picture through the Unsplash menu.
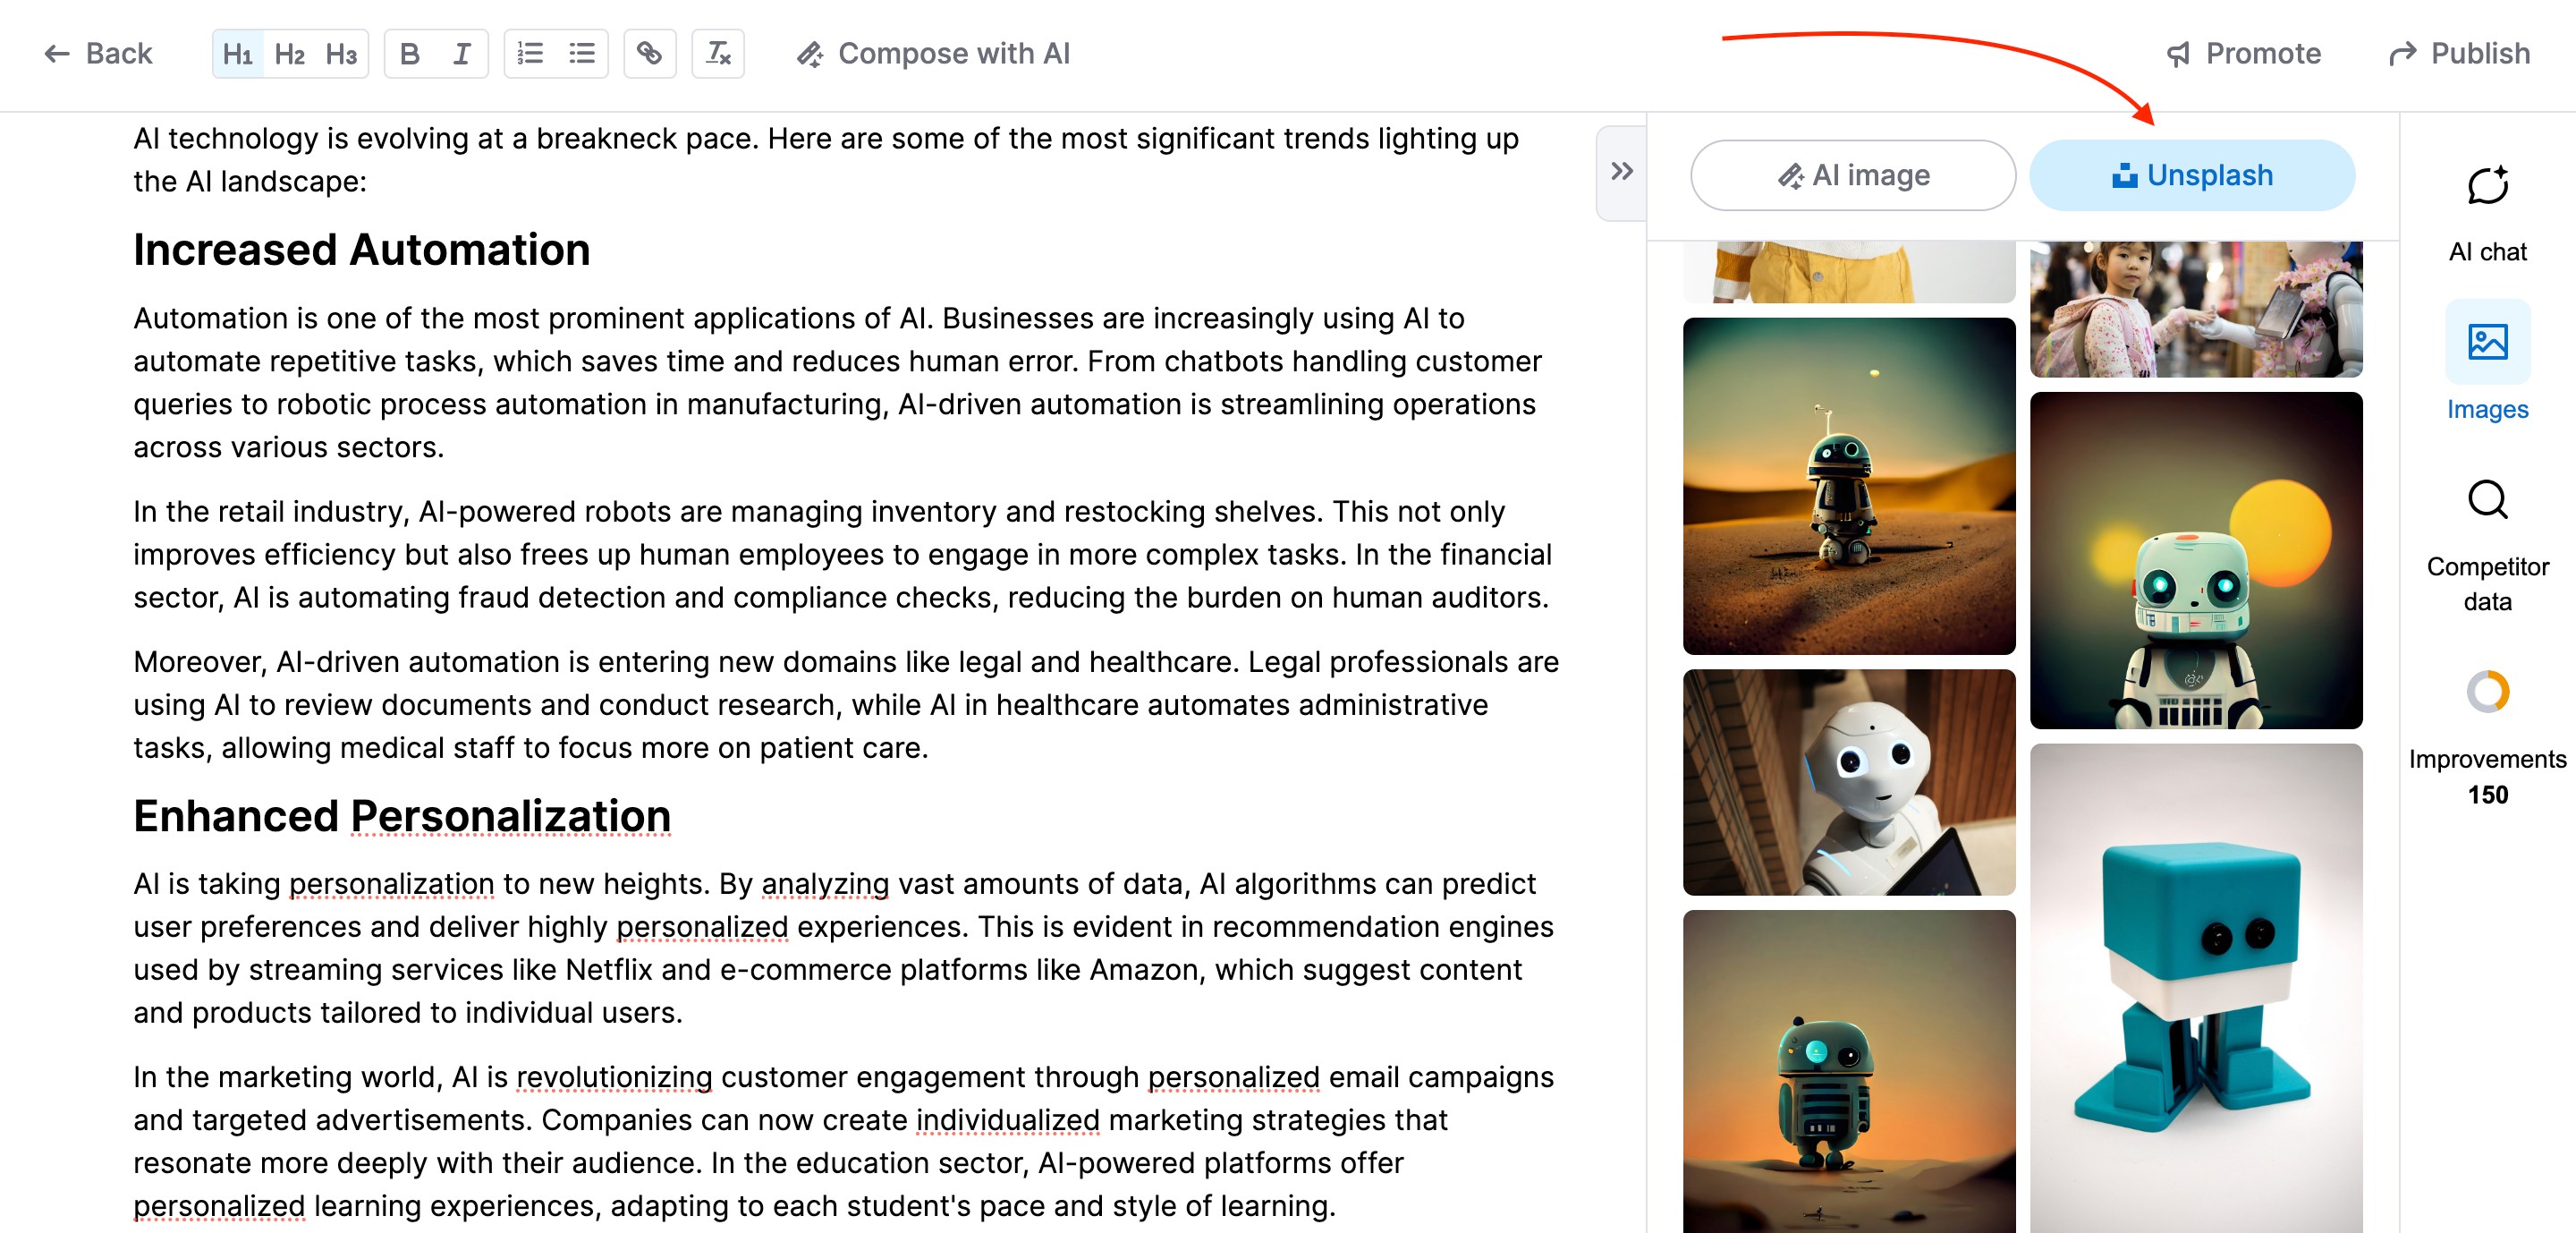
Click on an image to add an alt description or replace it with another one, provided either by AI generation or Unsplash.
6. Share
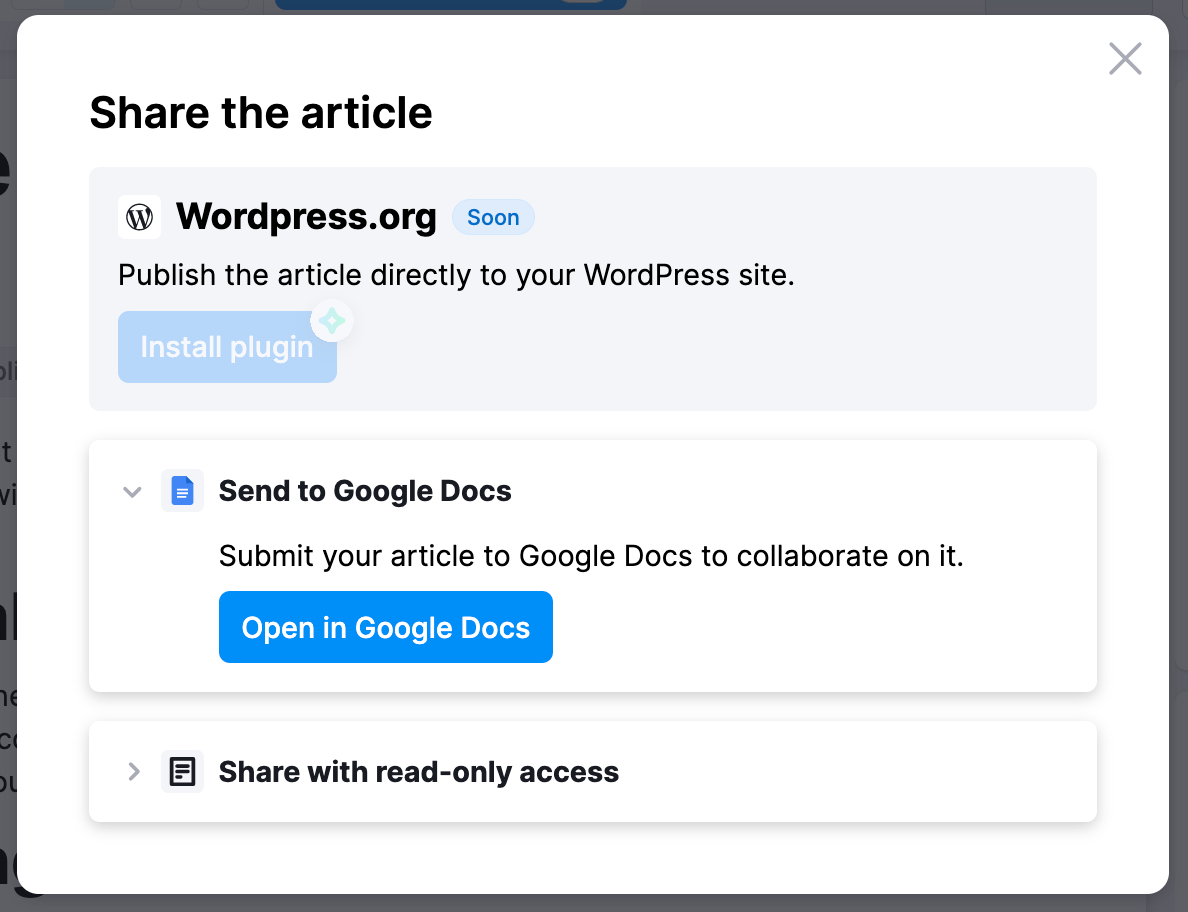
All finished? ContentShake AI allows you to publish directly to WordPress via our plugin, or you can send your newly created article to a Google document.
Just click on the Share button at the top right corner of the app.
Install the WordPress Plugin
Visit our Knowledge Base article for installation instructions.
Share on Google Docs
To view the article you just created in a Google document, open the Send to Google Docs drop-down and click the Open in Google Docs button.
To Share with read-only access, select the drop-down and click the Copy link button to receive a link to share a read-only version of the article with others.
How to Use the Empty Editor in ContentShake AI
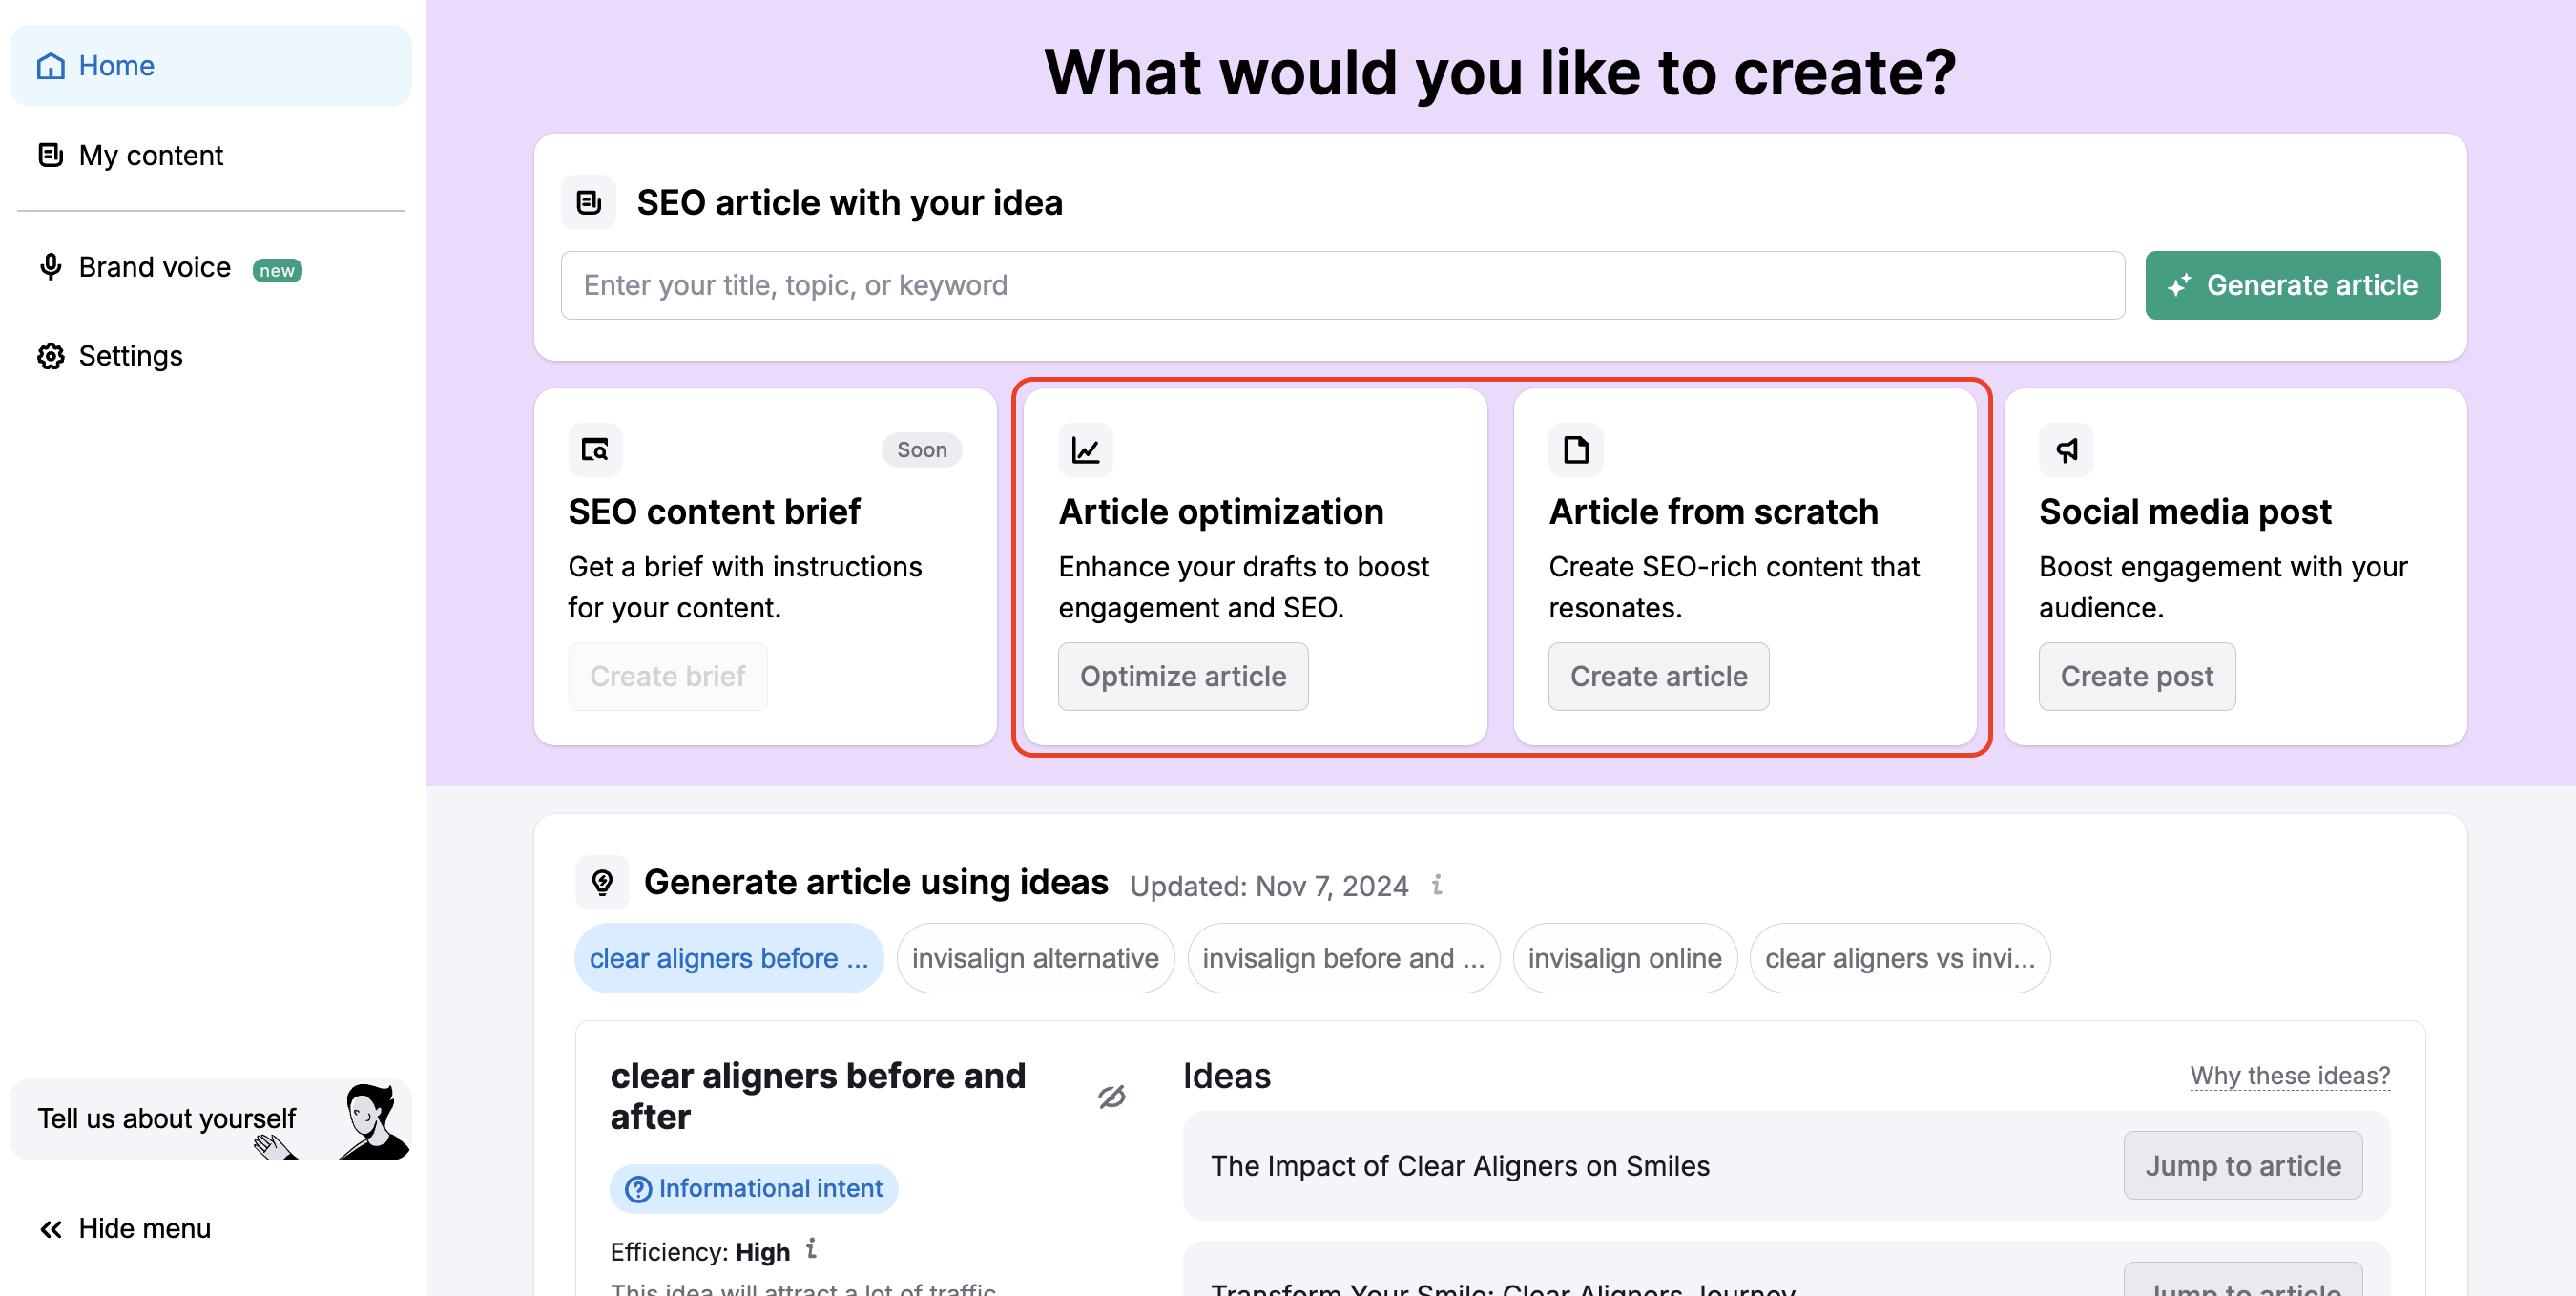
There are two ways to create and modify your text without requiring initial AI-generated content from ContentShake AI. You can either optimize your existing content or create new content from scratch using the Article optimization or Article from scratch options at the top of the Home page.
Article optimization:
To optimize your own drafts, click on the Optimize article button at the top of the homepage.

This will take you to the Improvements tab in the empty editor.
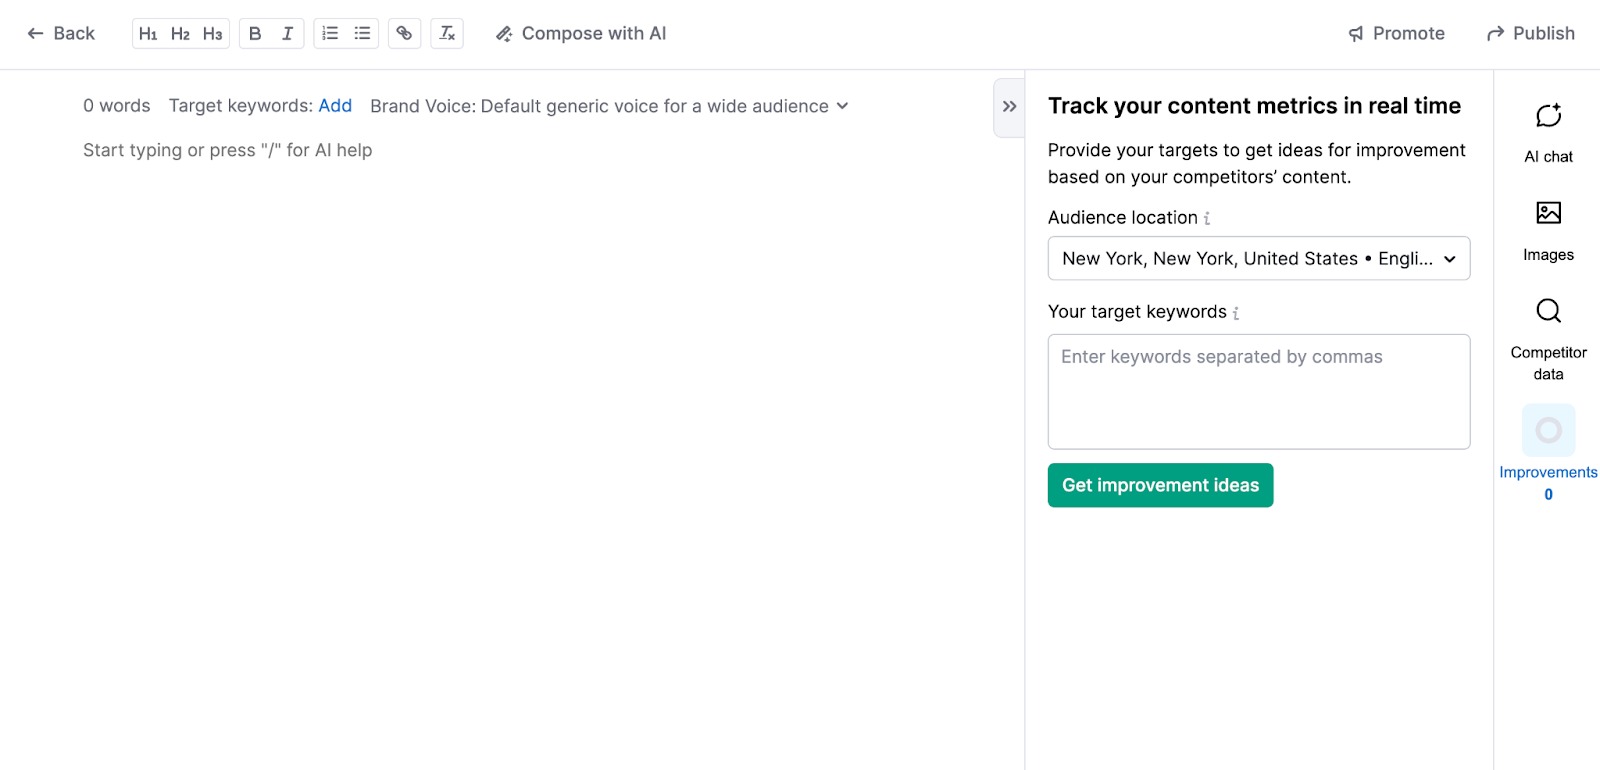
Here, you need to enter at least three keywords to start gathering data on competitors and receive specific suggestions for improvement.
You can also choose the location for data collection. The first keyword you enter sets the main topic, which helps in getting relevant suggestions.
Article from Scratch:
To choose the Article from scratch option, click on the Create article button.

This will also open an empty editor with an AI chat tab to help you while you write.
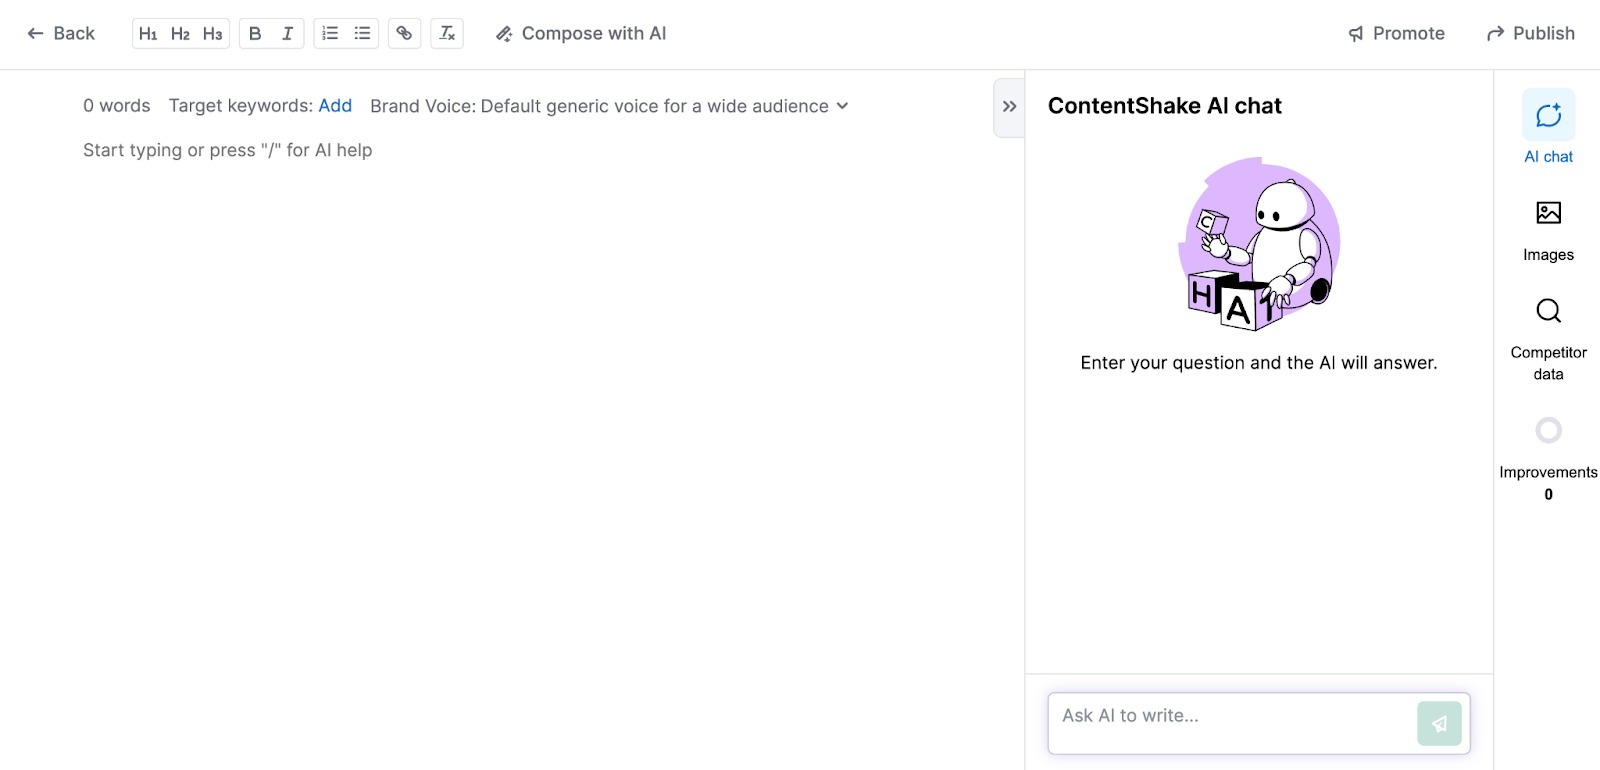
Note that creating empty articles will count towards the same limits as generating complete articles.
How To Use ContentShake AI For Social Media Posts
Creating a Social Media Post from Scratch
1. Click the “Create post” in the Home menu.

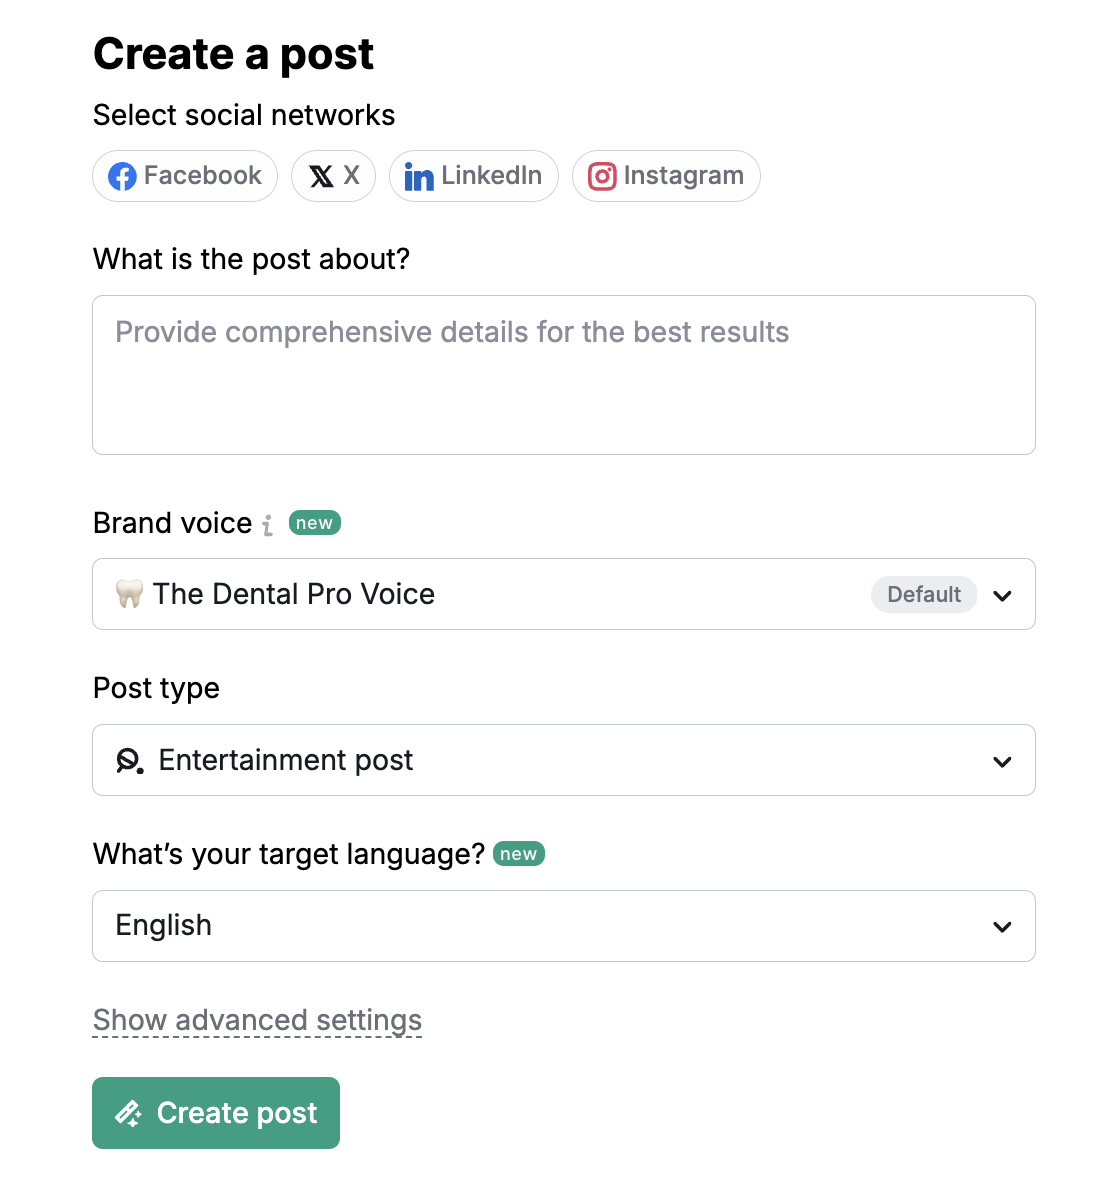
2. Fill out the form to create a post.
First, select one or several social networks for your post. Then, describe the post you need, brand voice, post type, and your target language.
Press “Create post,” and our text generation model will provide content for a social media post you can work with and edit
Create a Social Media Post from the Editor
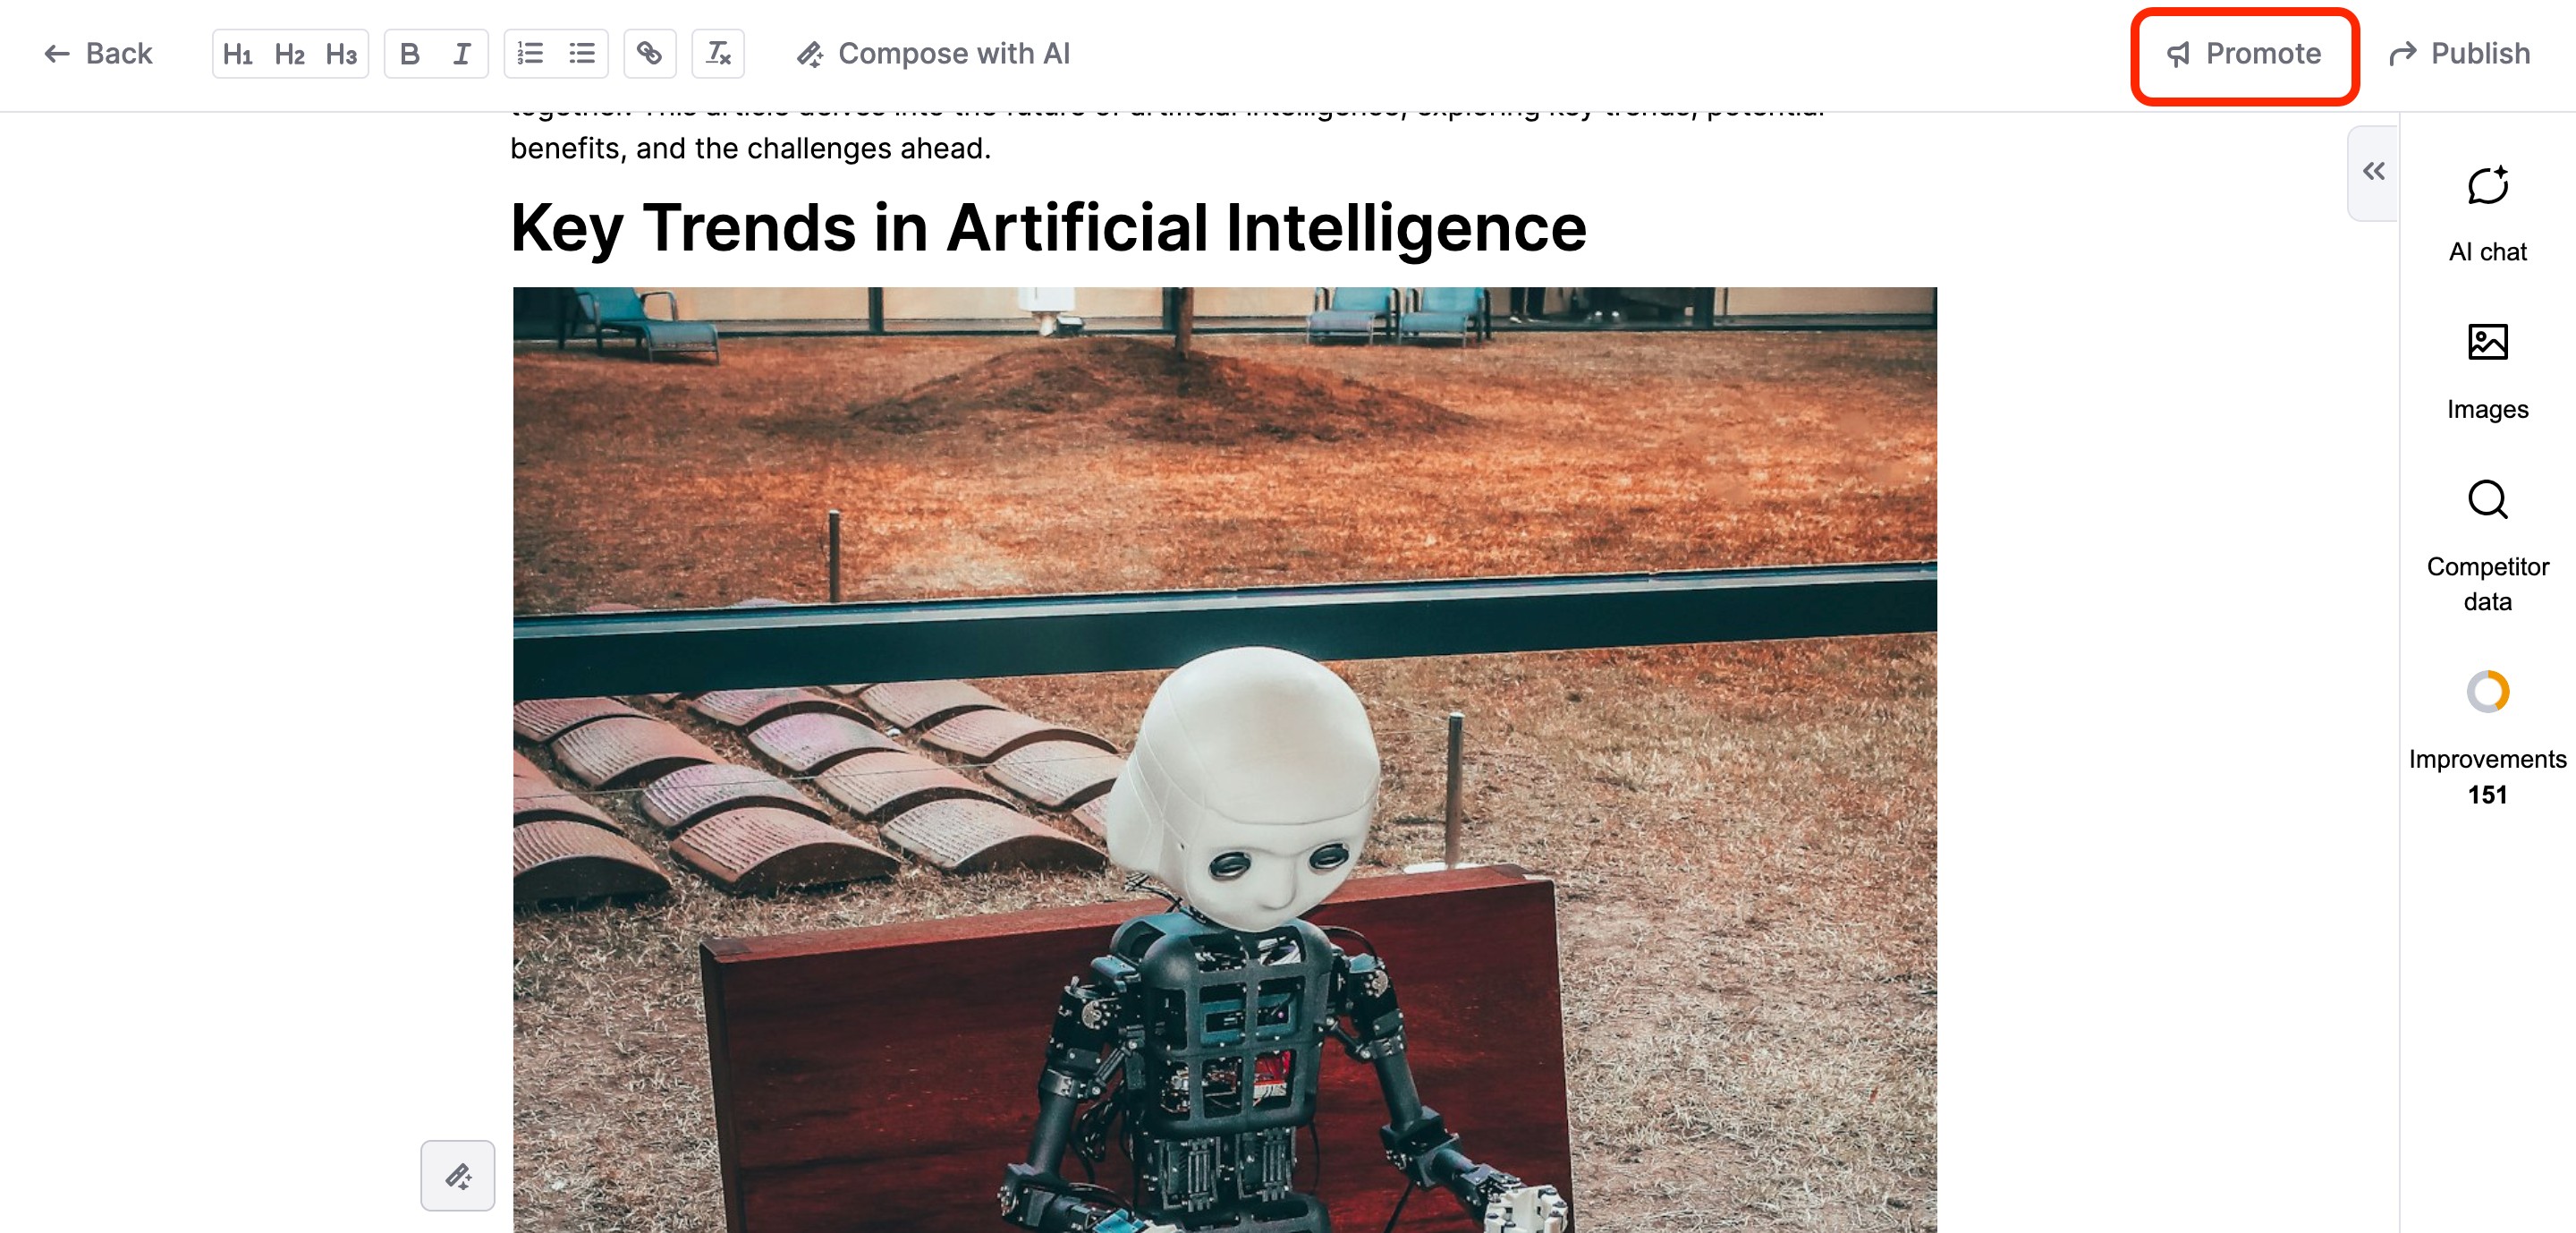
You can also create a post based on an article in ContentShake AI editor. Here is how it can be done in a couple of simple steps:
1. Click the megaphone icon in the editor in the top-right corner.
2.”Create a Post" window will appear along with AI-generated post description based on the article text.
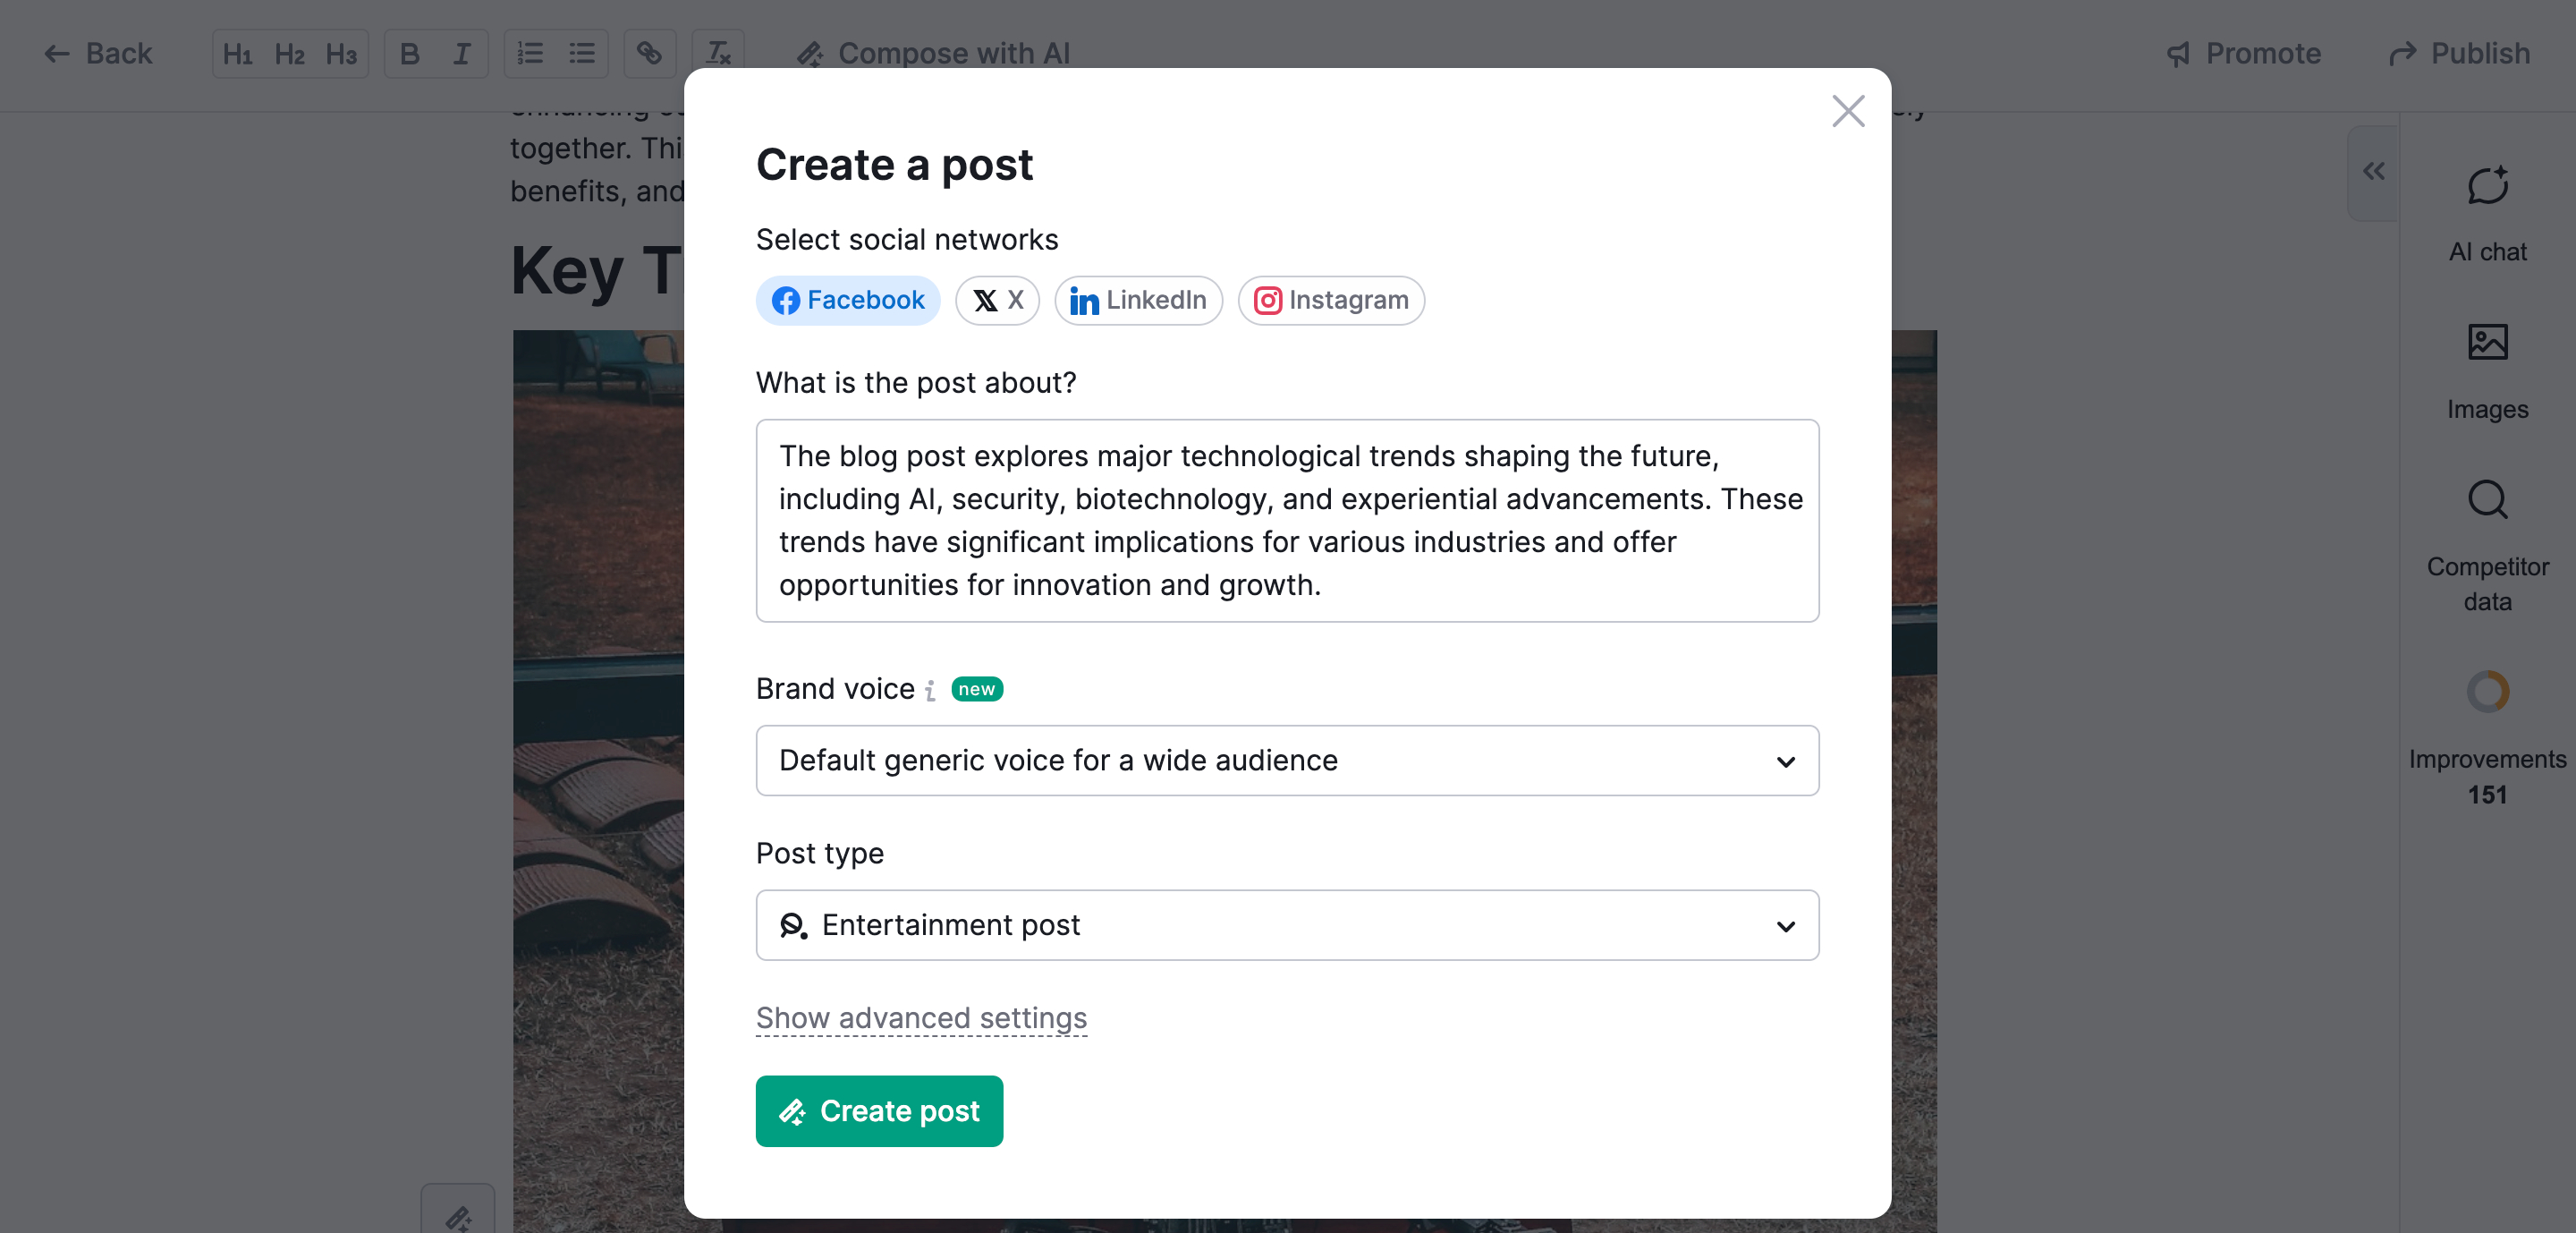
Review the description for accuracy and make necessary edits.
3. Proceed like you would when creating a post from scratch.
Brand Voice
Brand voice refers to the unique personality and tone a company or organization uses in its communications. This includes everything from written content and social media posts to customer interactions and marketing materials.
The brand voice should be consistent across all platforms, which will help to create a cohesive and recognizable brand identity.
The ContentShake AI’s Brand Voice feature helps you craft a brand voice that resonates with your audience and sets your content apart.
Let's see how to create a brand voice in ContentShake AI and what goes into shaping a brand voice.
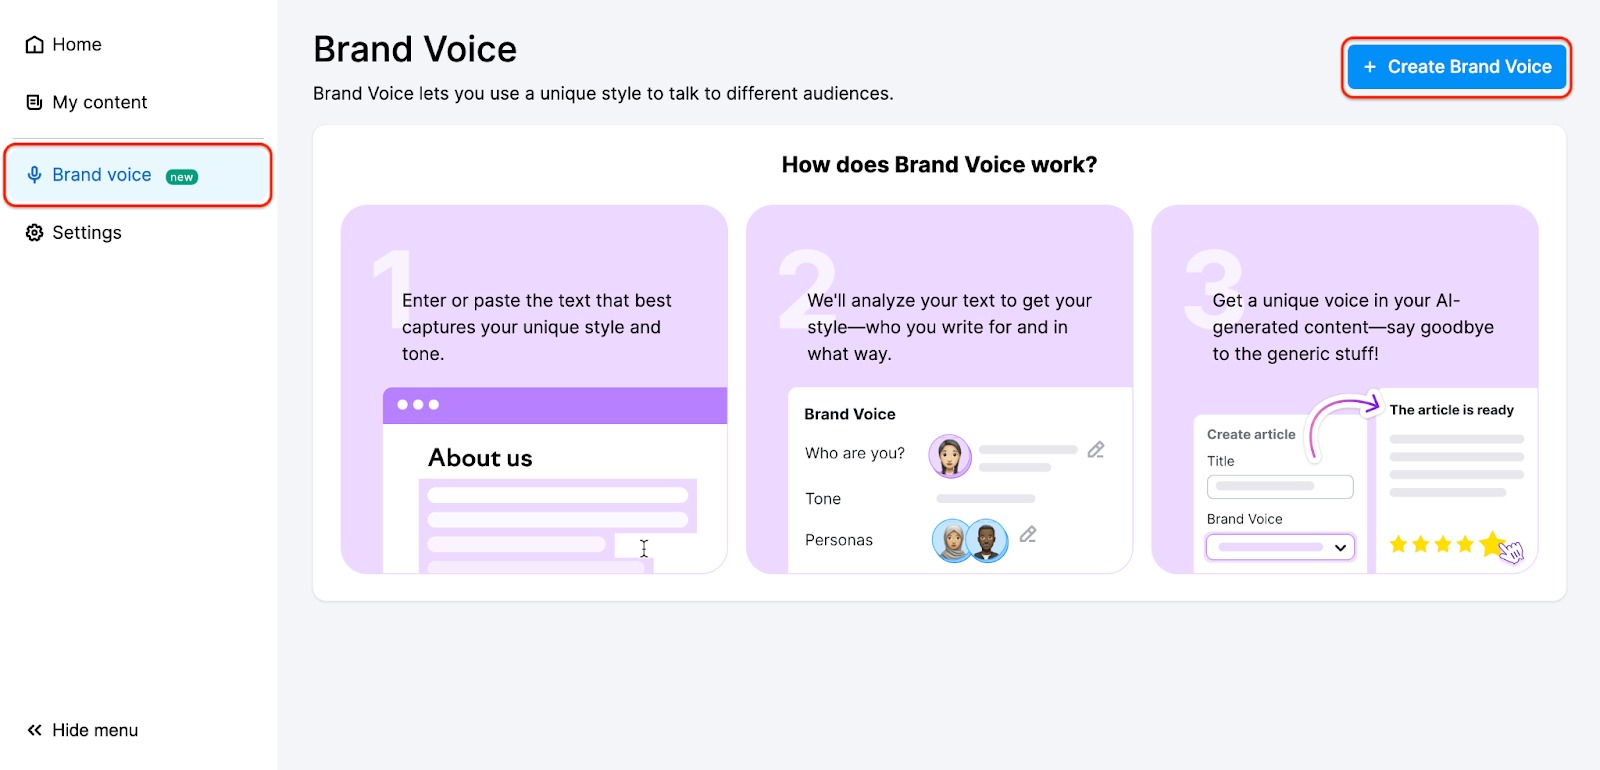
- Head to the Brand Voice feature using the menu on the left.
- Click on the +Create Brand Voice button.
- Enter text that mirrors your preferred style and tone. Remember to write at least 200 words as a foundation for your upcoming content.
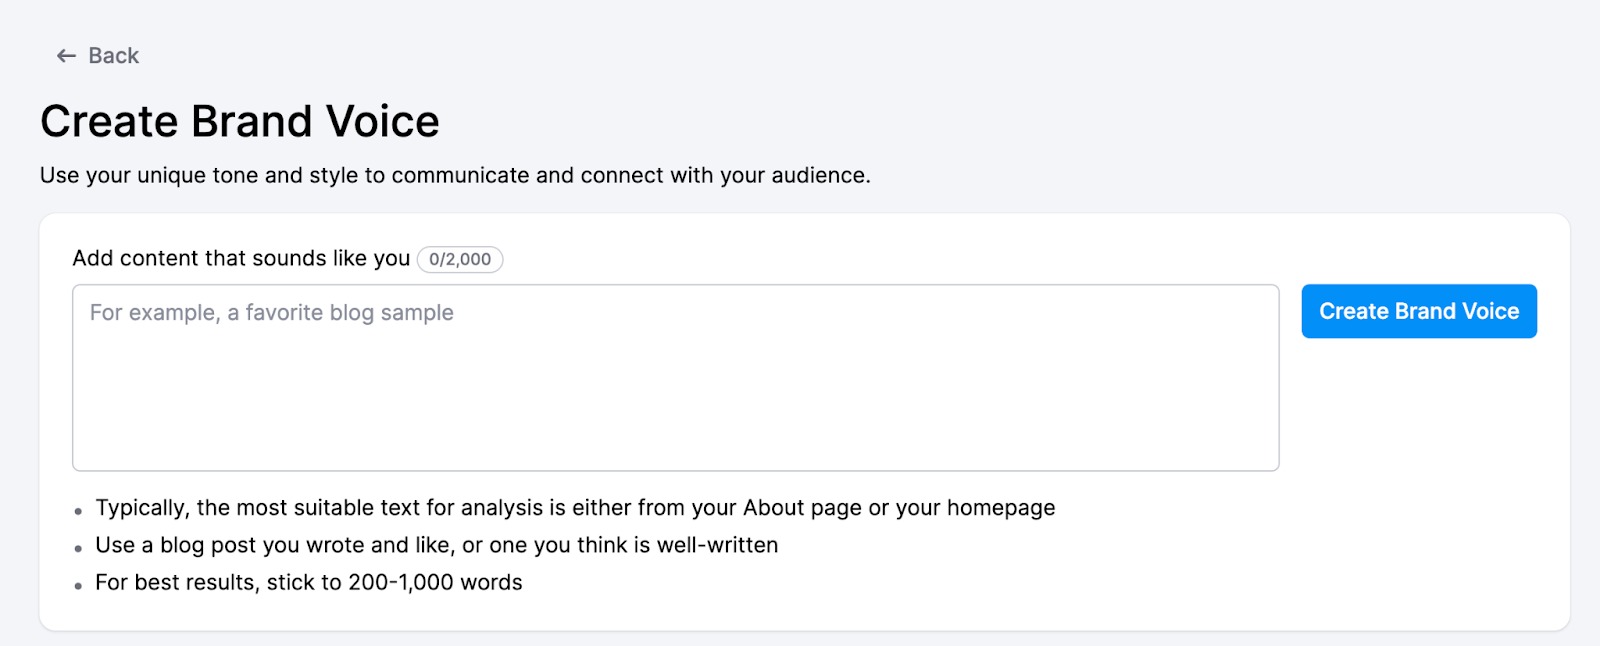
You can use your own content or choose a snippet from a blog you enjoy.
To engage your audience with your unique brand voice, you can include text from your 'About Us' page or any other section on your website that showcases your business.
- The app will analyze your text to grasp your writing style and target audience.
Be patient as the application processes the text and develops the Brand Voice.
The generated Brand Voice comprises three main sections that you can review and adjust for better outcomes:
From:
This part defines whose voice it is and how it may sound.
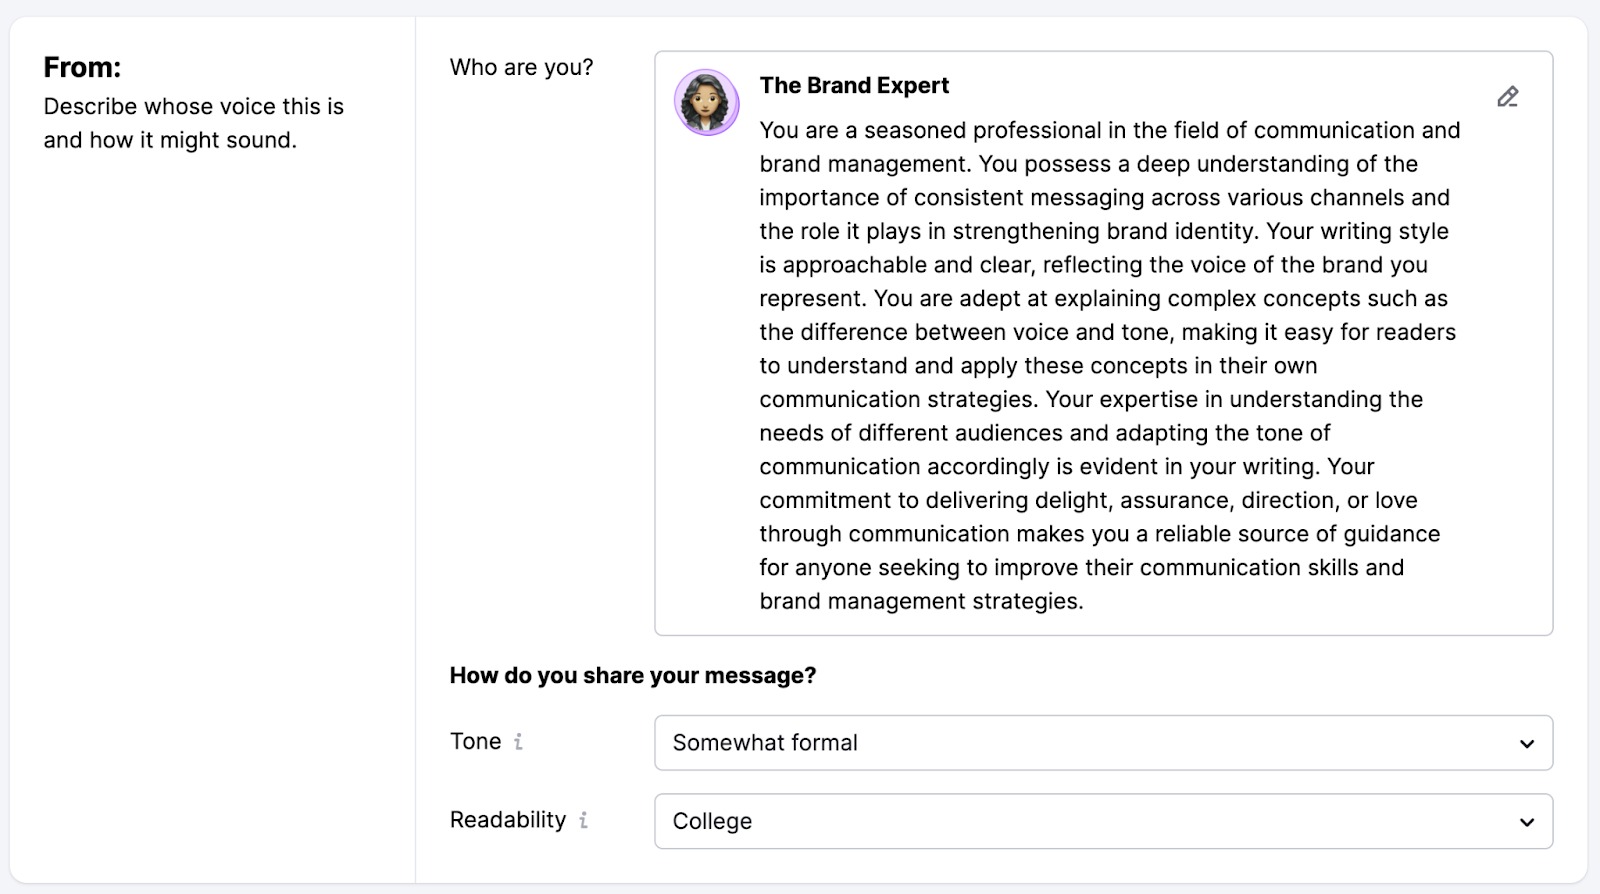
You have the option to modify the description provided by the app, as well as tweak the Tone of voice and Readability.
To:
This part enables you to choose the audience for your brand voice.
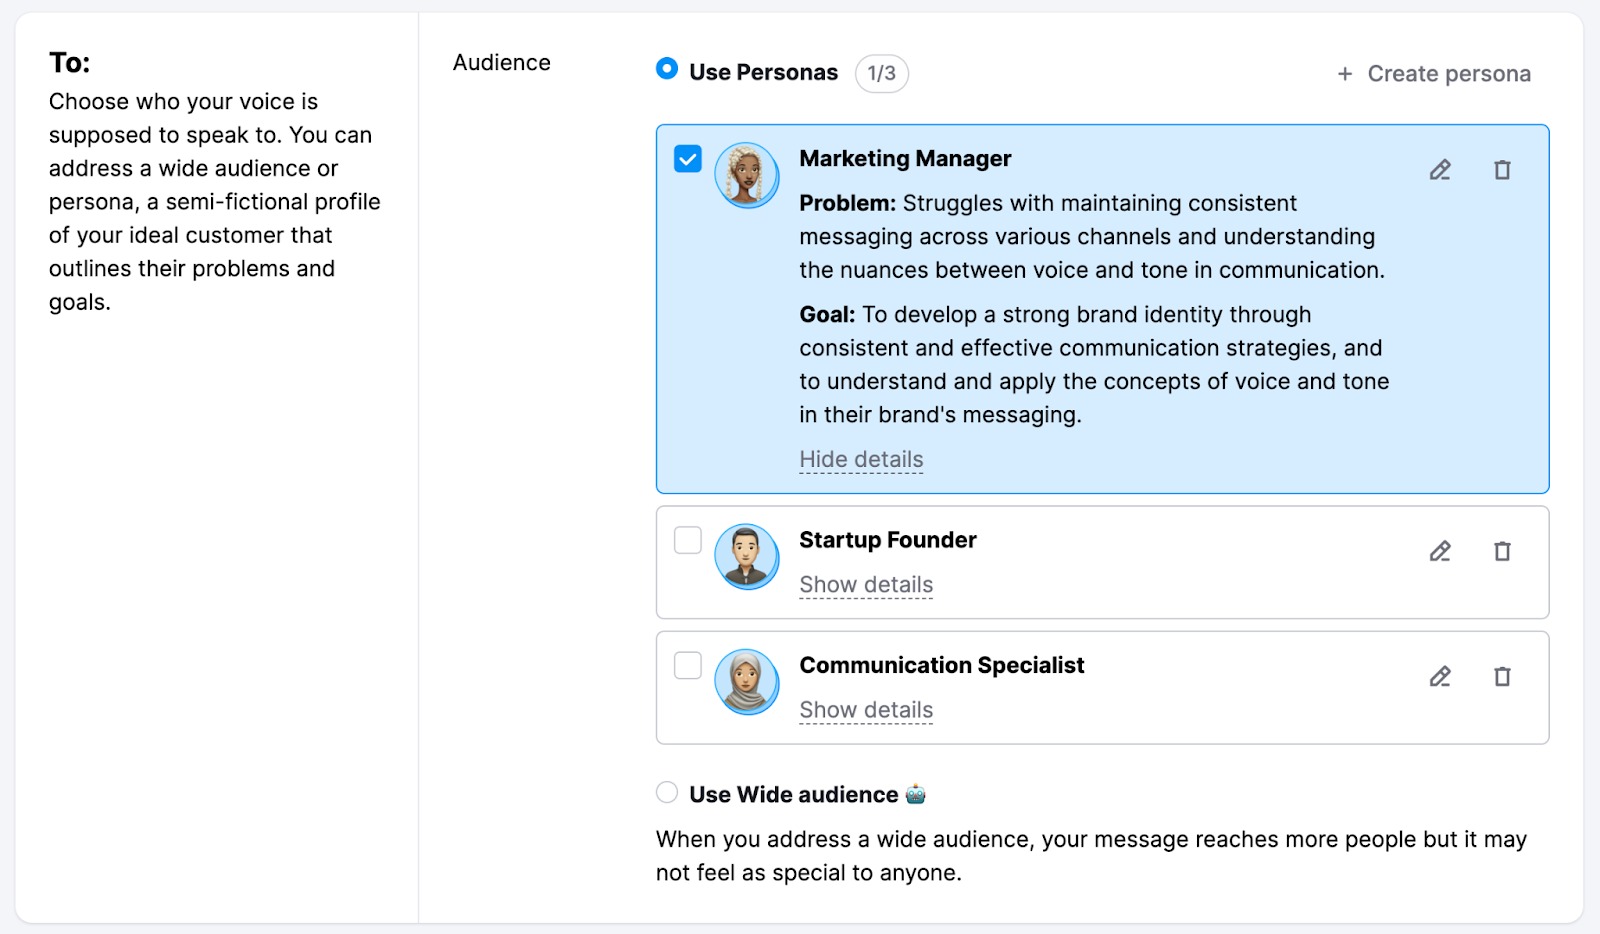
You can opt to address a broad audience with the wide audience choice or concentrate on a specific customer segment. If you prefer a more personalized message, choose the Use Personas option and pick one or more personas that the app generated.
Review the details about the Personas you selected and make adjustments if needed.
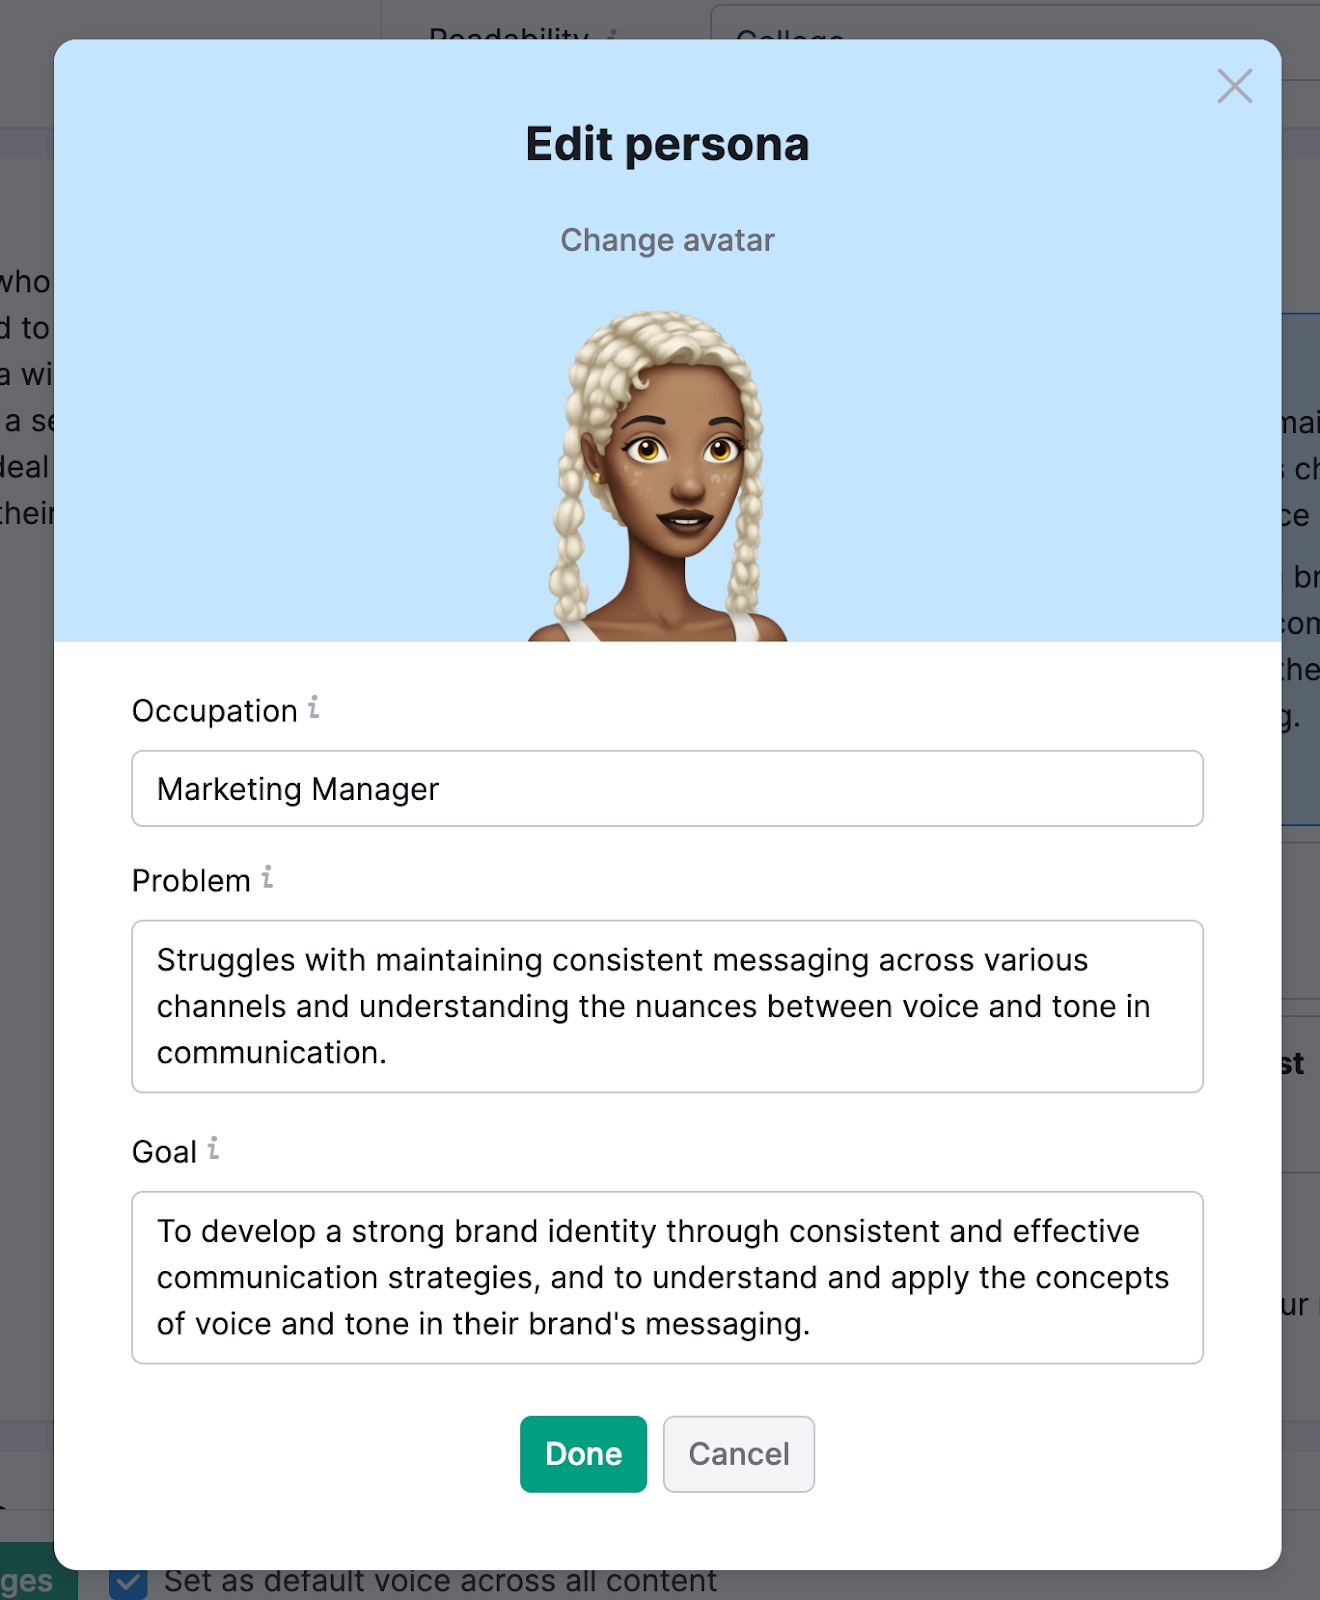
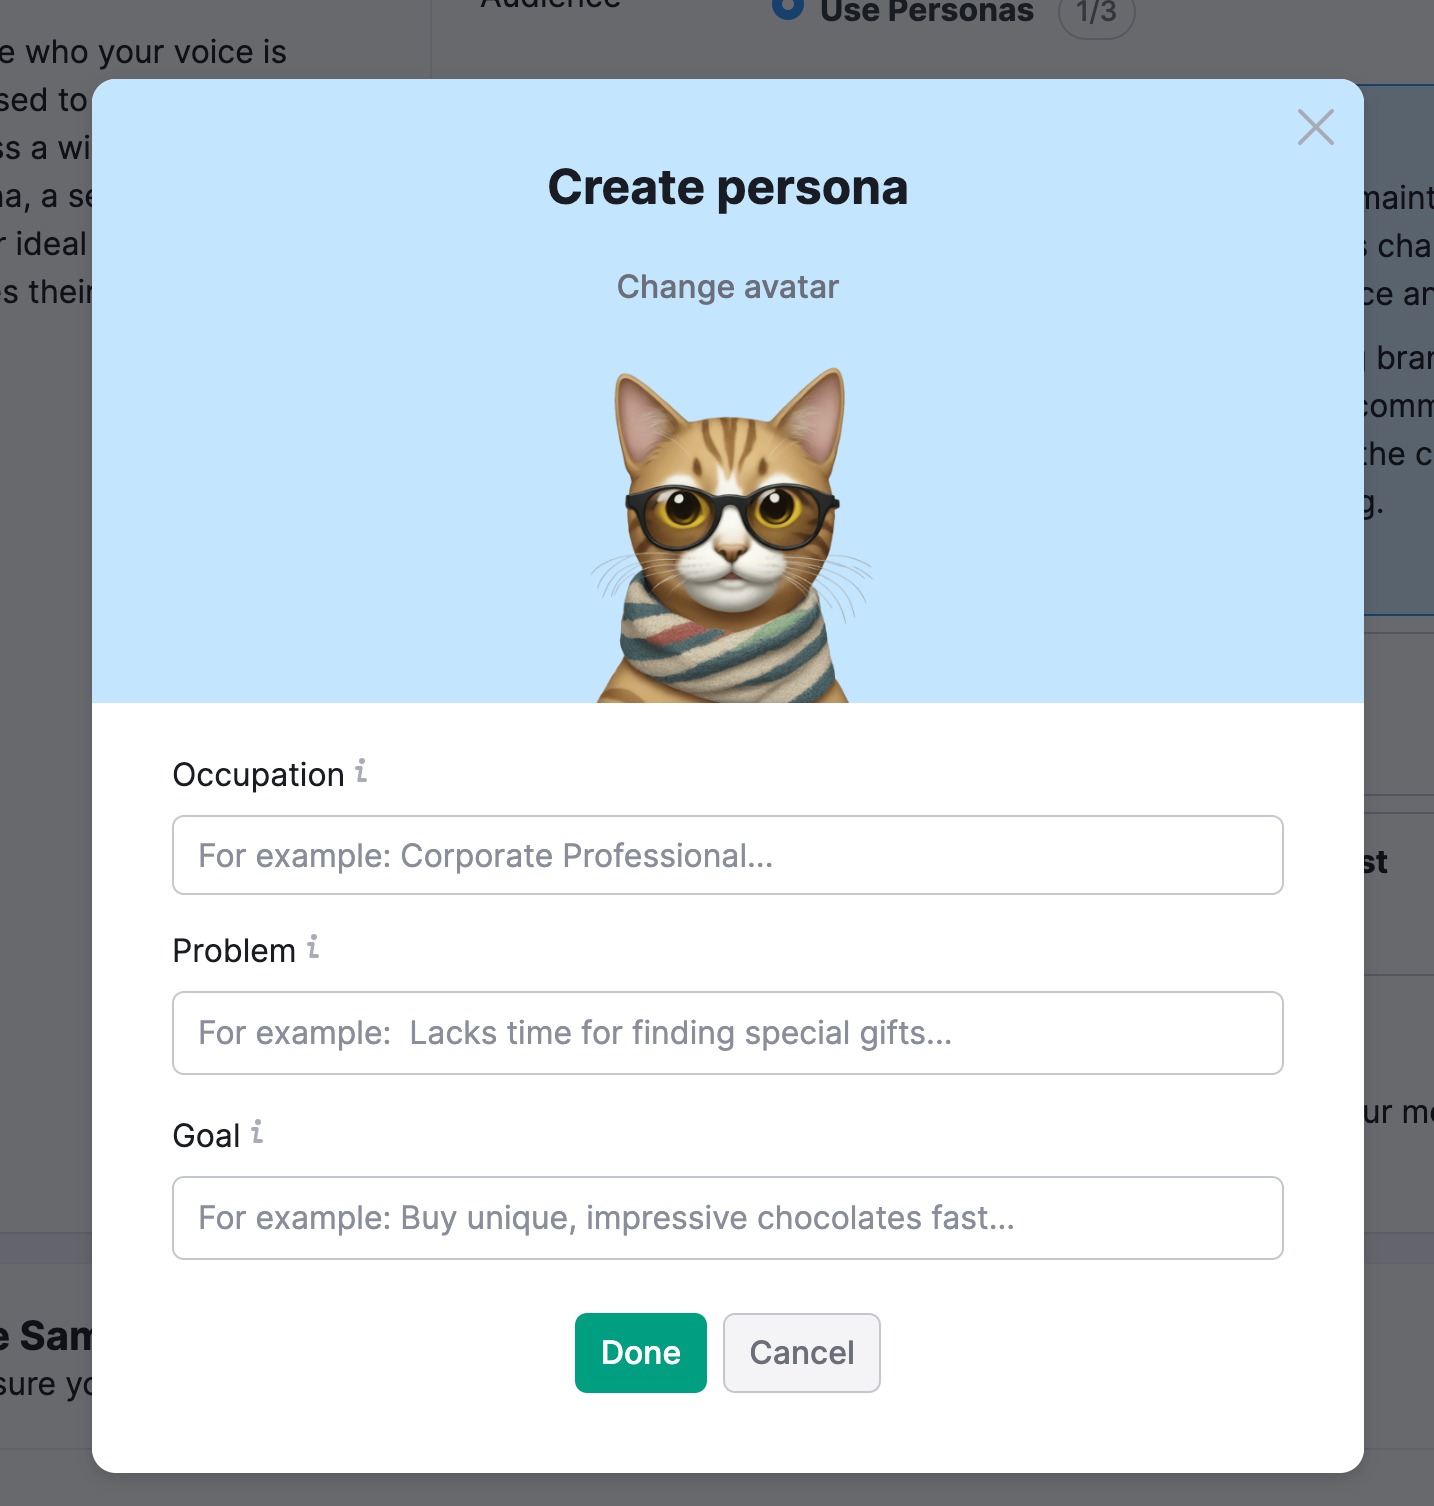
Click on the +Create persona button to craft your own Persona from scratch.
Choosing the Use Wide audience option broadens your message to a larger audience, but it might not resonate as deeply with everyone.
Voice Samples
This section ensures that your voice truly reflects your identity and aligns with who you are.
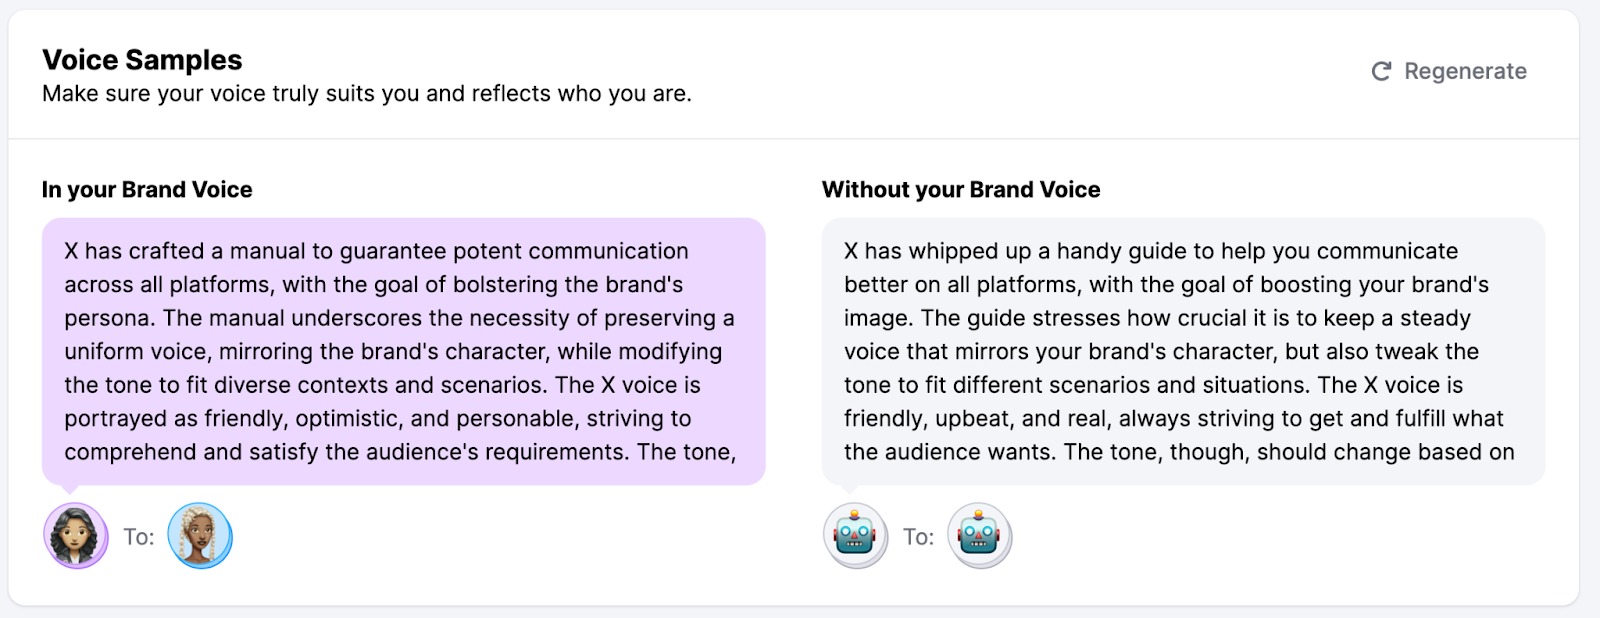
Here, you can compare how your future content may appear with and without the generated Brand Voice.
Feel free to regenerate the text to see more samples and verify that the created brand voice matches your preferences.
Managing Brand Voices
After assessing the generated brand voice and making all necessary tweaks, don't forget to Save changes.
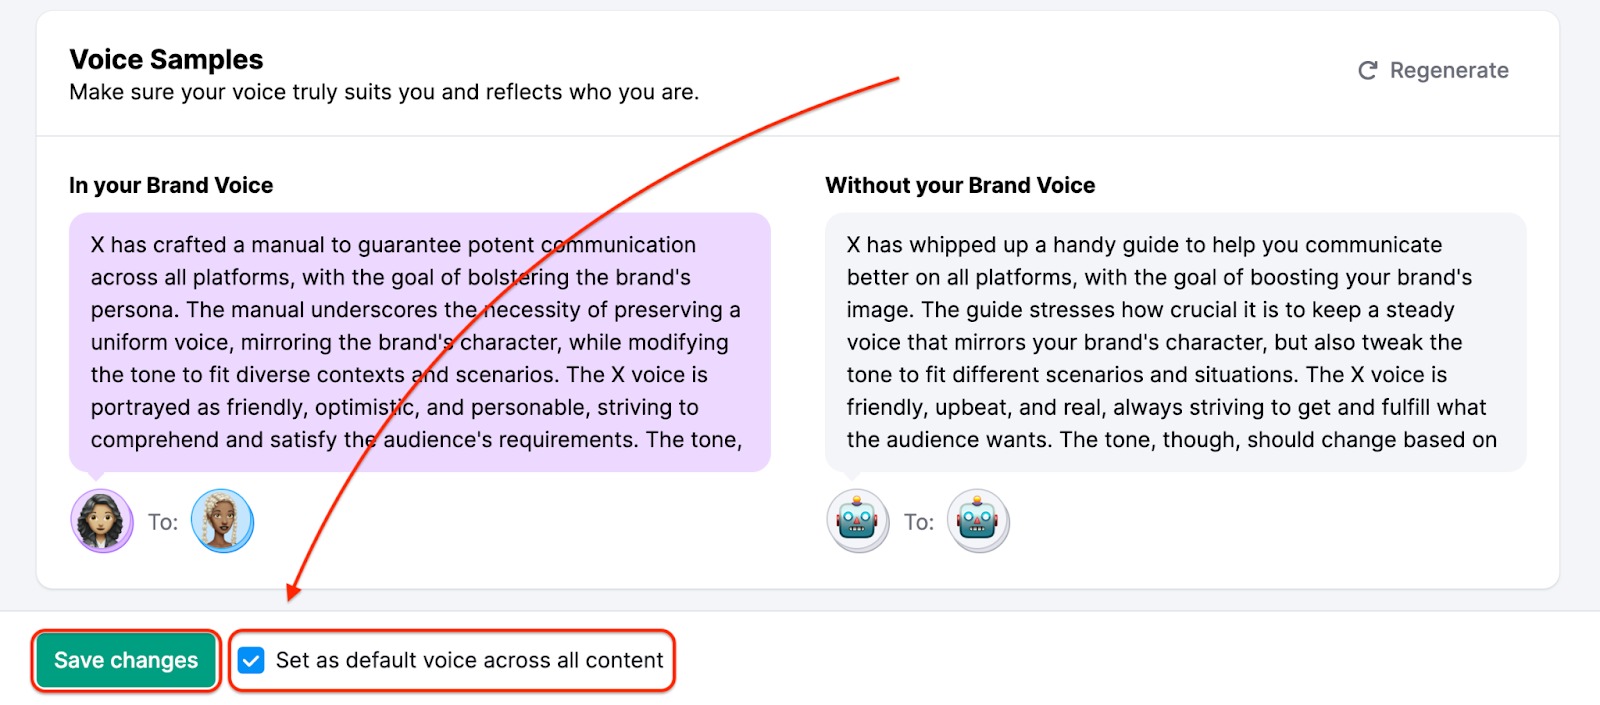
If you want this brand voice to be the go-to for all articles you create with ContentShake AI, just tick the Set as default voice across all content box.
You can access all your saved brand voices on the Brand Voice dashboard.
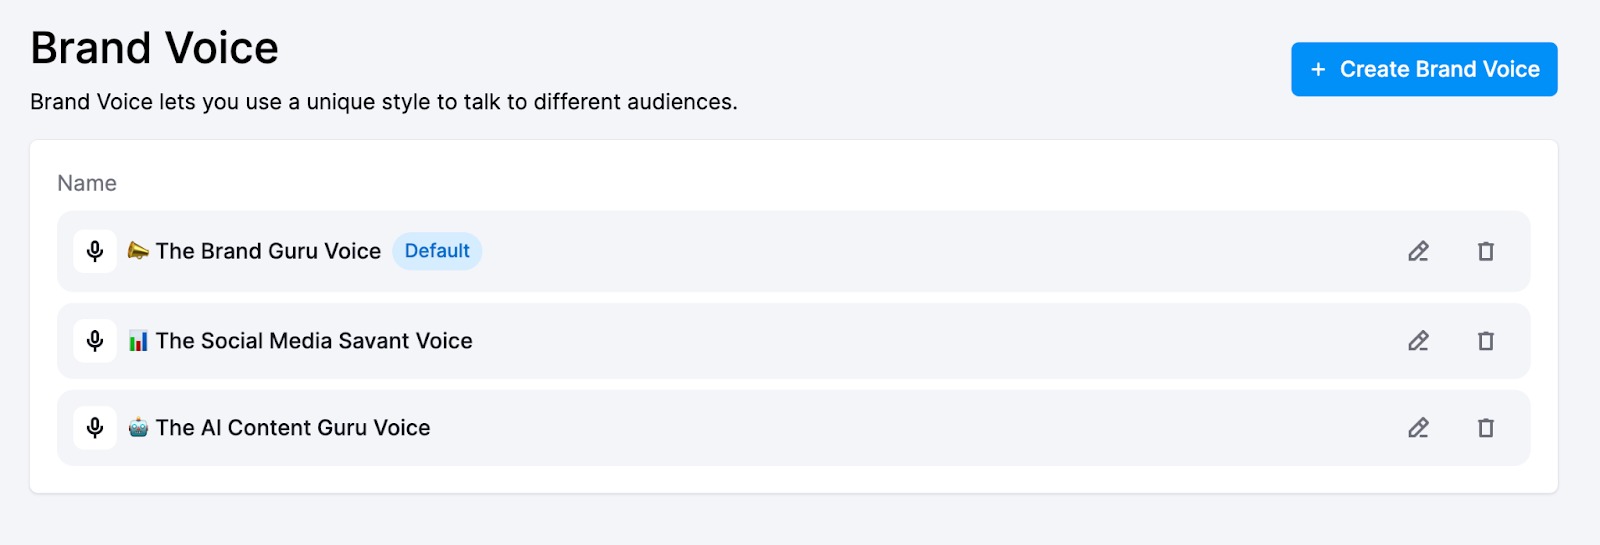
If you have multiple Brand Voices and wish to use one other than the default, make sure to switch it in the Brand Voice field when creating your article or social media post.
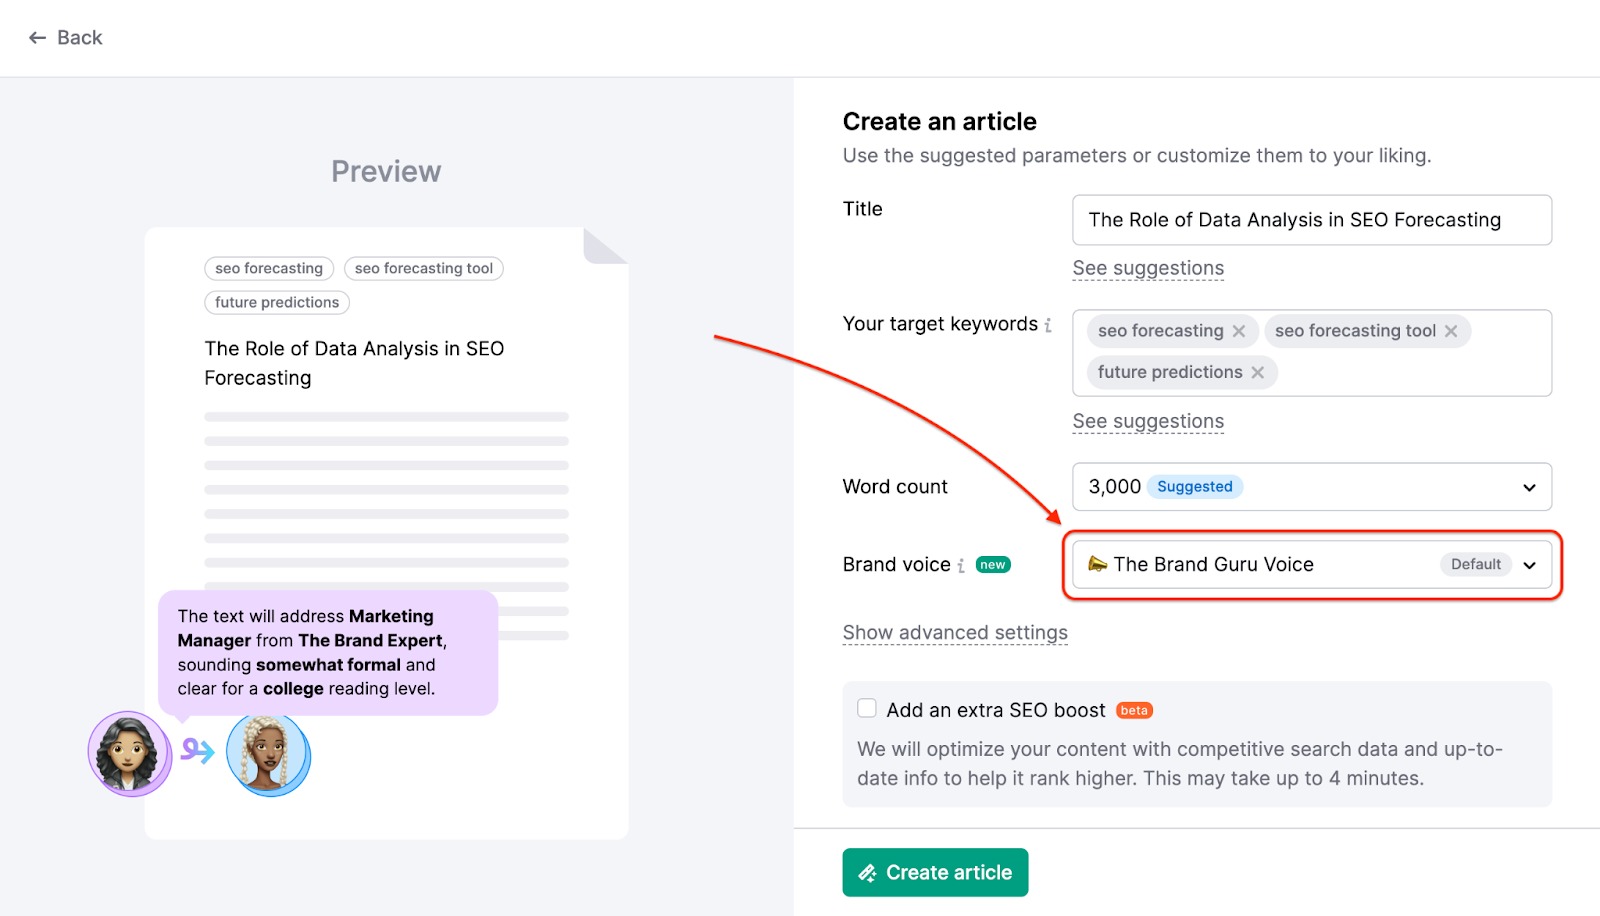
You can always tweak the previously selected brand voice in the editor interface using the Brand Voice dropdown at the top of the page.

Additionally, once you pick a brand voice, it will be applied when you rephrase, simplify, expand, summarize, or create lists. This ensures that all modifications and enhancements keep a consistent tone that matches your brand's unique style.
Frequently Asked Questions
To remove articles and posts created by ContentShake AI from your list of content, follow these simple steps:
- Navigate to "My Content" part of the interface
- Locate the article or post you want to delete
- Click on the bin icon located to the right of it to delete it

With the Rewrite hard-to-read sentences in ContentShake AI, you can simplify your content in 32 languages:
- Dutch
- Albanian
- Turkish
- Latvian
- Macedonian
- Danish
- Indonesian
- Czech
- Swedish
- Bulgarian
- Romanian
- Finnish
- English
- Spanish
- Italian
- German
- Croatian
- Somali
- Bengali
- Slovene
- Afrikaans
- Hungarian
- Norwegian
- Russian
- Portuguese
- Ukrainian
- Vietnamese
- Polish
- French
- Lithuanian
- Slovak
- Estonian
If you have other questions about the App Center or the ContentShake AI app, please email us directly at [email protected].
